
On January 19th, 2007 I was injured by an IED. Most of the shrapnel was blocked by the steel plate on the floor of the truck. Shrapnel cut through the right side of my right foot and some shrapnel was in my left leg but nothing too bad. My right ankle was shattered, most of the bones in my foot were broken, and my tibia and fibula were both broken. On top of the physical injuries, I got a massive infection. Several doctors were advising me to amputate. They said the infection was bad, that my leg was dead and it needed to come off. One doctor told me he thought my leg could still be saved, so I decided not to amputate. It took dozens of surgeries over several years to save my leg.
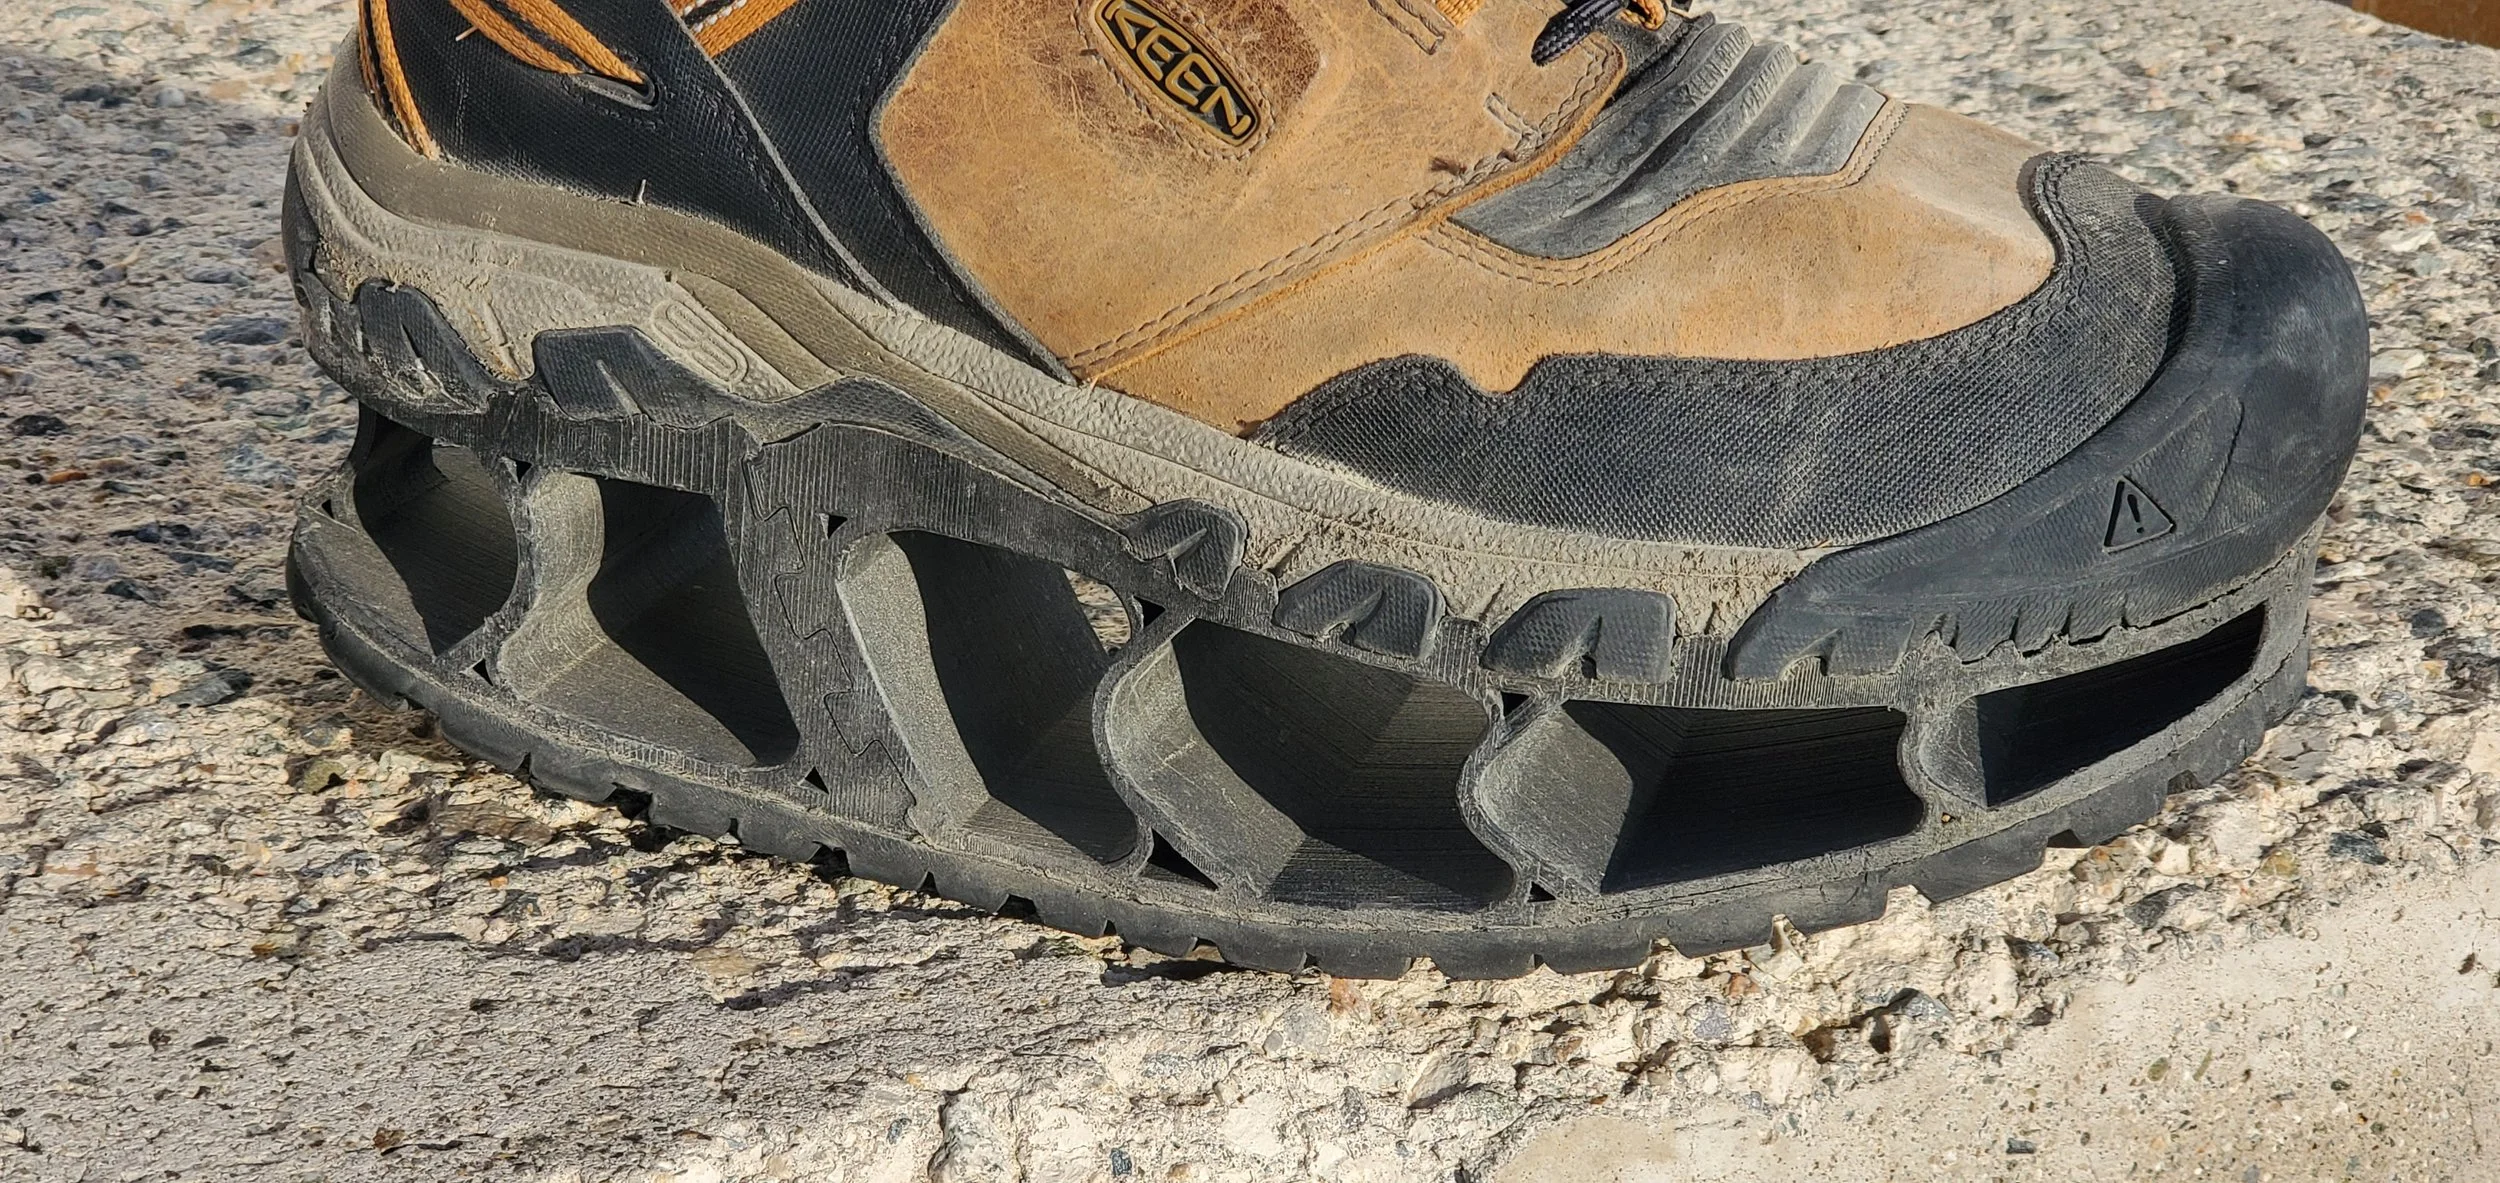
The end result is that my right leg is shorter than the left. I need a shoe lift to make up for the height difference, and the bottom of the lift needs to be curved to make up for the missing ankle. The standard way to make a shoe lift is to glue a giant block of rubber on the shoe and grind it down by hand until it fits just right. This has never worked for me very well. I have nerve damage, and being a tiny bit off causes pain in every step. Doing the lift by hand made every single lift a little different, and I would have to adjust to the pain of a new lift every time I got a new pair of shoes.
I learned about 3D printers and bought one around 2021-22. Designing a lift on the computer would remove the human error and I could have the exact same lift every single time a new one was needed.
I wanted to show how I started making my own custom orthotics with engineering grade materials in the corner of my living room for less than $1,500. 3d printing is incredible technology that anyone can do.
The following is the equipment I use, and the current process I use to make the lifts now.
Equipment I use:
Ender3v2 - Modified for printing high temperature abrasive materials.
An enclosure for the printer to keep the heat in and draft out.
Filament used: NylonX (carbon fiber) from Matter Hackers is what I use the most.
Nano Polymer Adhesive from Vision Miner.
SUNLU filament dryer.
Revopoint POP3 scanner
Deburring tool
Sandpaper
PPE - always worn when sanding carbon fiber an fiberglass
Blender - Free modeling software
Revo Scan - Free software for the scanner
Cura - Free slicer software for turning the 3d model into a print file
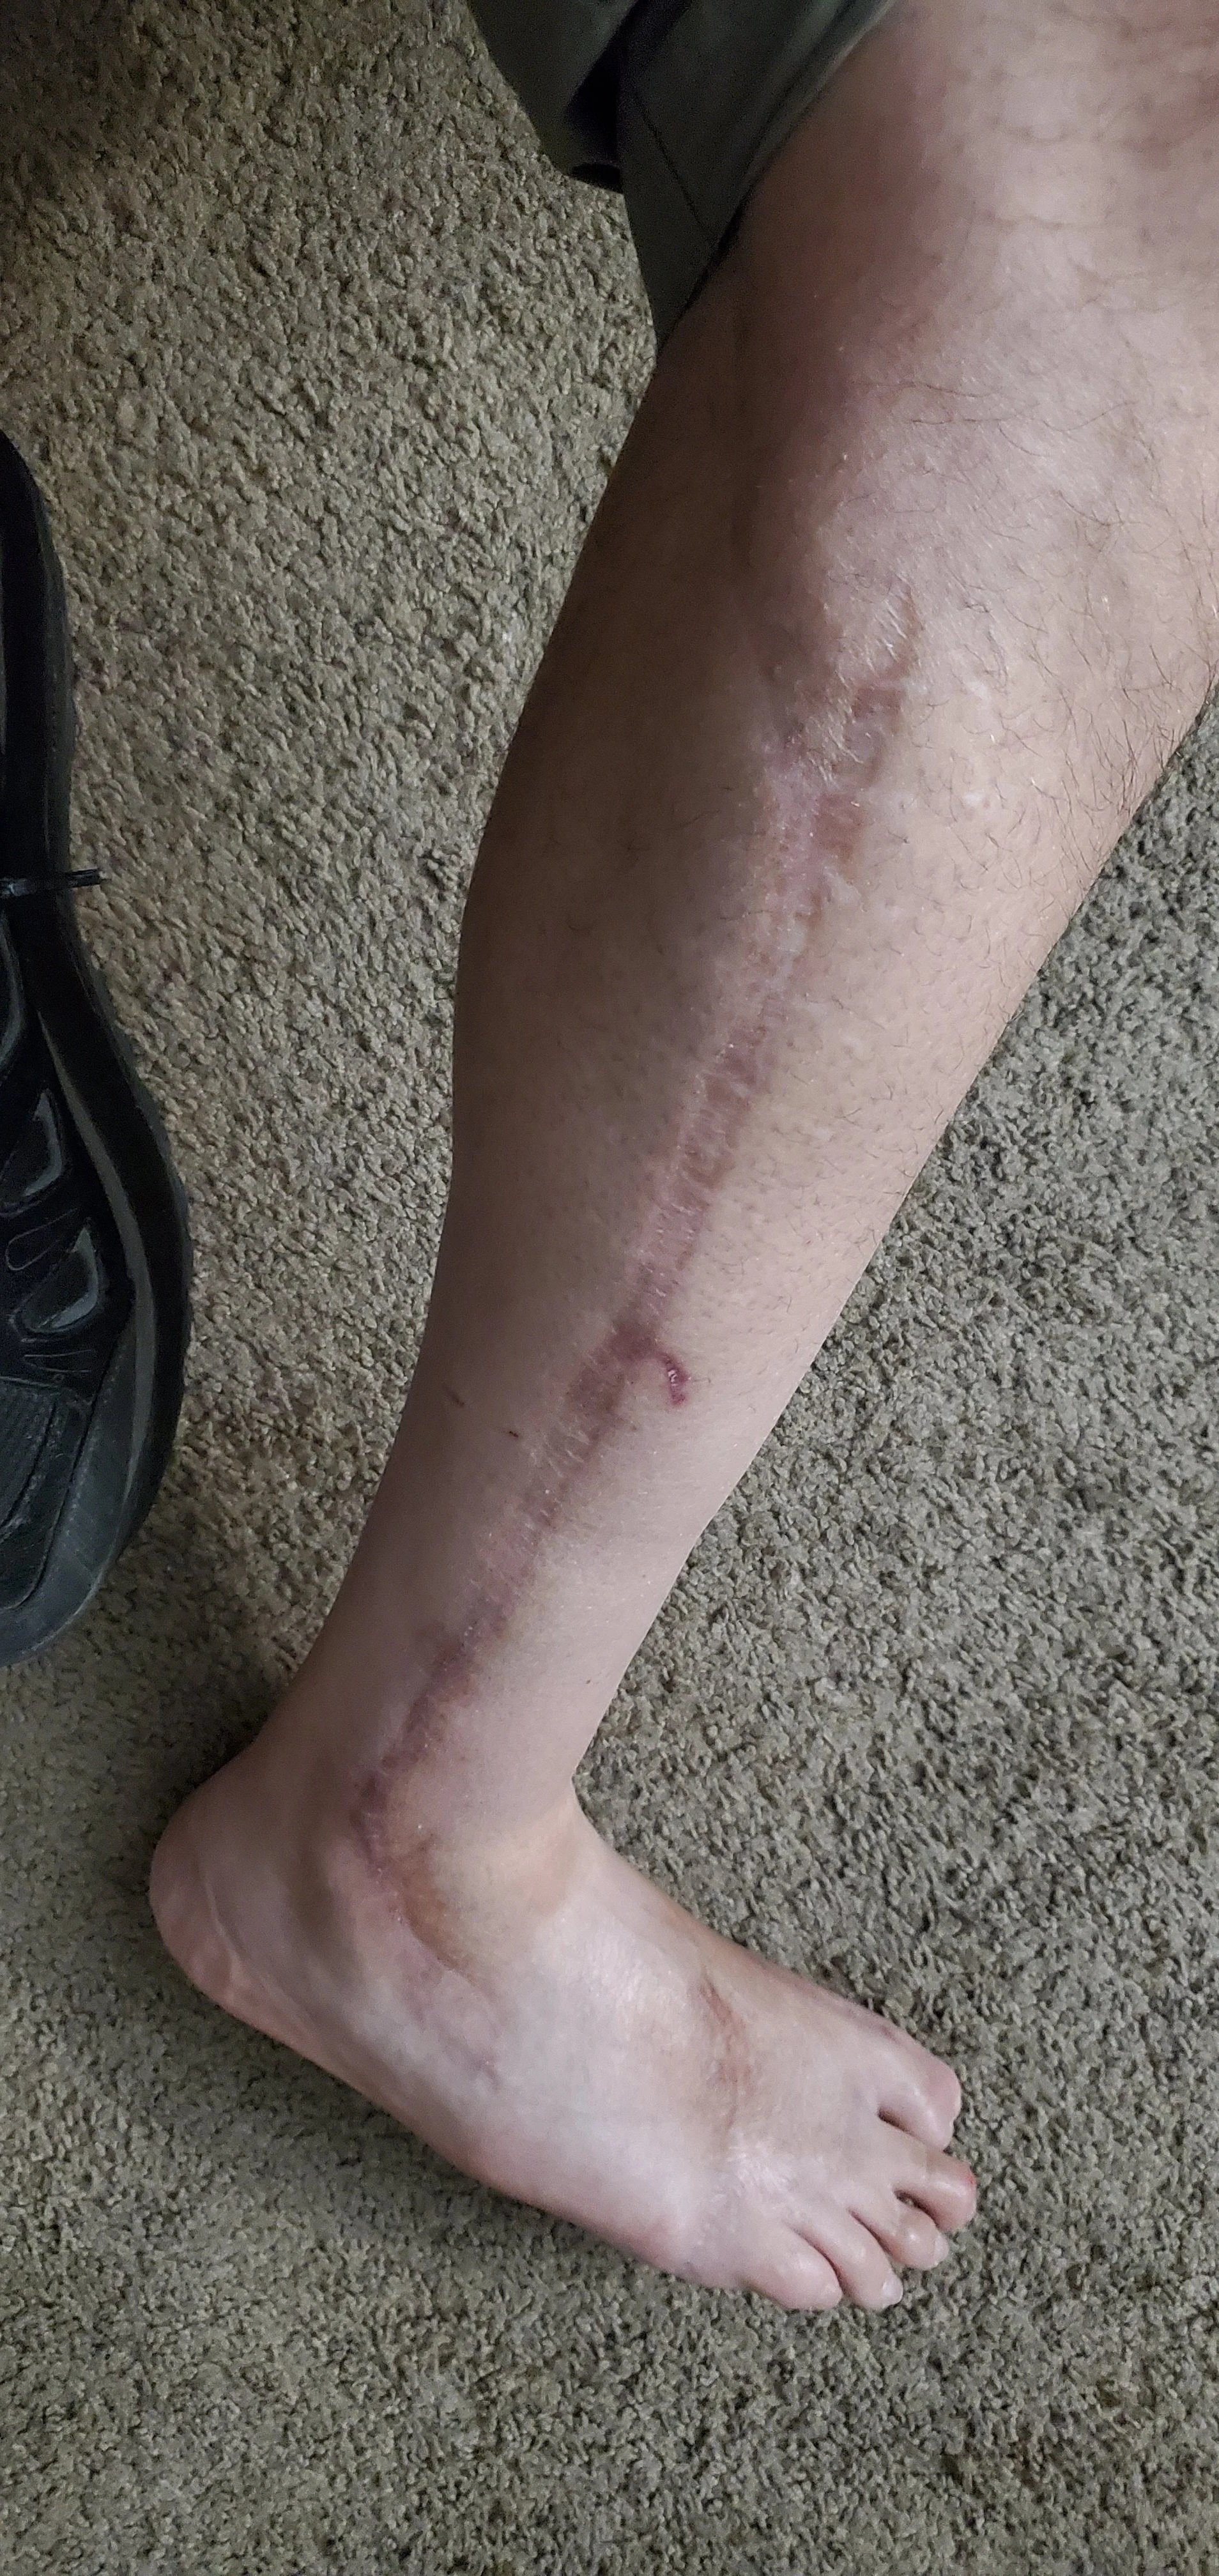
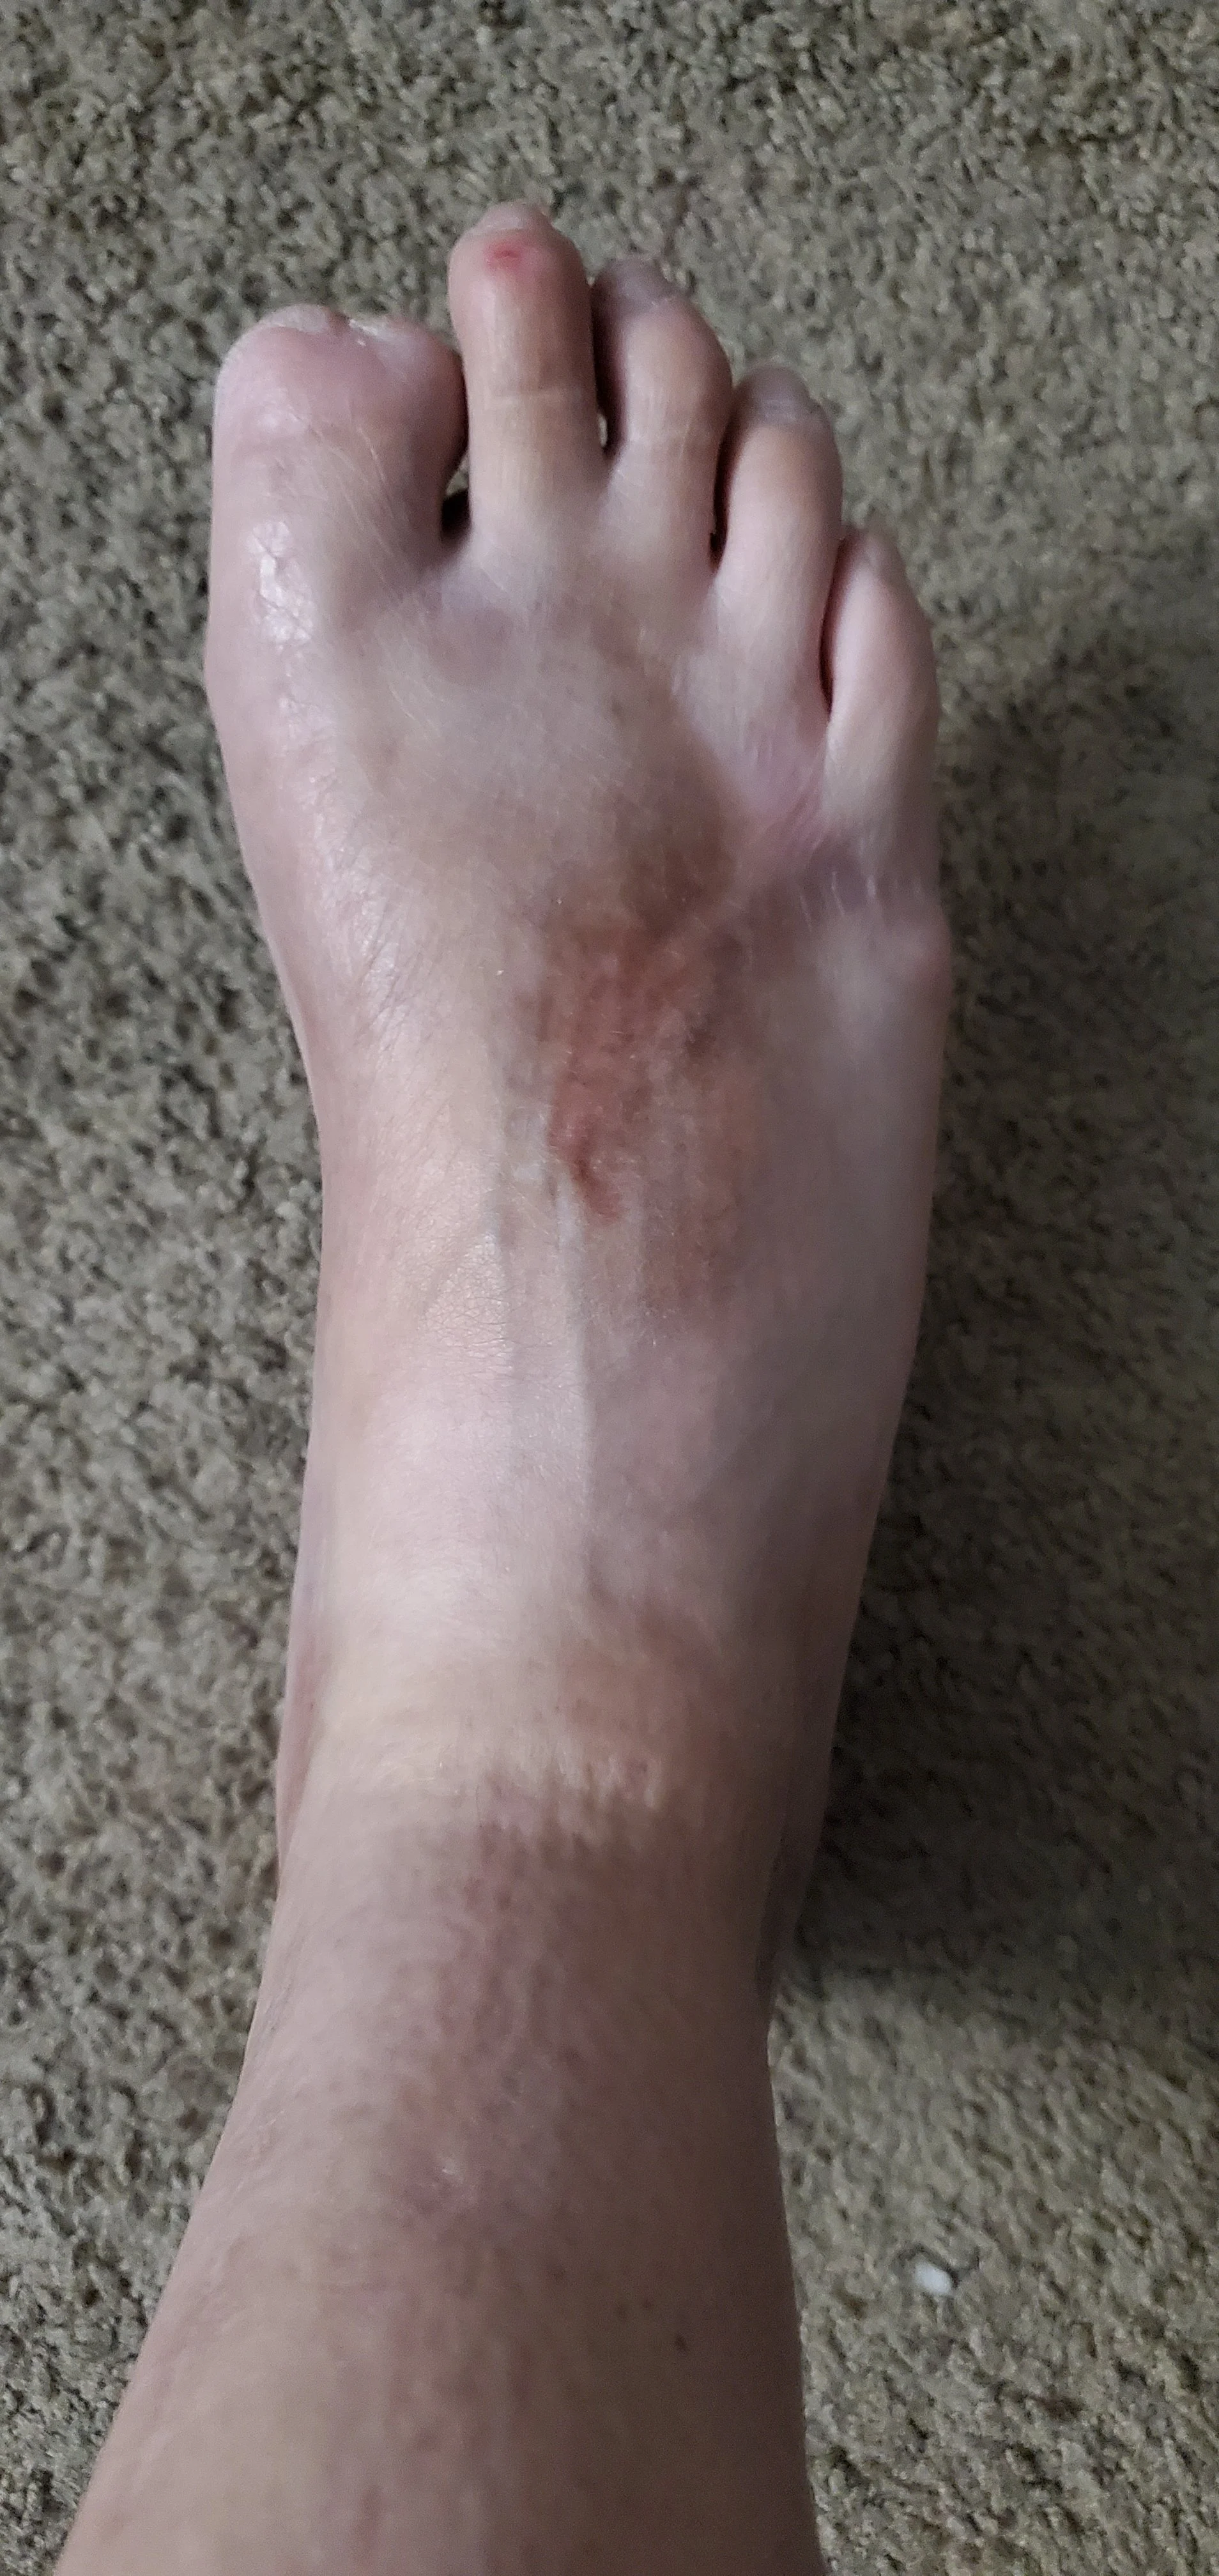
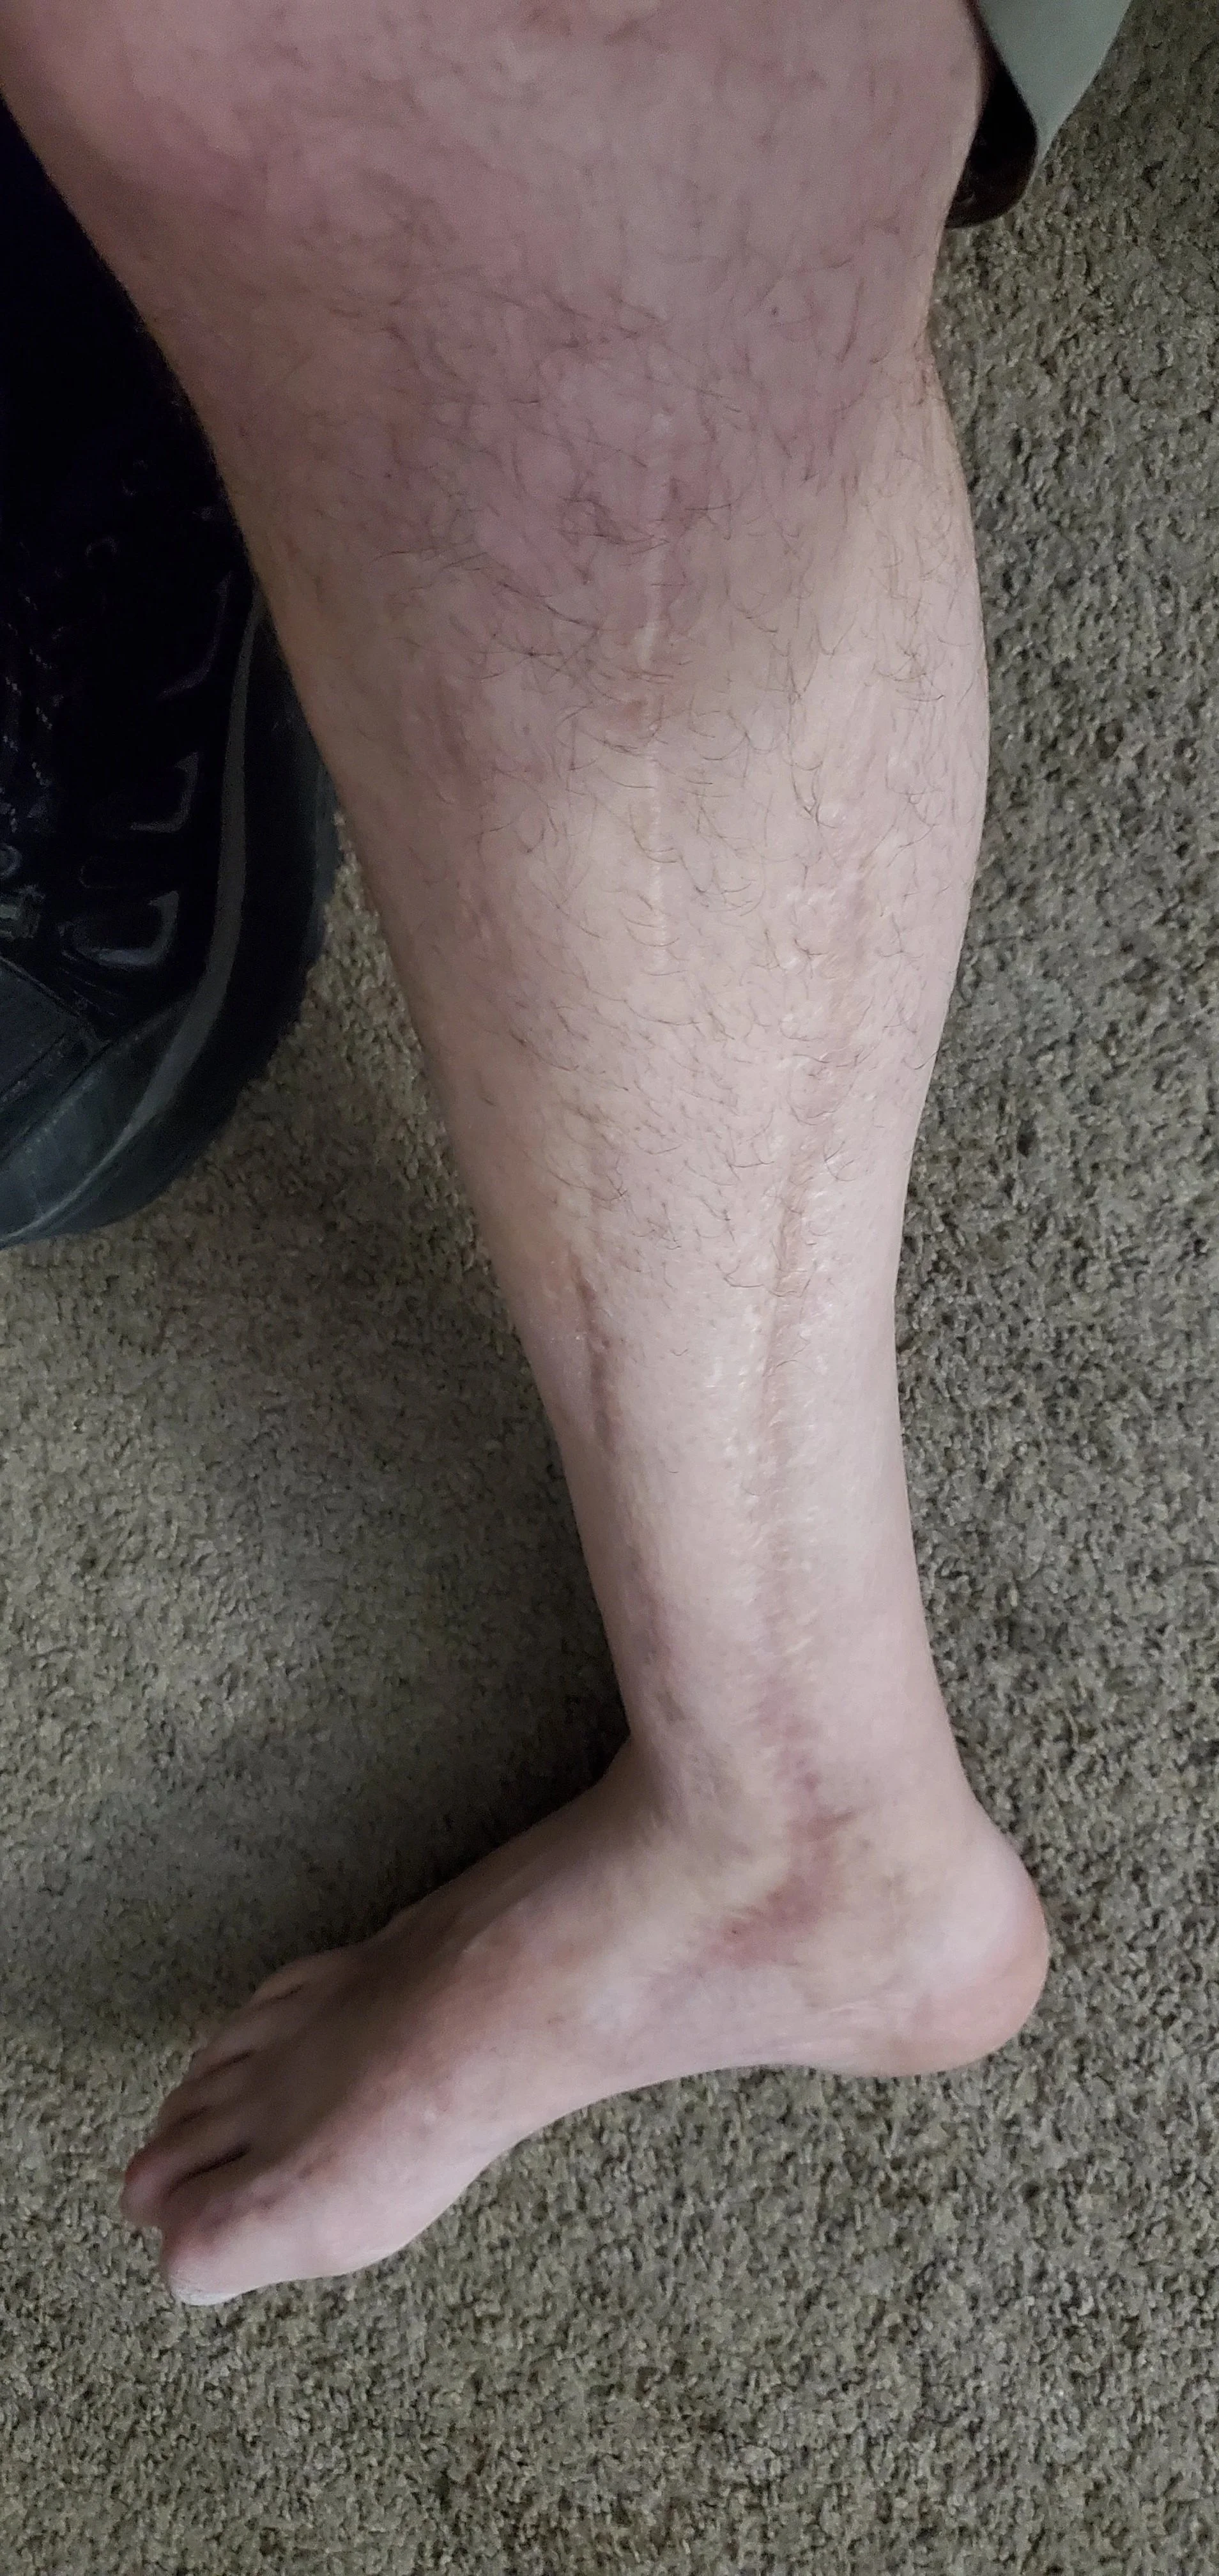
This is what my leg looks like now. You can see on the top of my foot how the shrapnel internally severed my little toe. The long straight scars are from surgery. Doctors cut open both sides to allow room for the leg to swell up after the blast. Both incisions have been reopened multiple times for dozens of surgeries.
The current process
1: Scanning
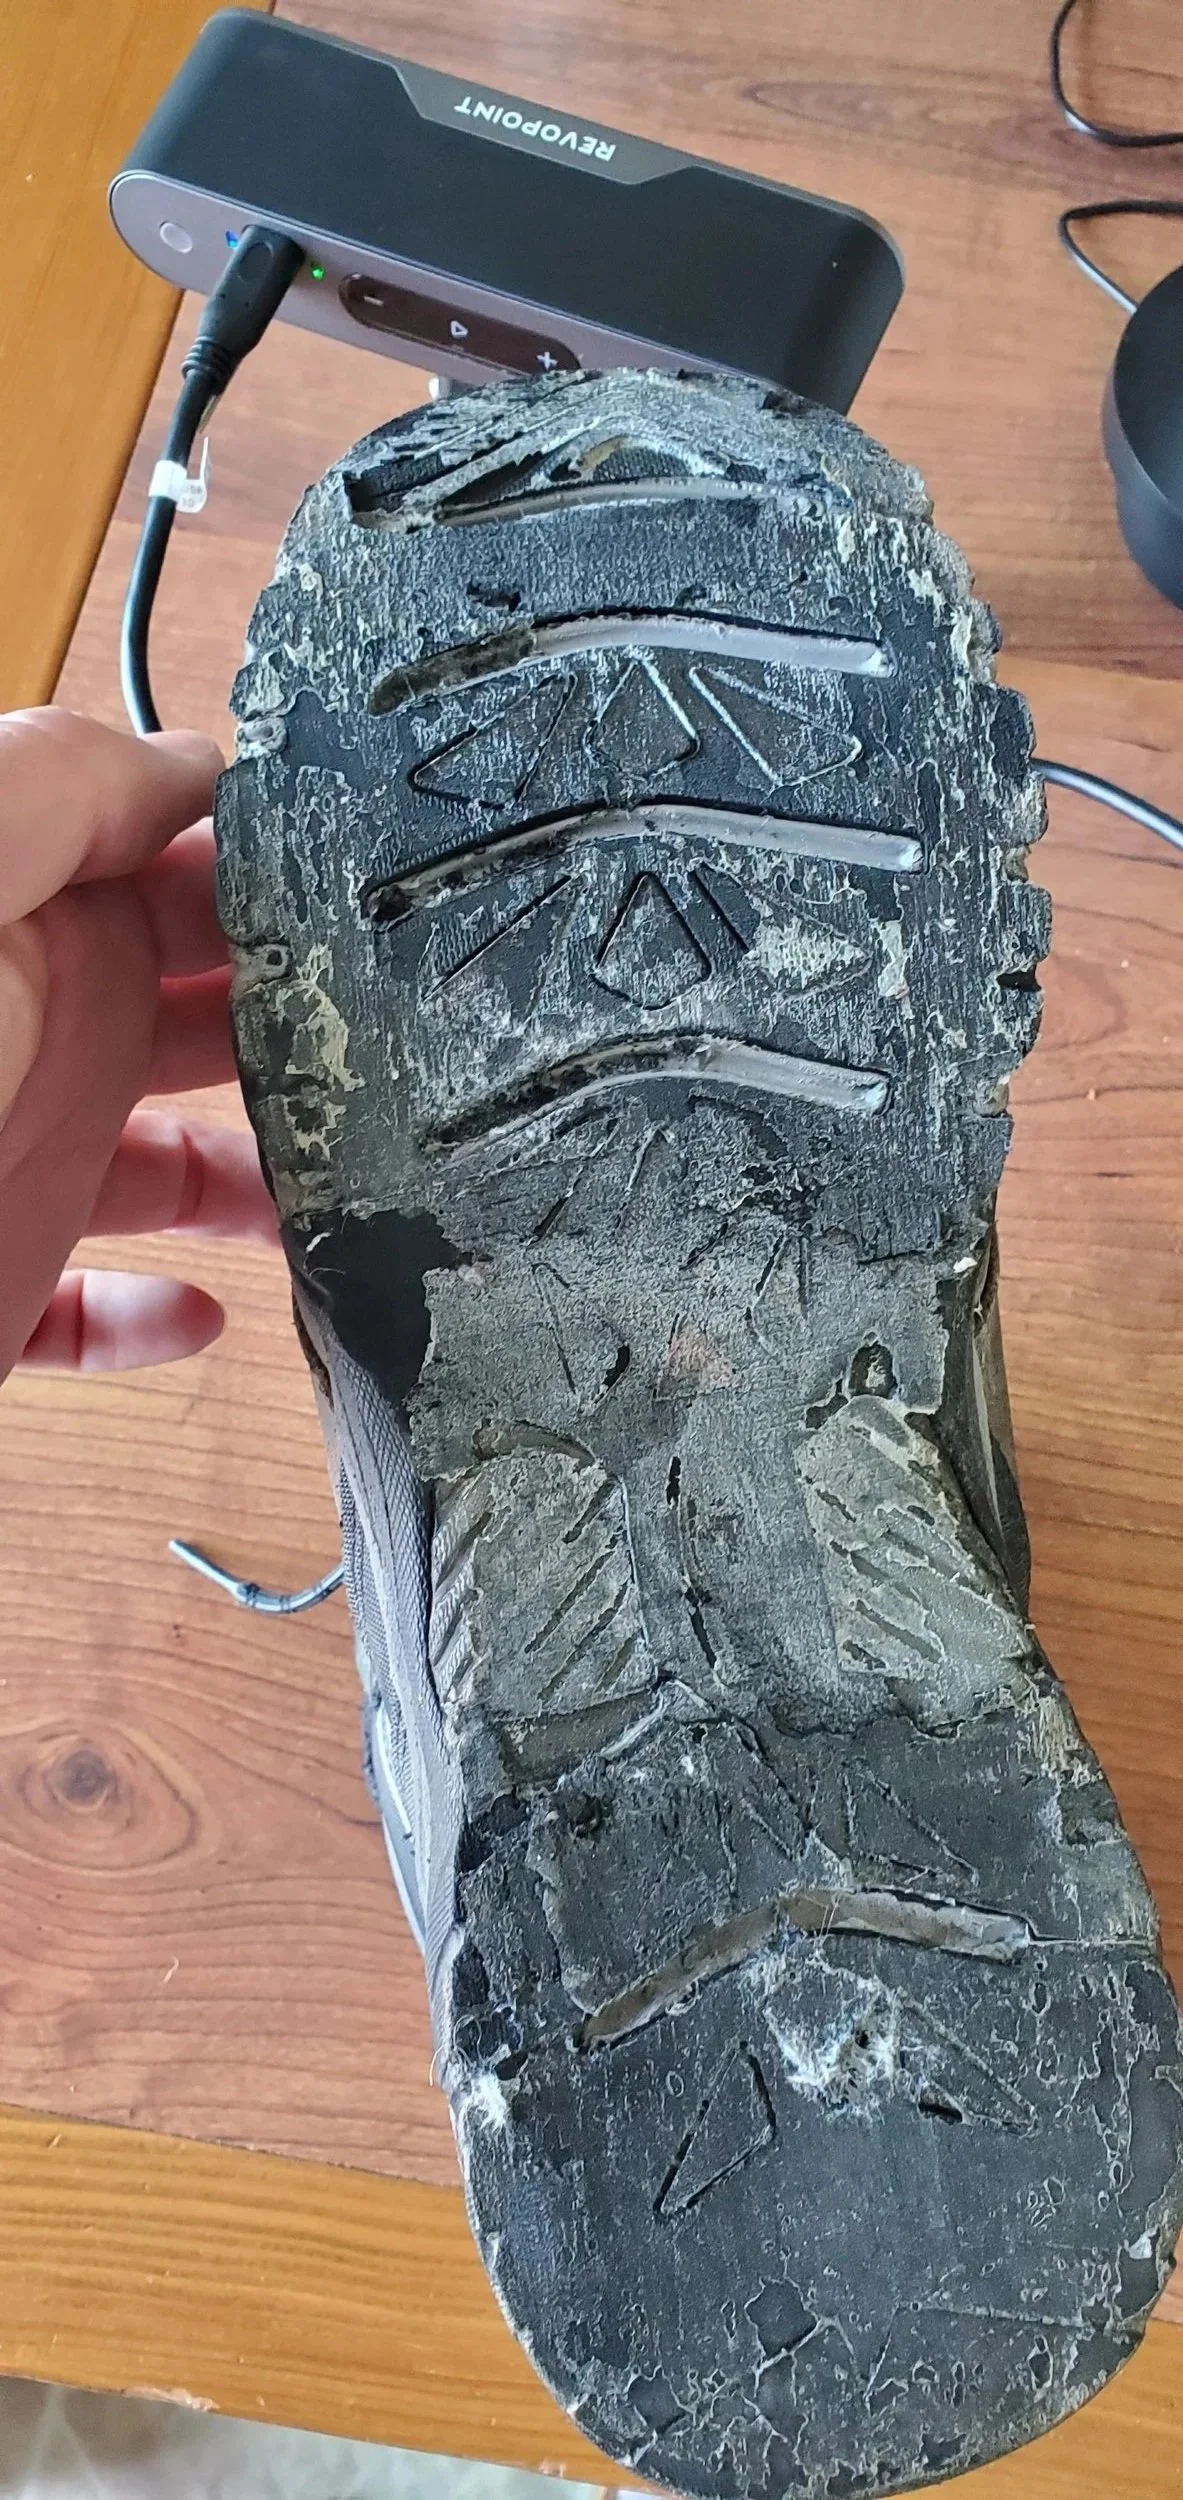
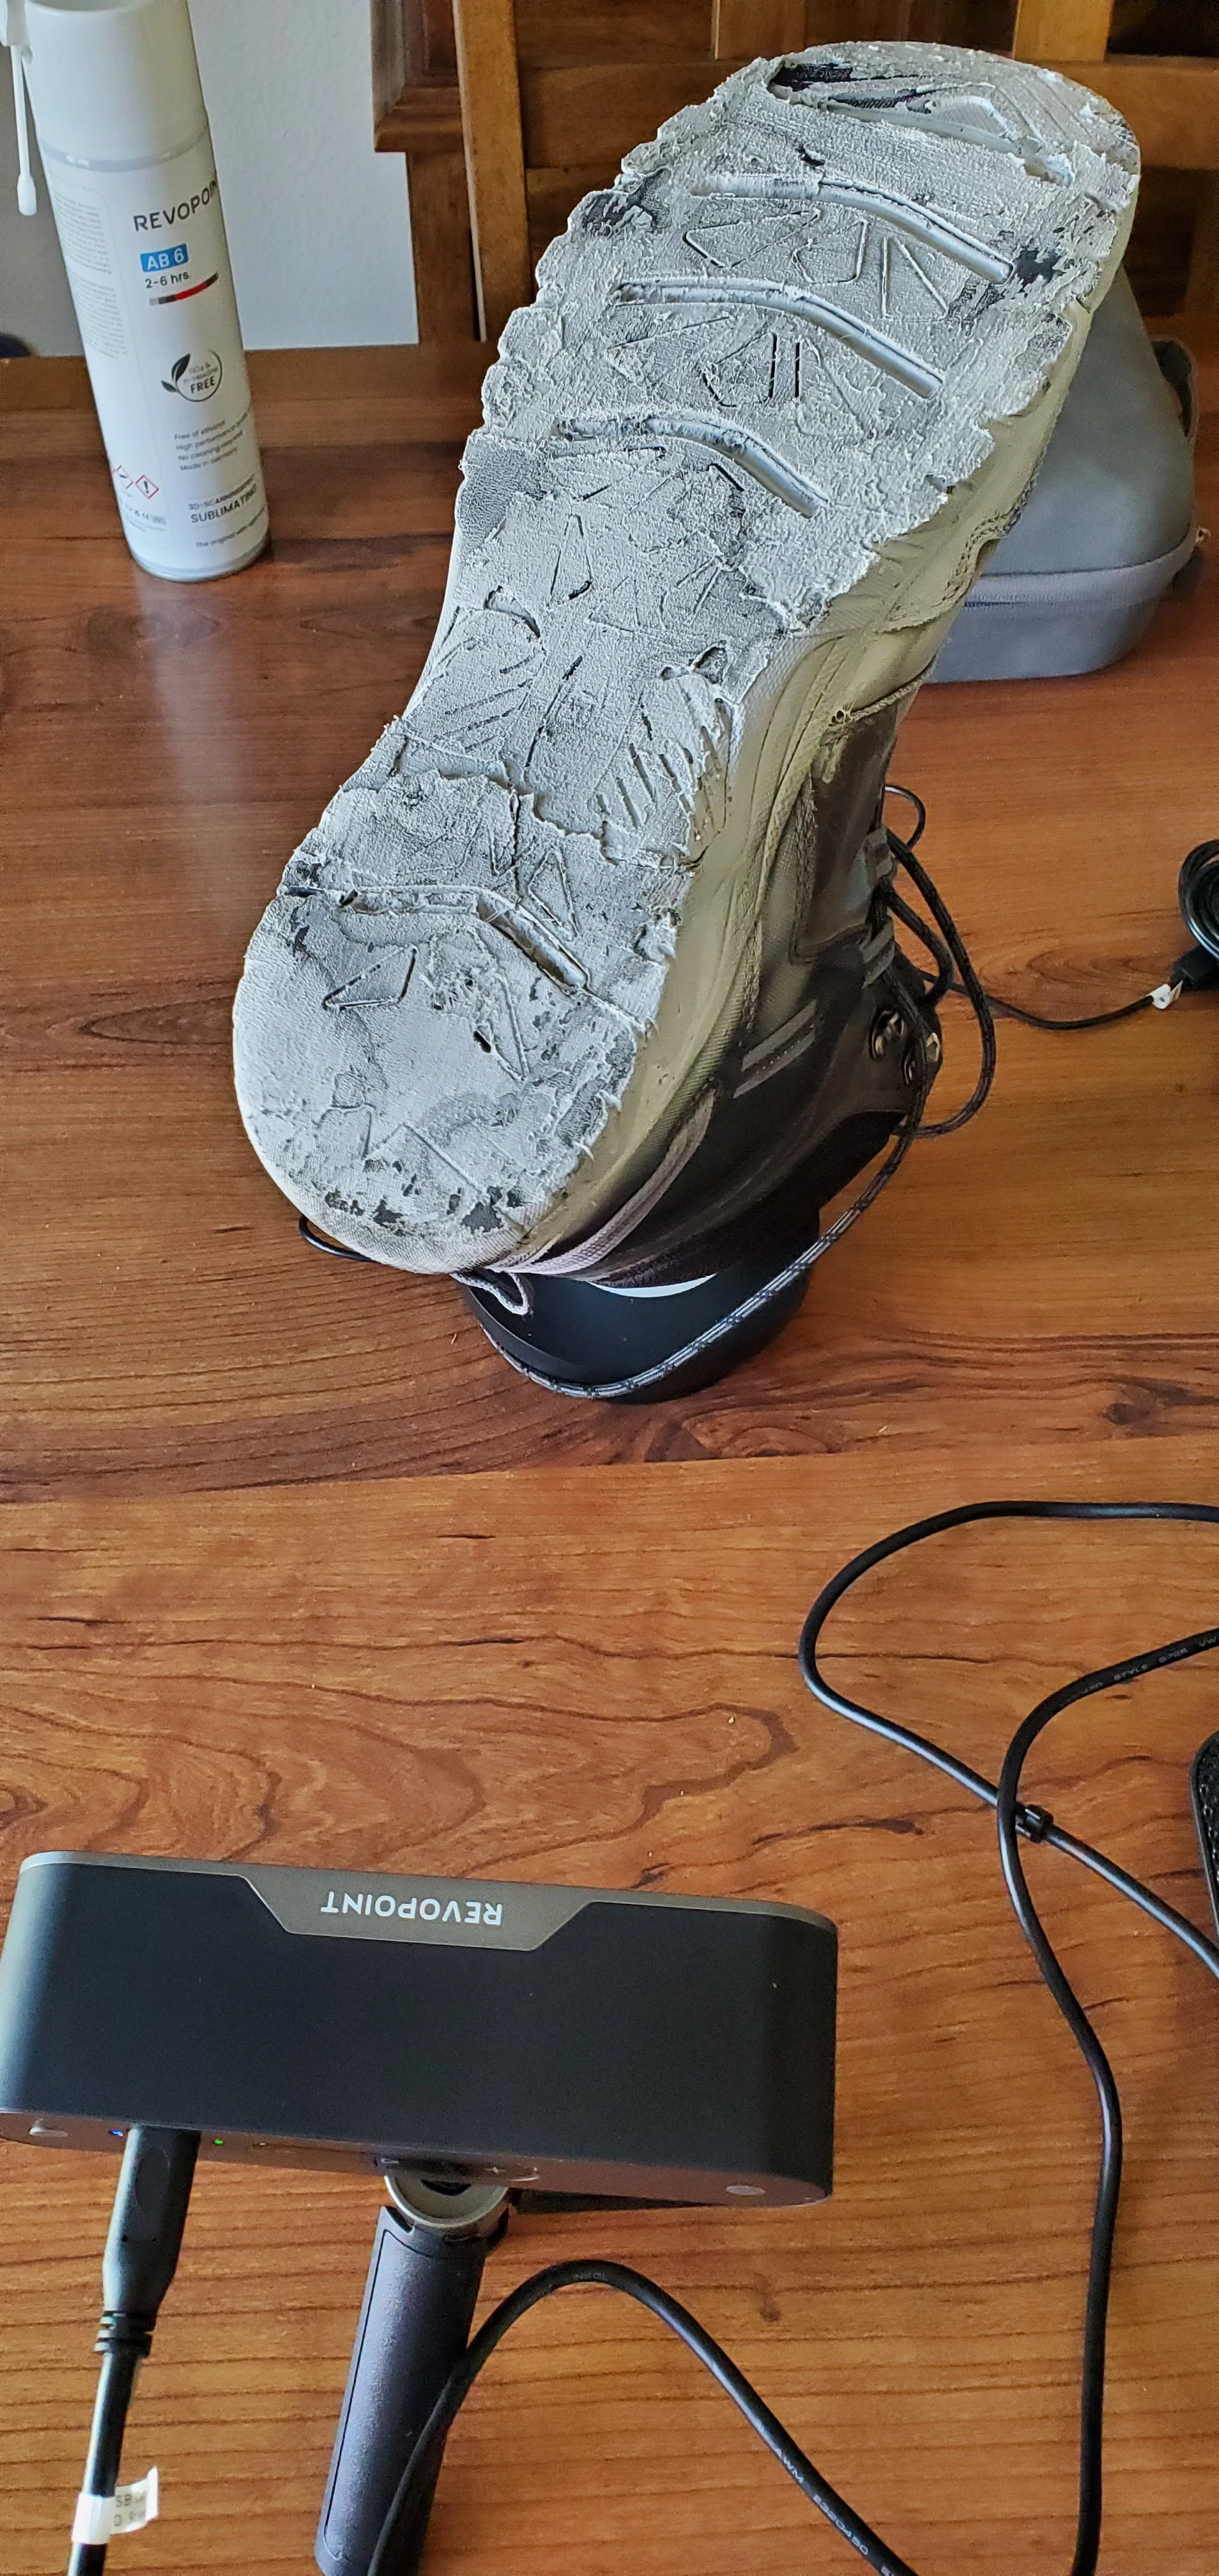
When I get a new pair of shoes, I have the sole sanded down as flat as possible. Then I scan the shoe. This is an older shoe that needed a new lift. I didn’t clean off all the glue from the old lift, so it was extra messy for this scan. The POP3 scanner will not pickup black, so I need scanner spray to make it work. The spray gives a flat white surface that evaporates after a few hours. Scanning can be tedious. I had to delete and restart several times. Usually I get multiple scans, then I clean each one individually before merging them, then I clean the merged scan.
You can see I missed a few spots with the spray that left holes in this scan, but that should be easy to fill in. I scan the whole shoe because that makes it easier for the scanner to keep tracking, but I don’t need anything more than the sole, and before I import the scan into Blender I cut away everything that isn’t needed. All the extra polygons slow down Blender a lot, so I reduce them as much as I can.
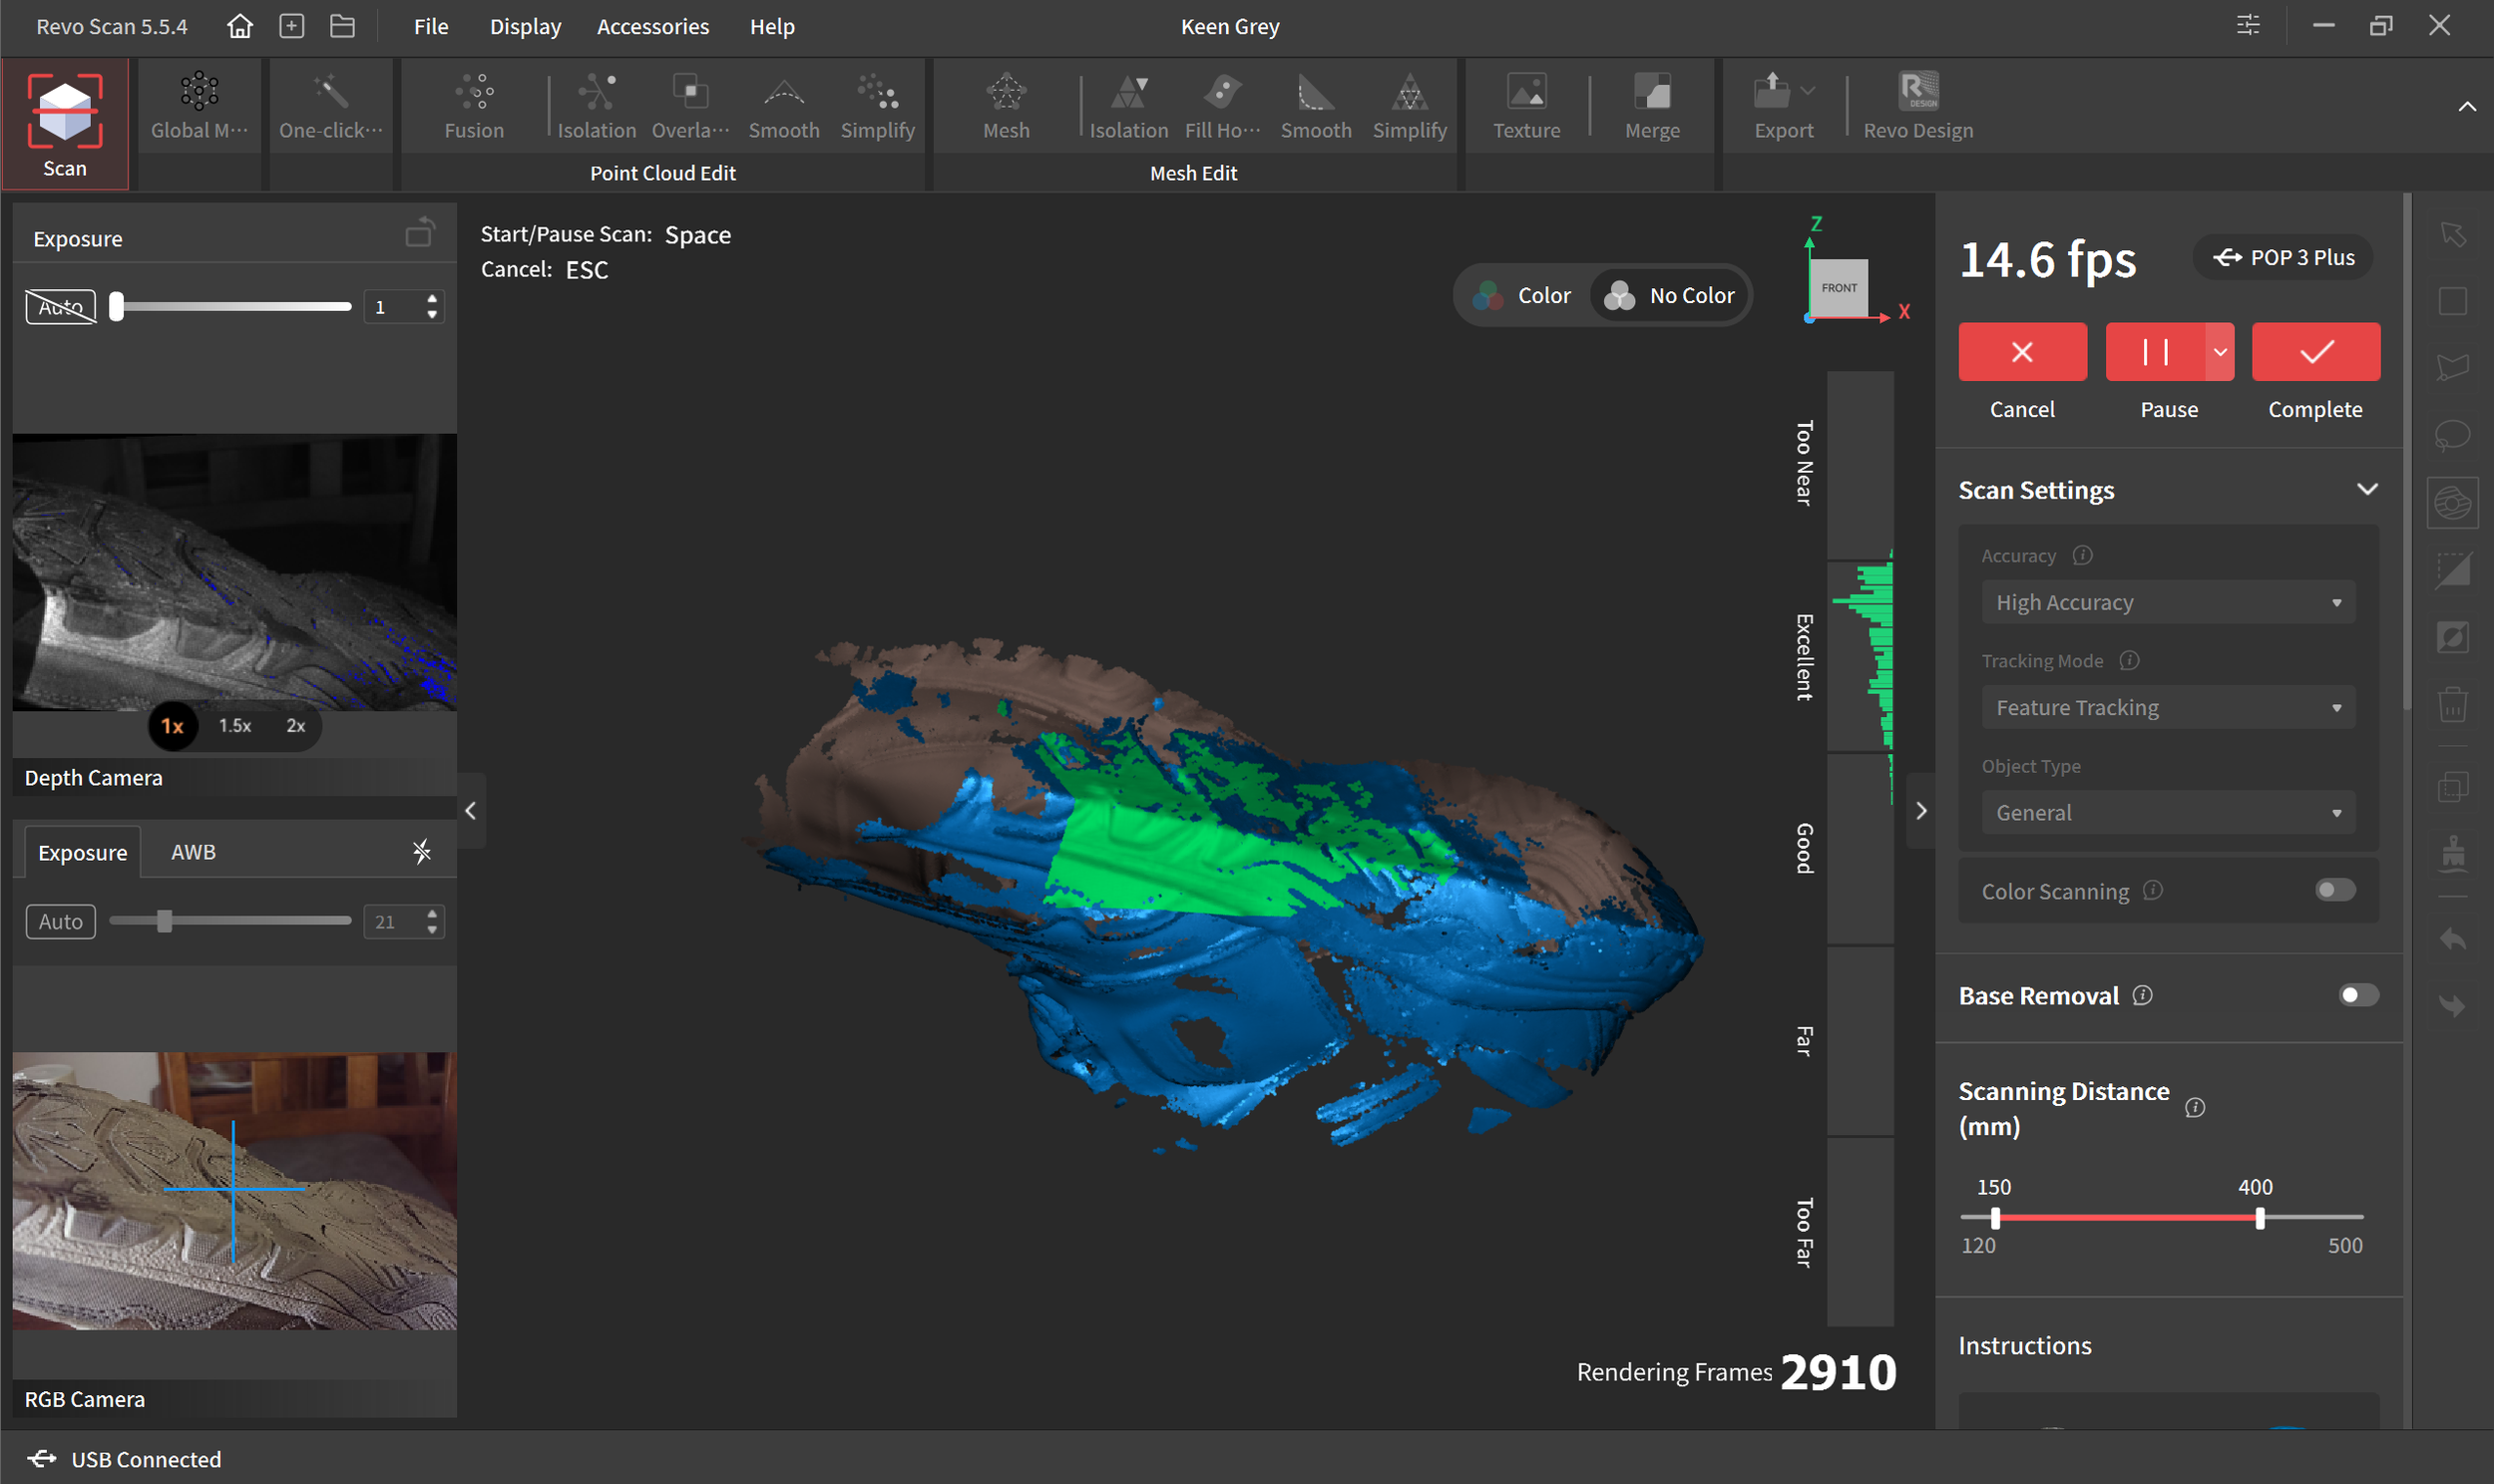
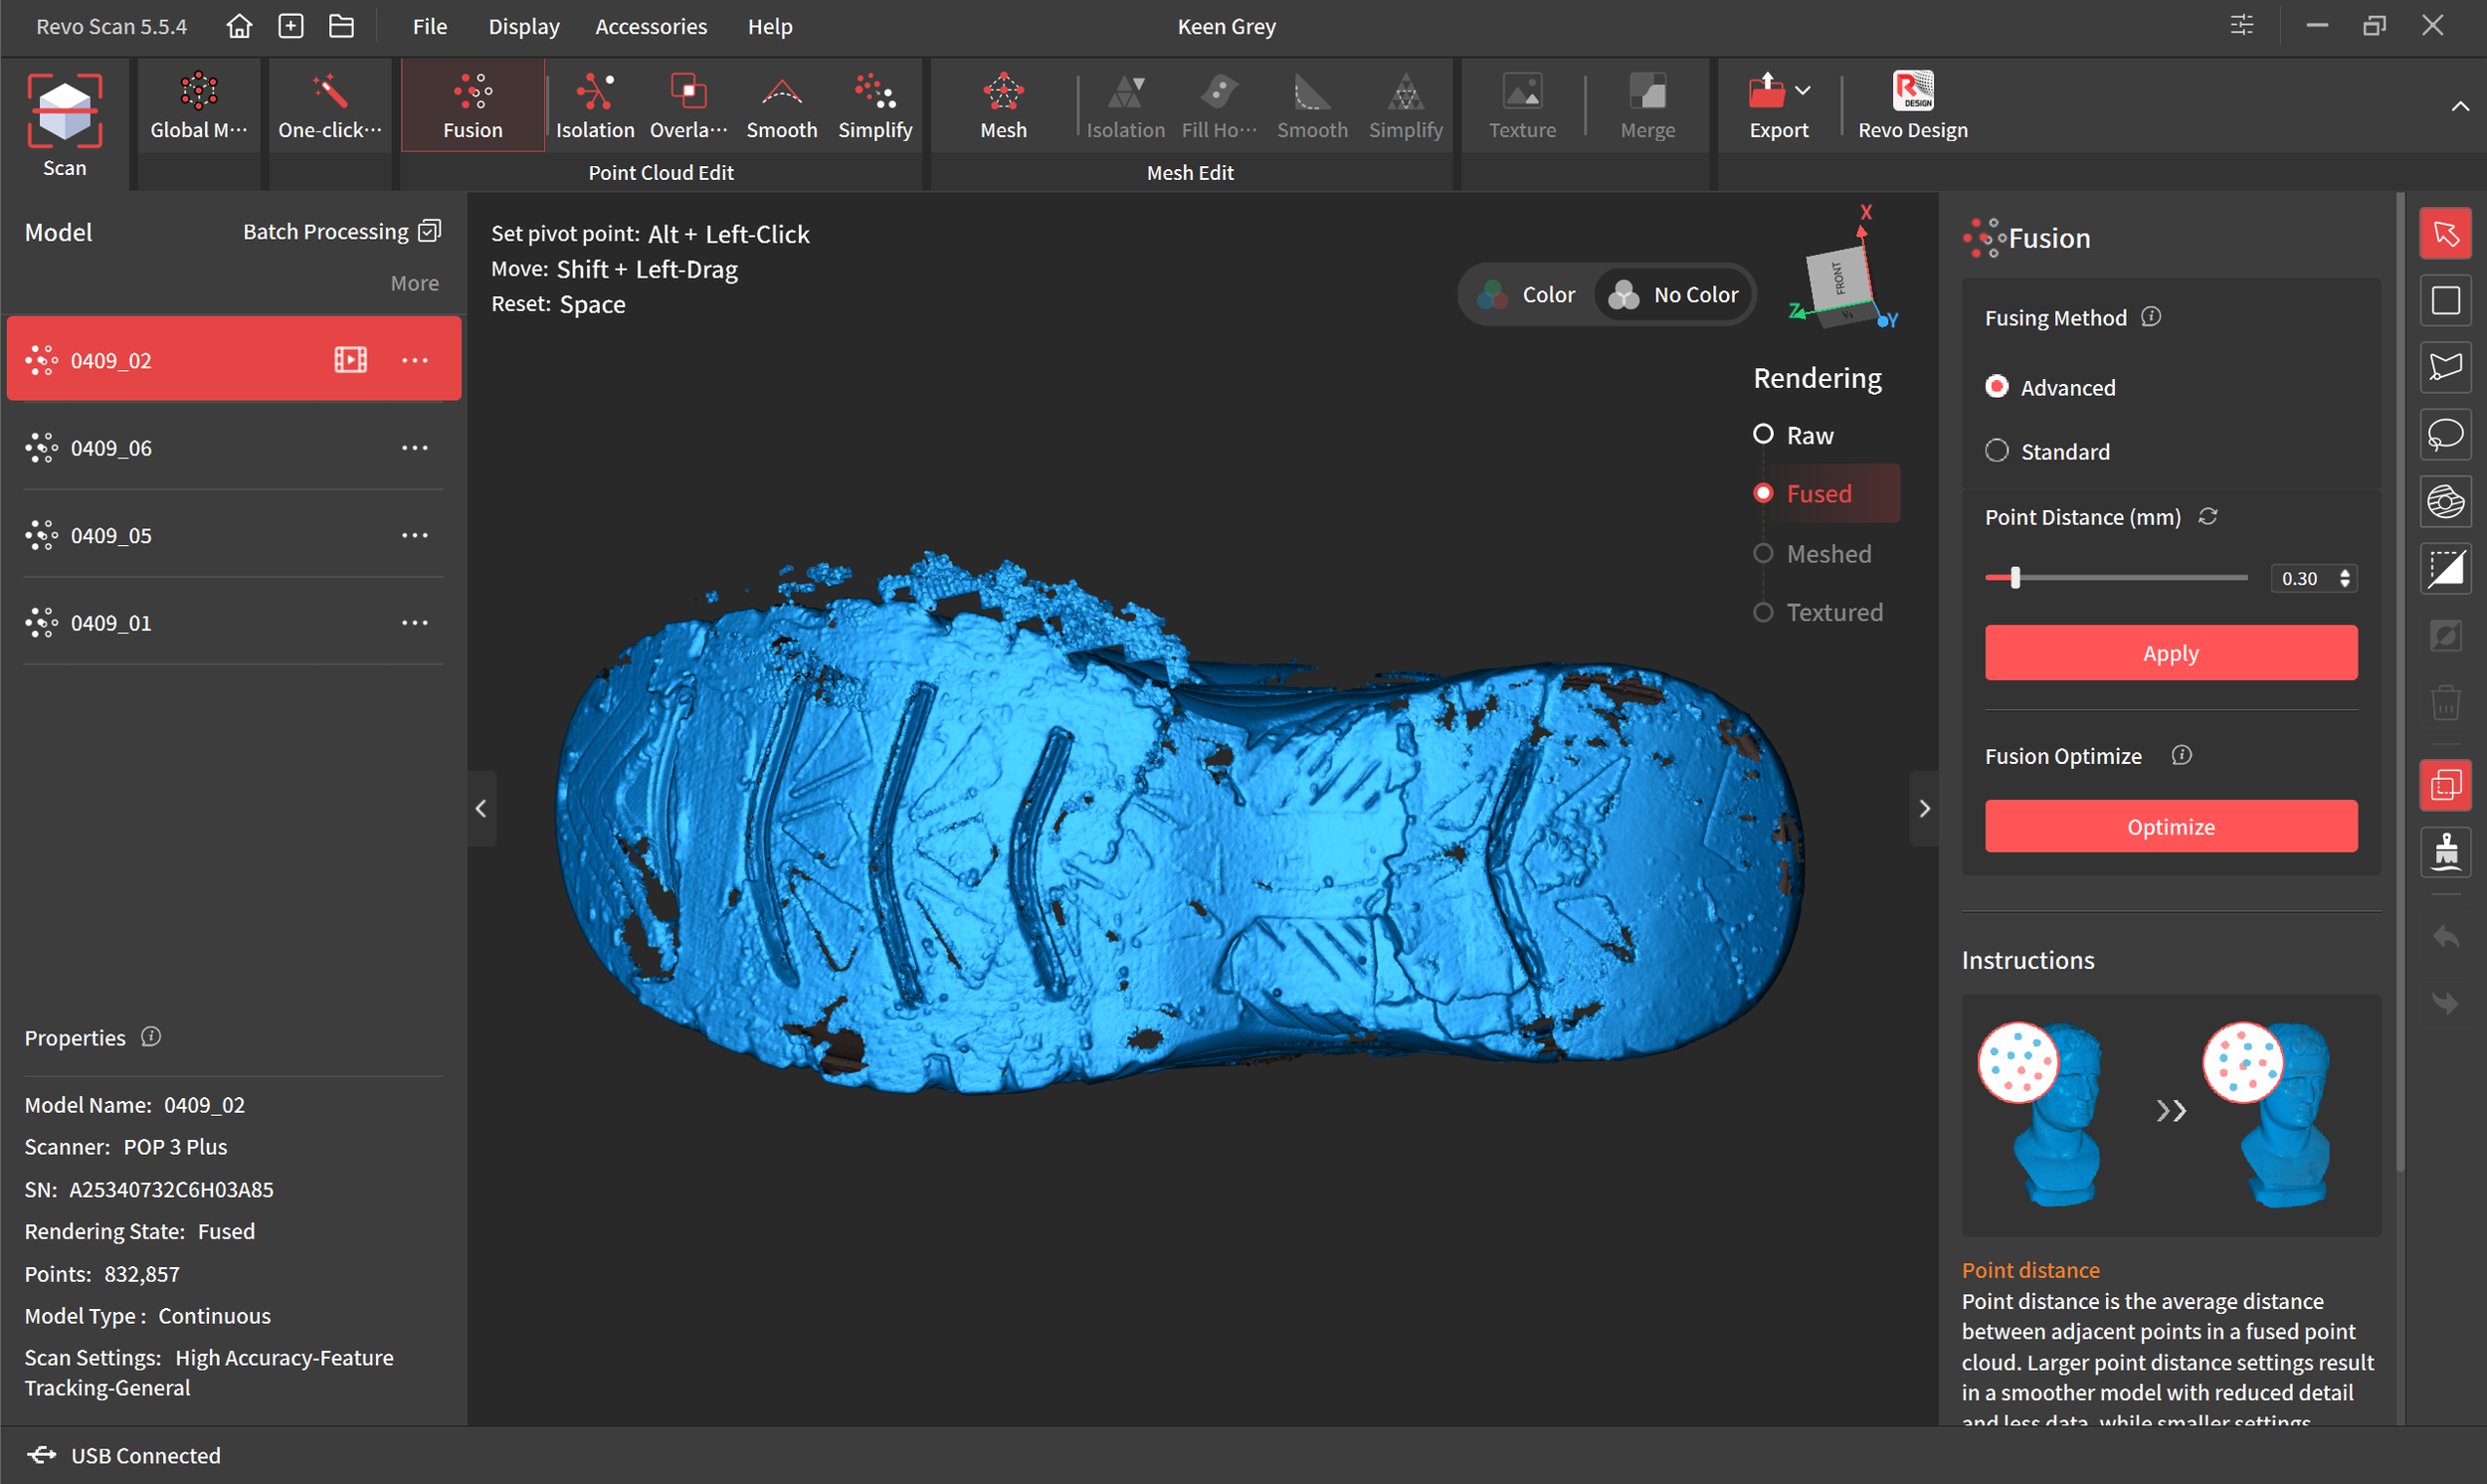
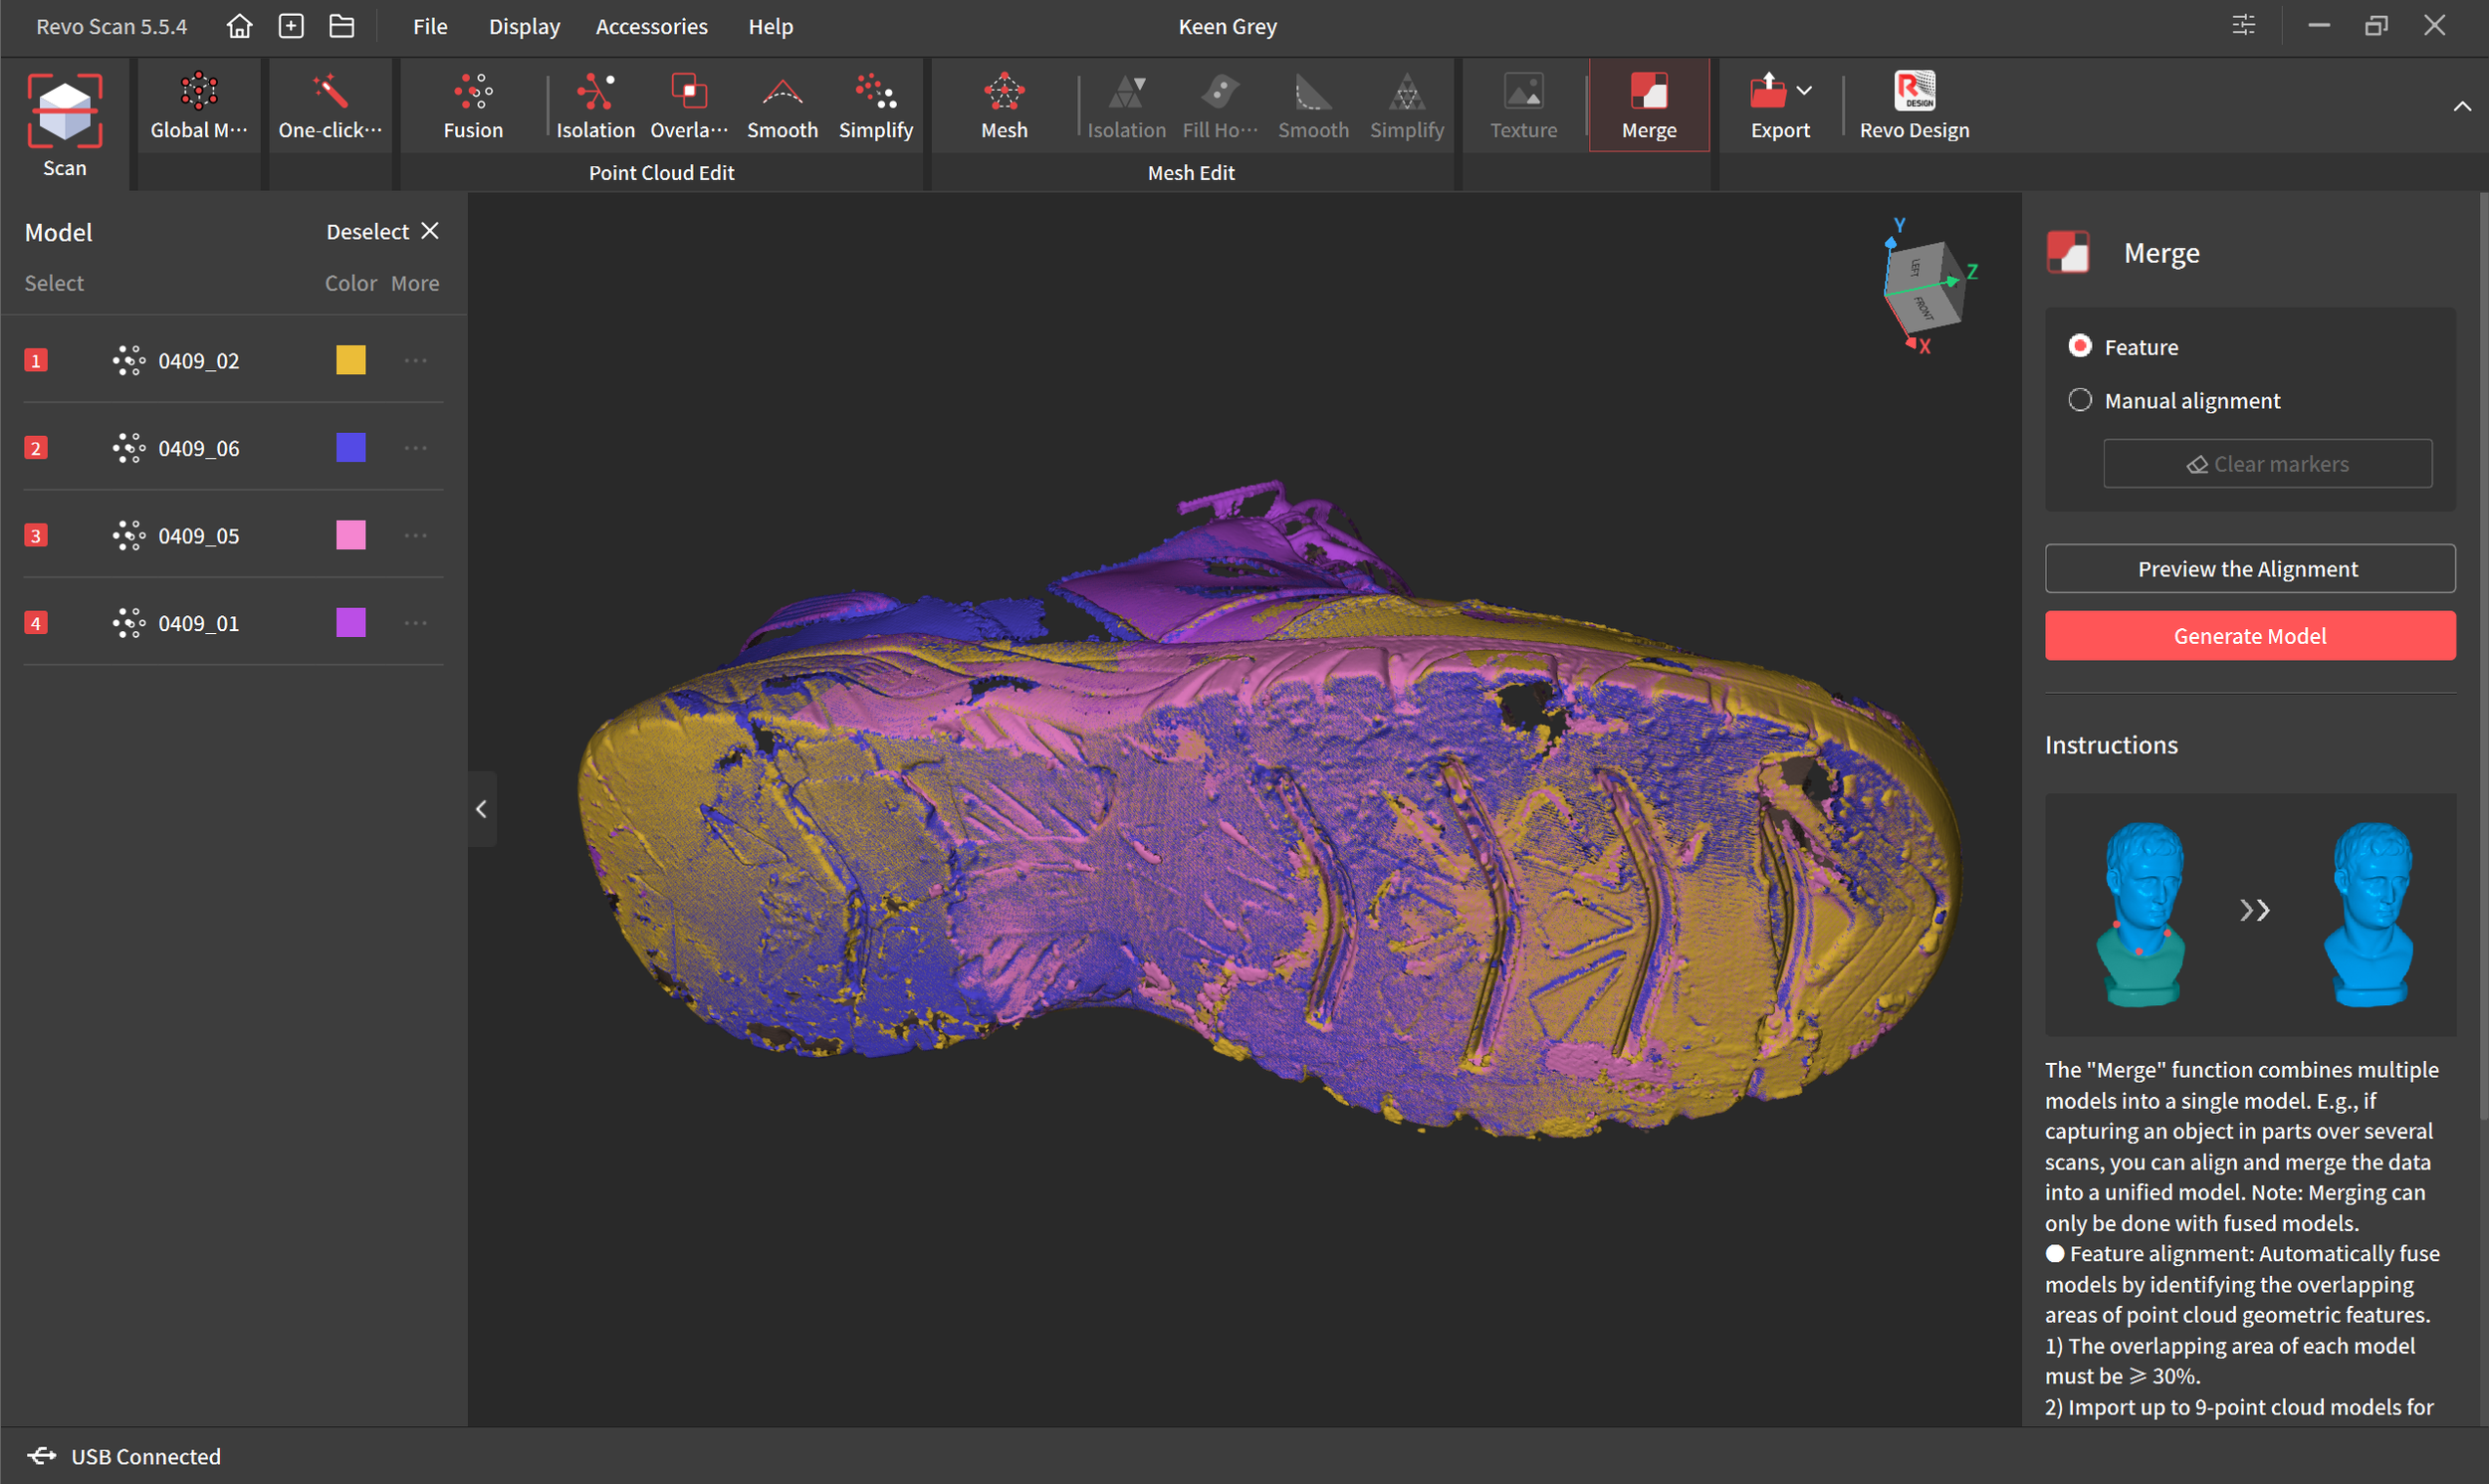
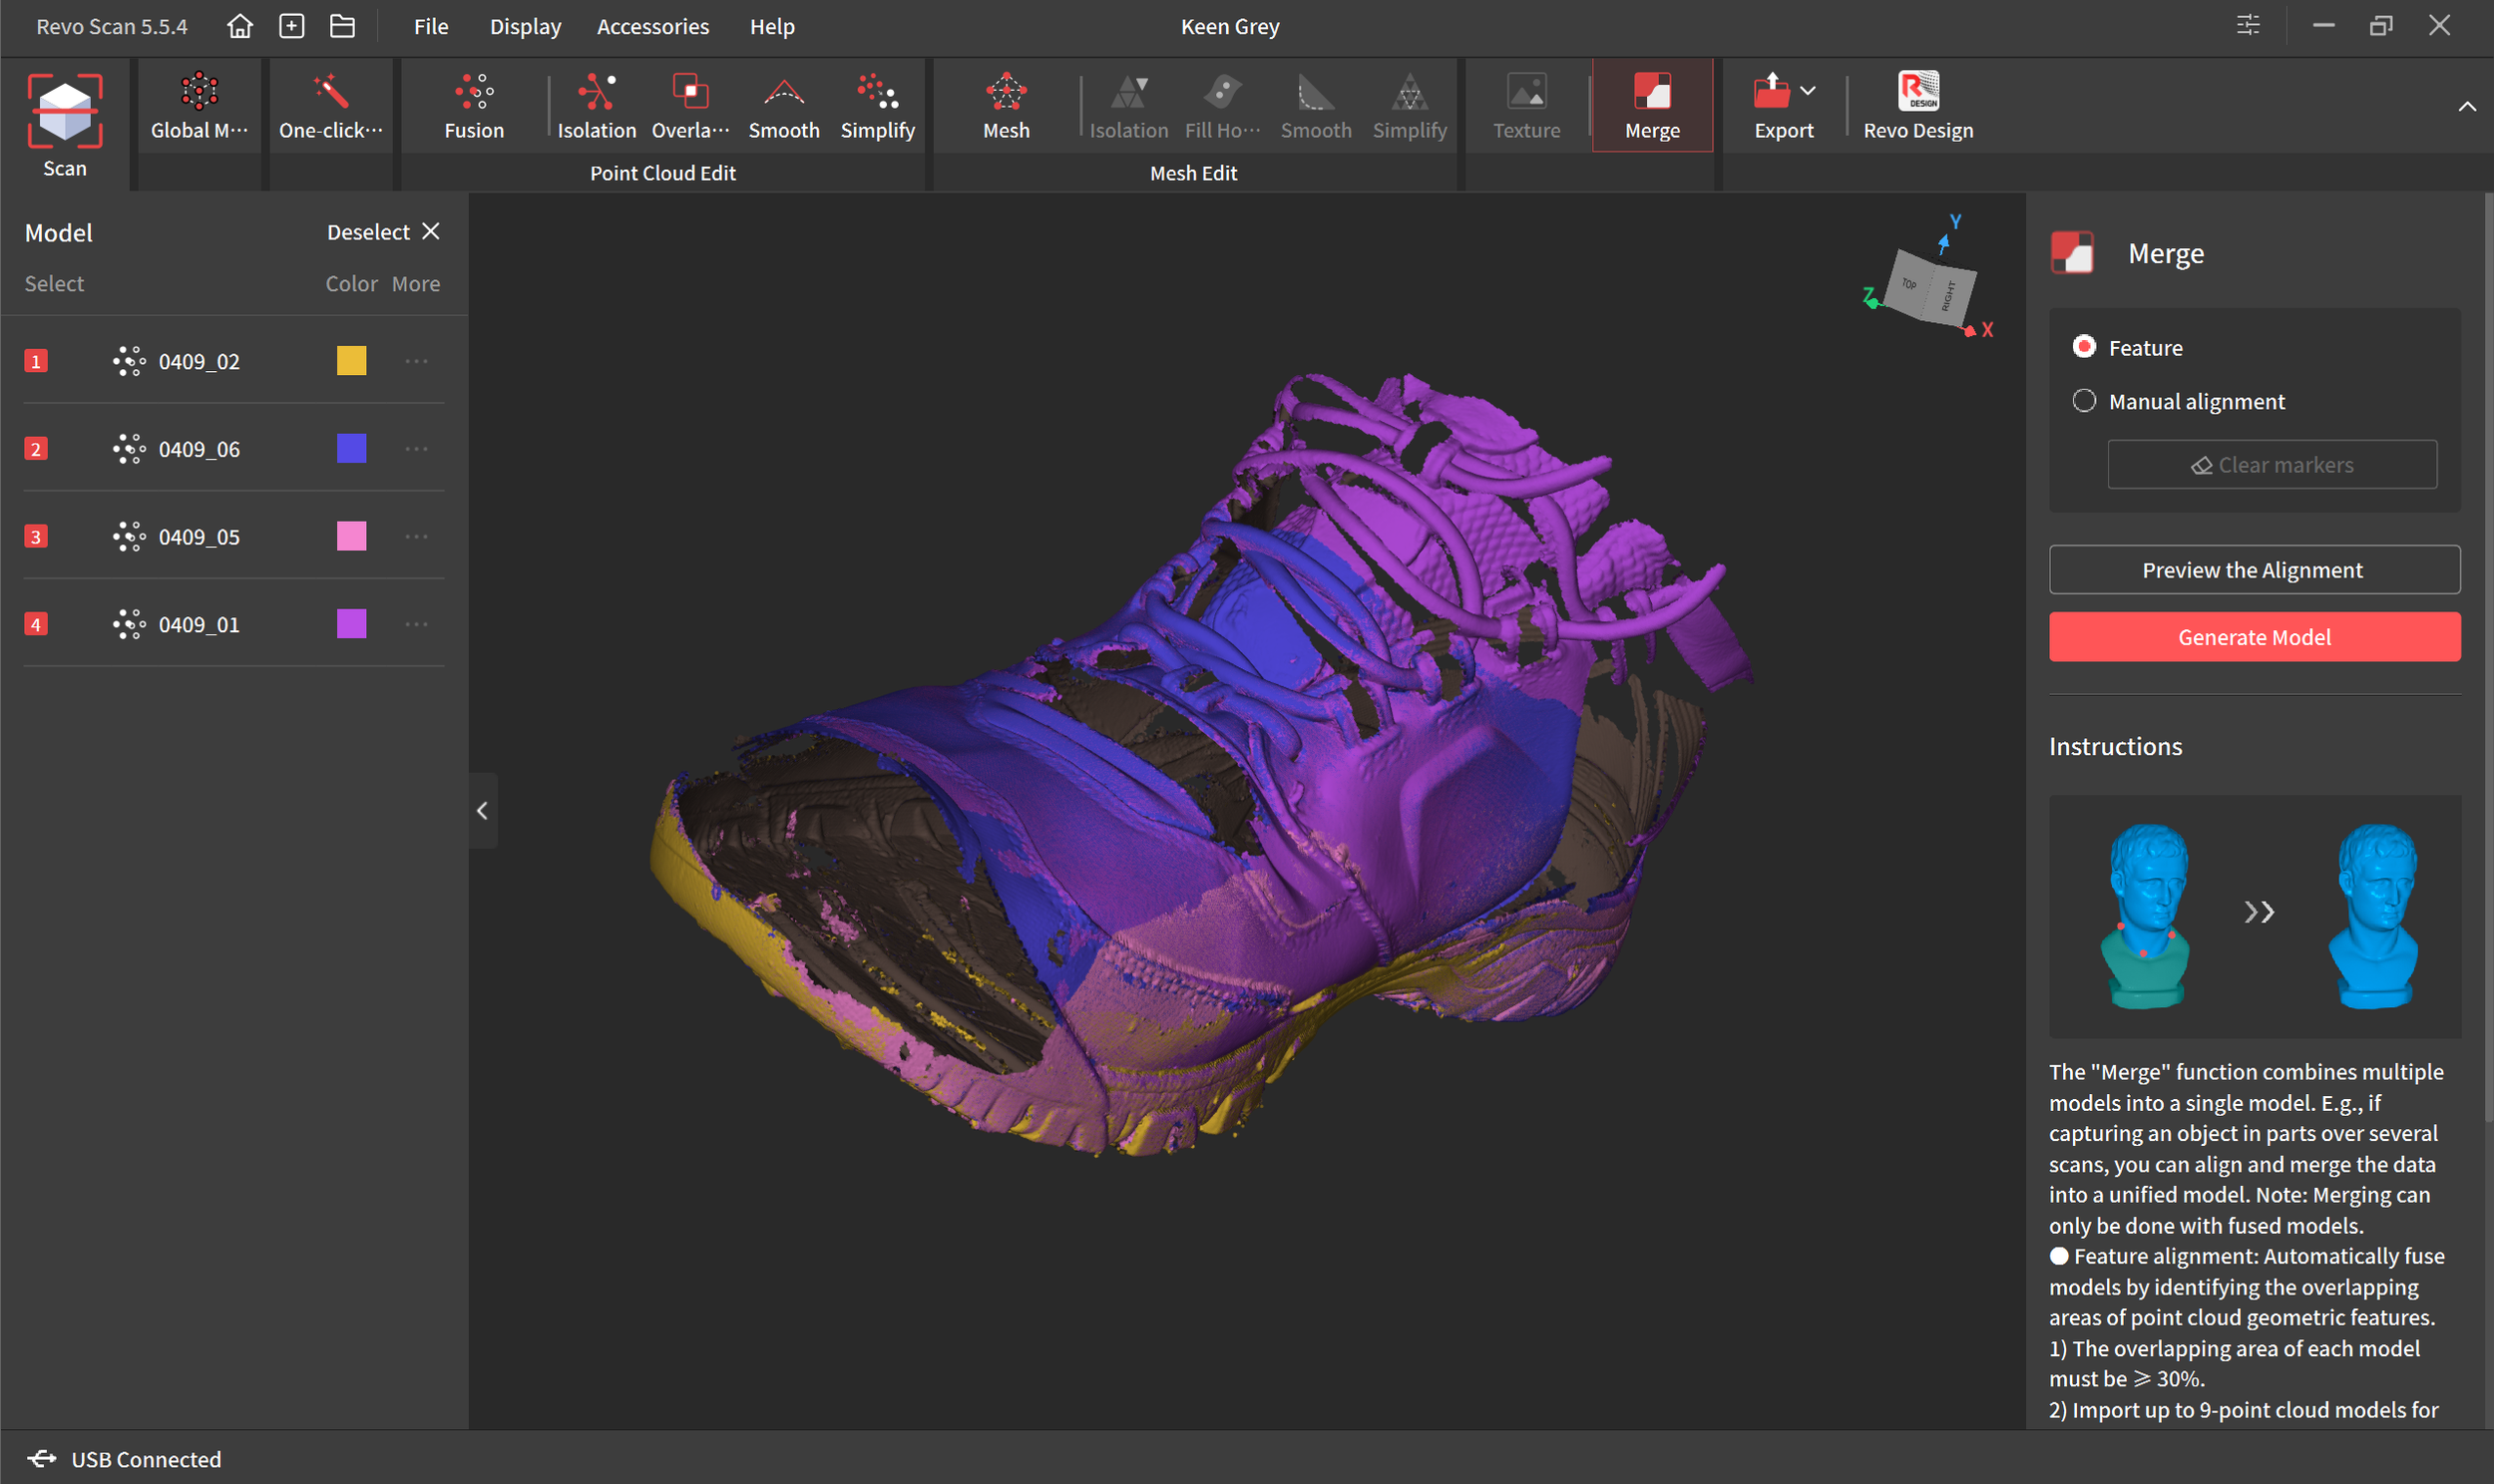
In the 4 images below you can see the scanning process. Blue is the point cloud of what it scanned. Green is what the scanner is currently scanning. The second image is errors in one of the scans that needed to be cleaned up. The 3rd image shows I made 4 scans that I merged together to create the best model. I did probably 10 scans but only kept 4 of them. There are several issues with this scan. There are multiple holes where the scanner spray missed, or wasn’t thick enough, and that left some holes in all 4 scans, but it’s easy enough to fill them in. I didn’t miss any critical features. They aren’t on corners or anything, they can be simply filled in flat.
Despite the issues, the scans came out decent. The lower 2 images show the merging of the scans. Each scan is a different color, and the multi color image shows the slight deviations in each scan as they merge together. The yellow is dominant on the heel and toe, while blue is showing more bumpy issues from the glue I didn’t clean off. Yellow has some blobs of glue at the toe as well. I smooth those out later.
I had to individually clean up each of the 4 scans, then merge them, then clean up the merged scan. The most tedious part of the process is cleaning the scans.
The 4th image shows how nothing on the toe would pickup in any scan. There wasn’t enough spray to make it visible to the scanner. I don’t actually need that part of the shoe at all, but it helps the scanner maintain tracking when it can see everything. Loss of tracking around the toe was the primary cause of deleting most of these scans.
The Revo Scan software is extremely easy to use. It gives instructions for every step on the right side. During the cleanup I use the isolation and overlay options multiple times. When part of the point cloud is deleted it usually allows the algorithm to detect several other parts that need to be deleted. So I clean a spot, isolate, delete, clean a spot, overlay detection, delete, over and over again. I slowly subtract from the scan until it looks clean. I clean each scan, then I merged them. Revo Scan almost always gets the auto alignment perfect. I’ve only had to do a manual alignment of scans once, and that was fairly easy as well. Once they are all merged I delete everything I don’t need and do a detailed final clean of what’s left.
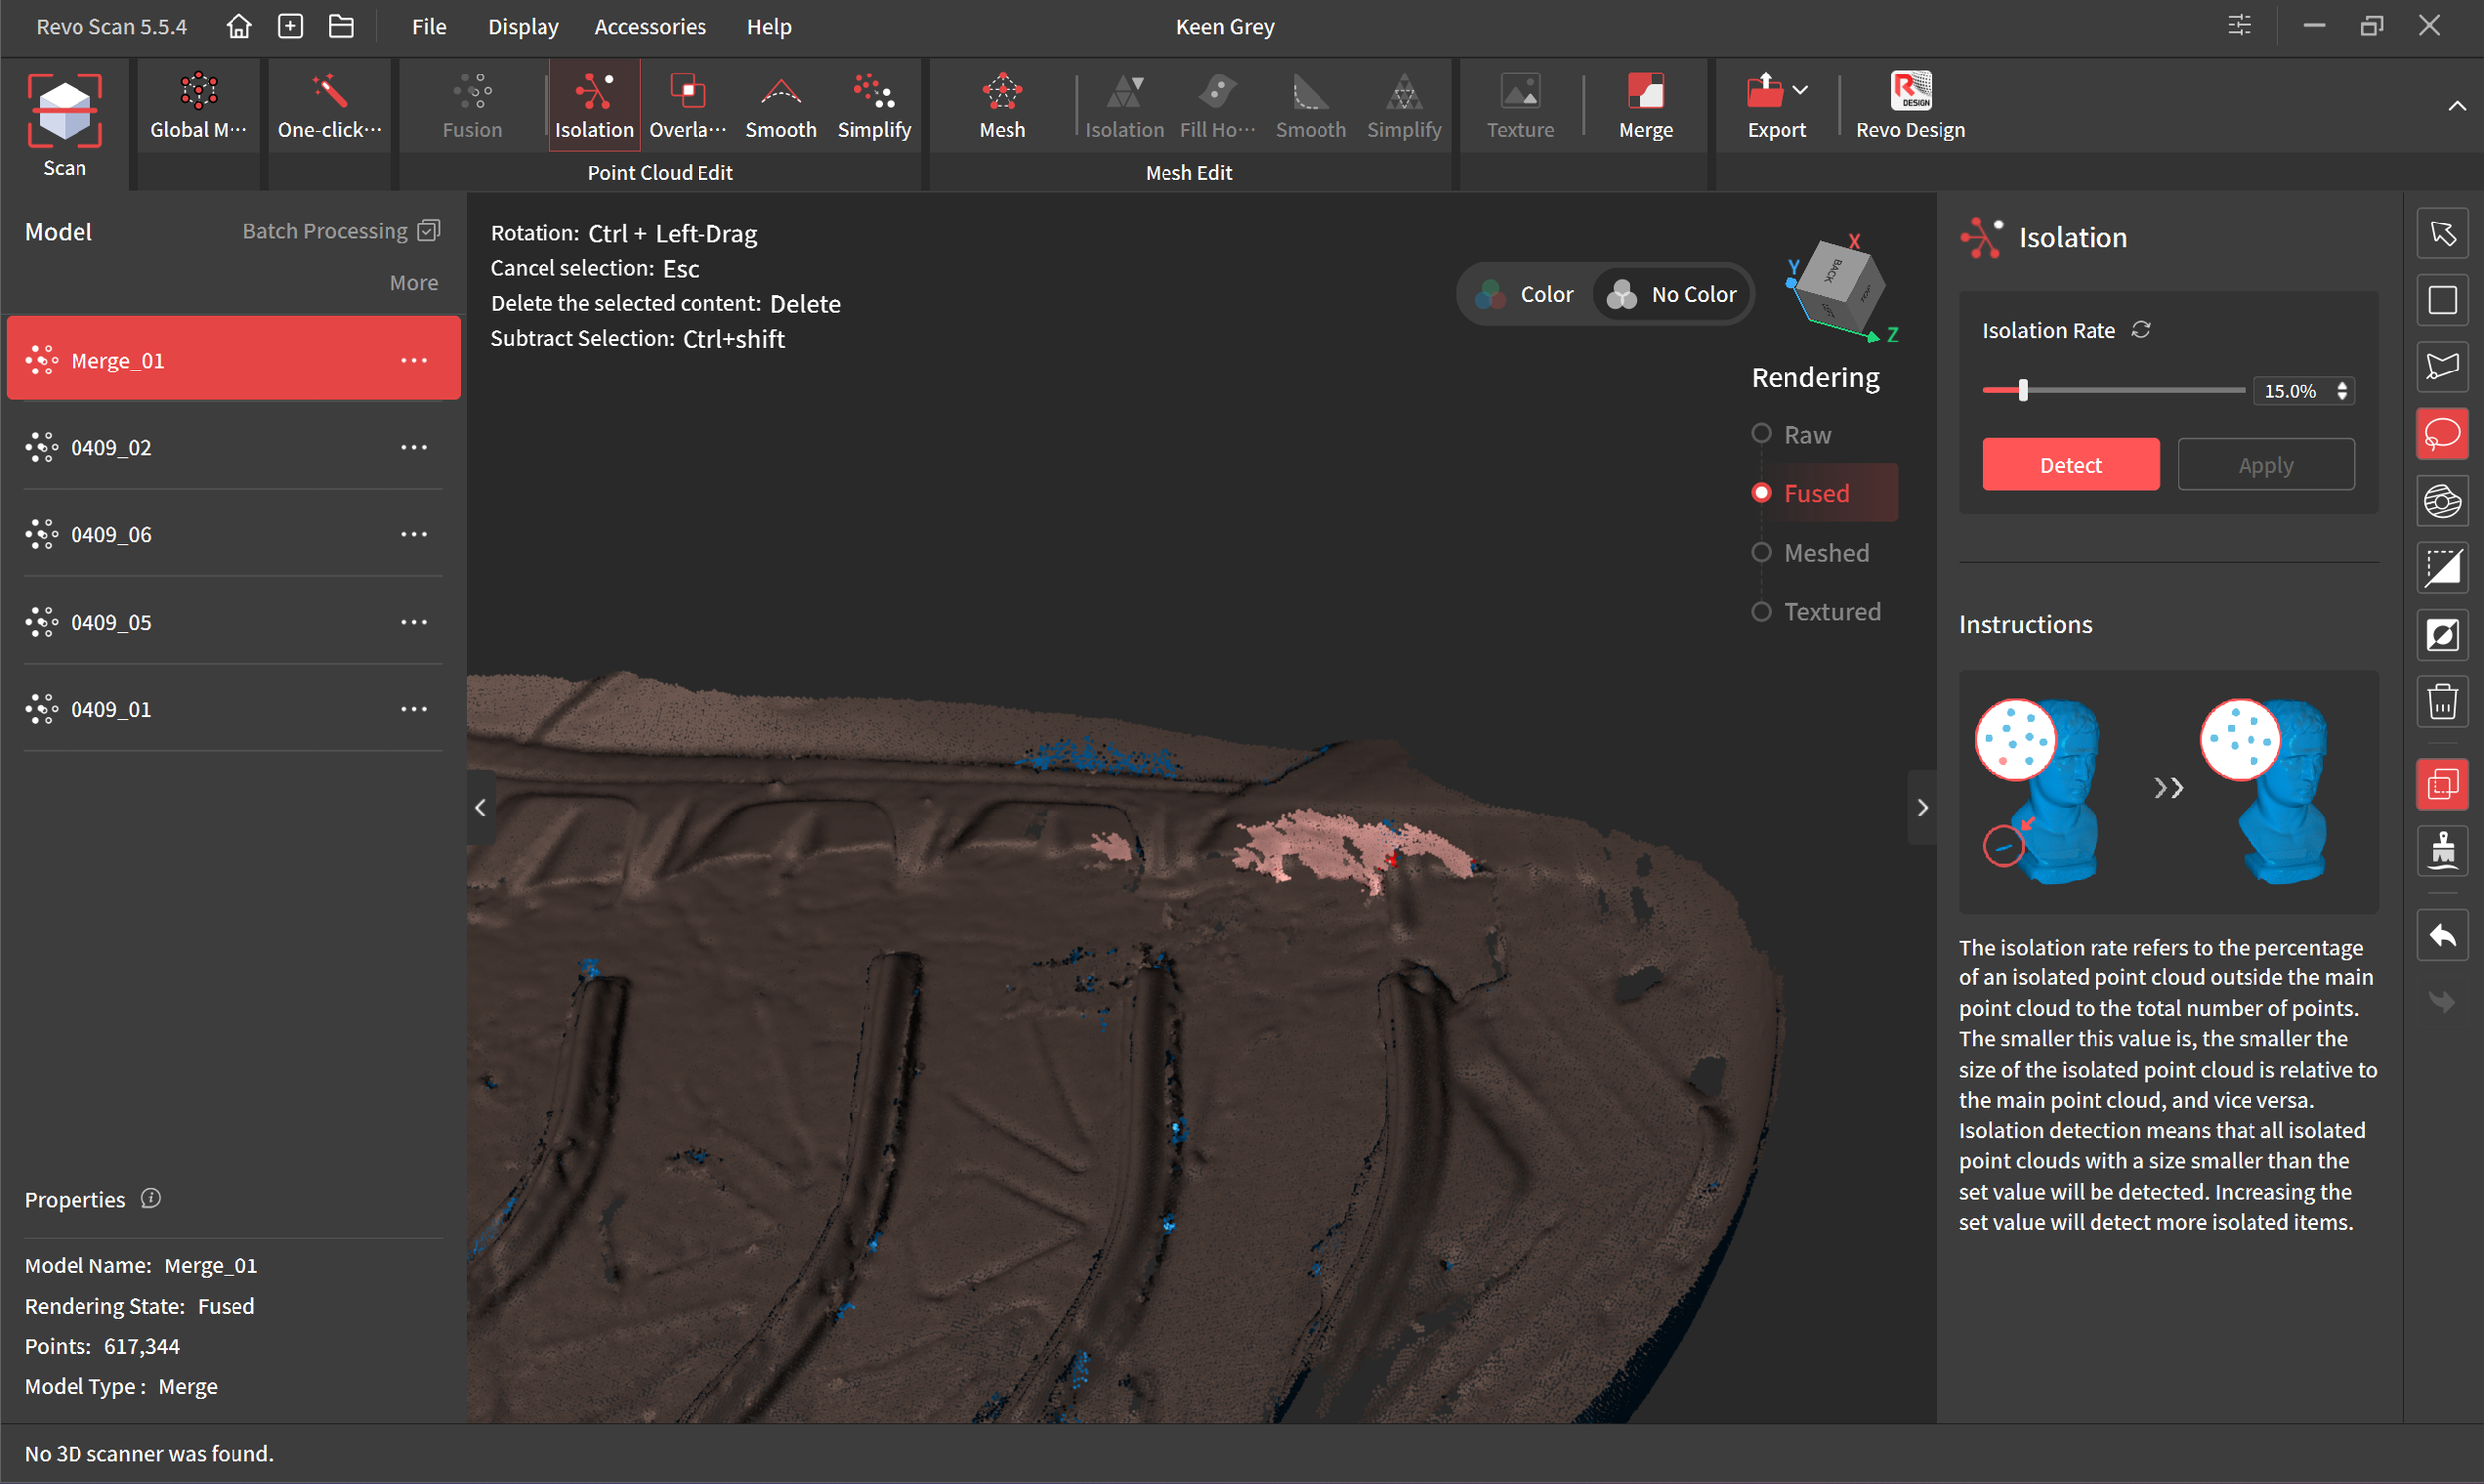
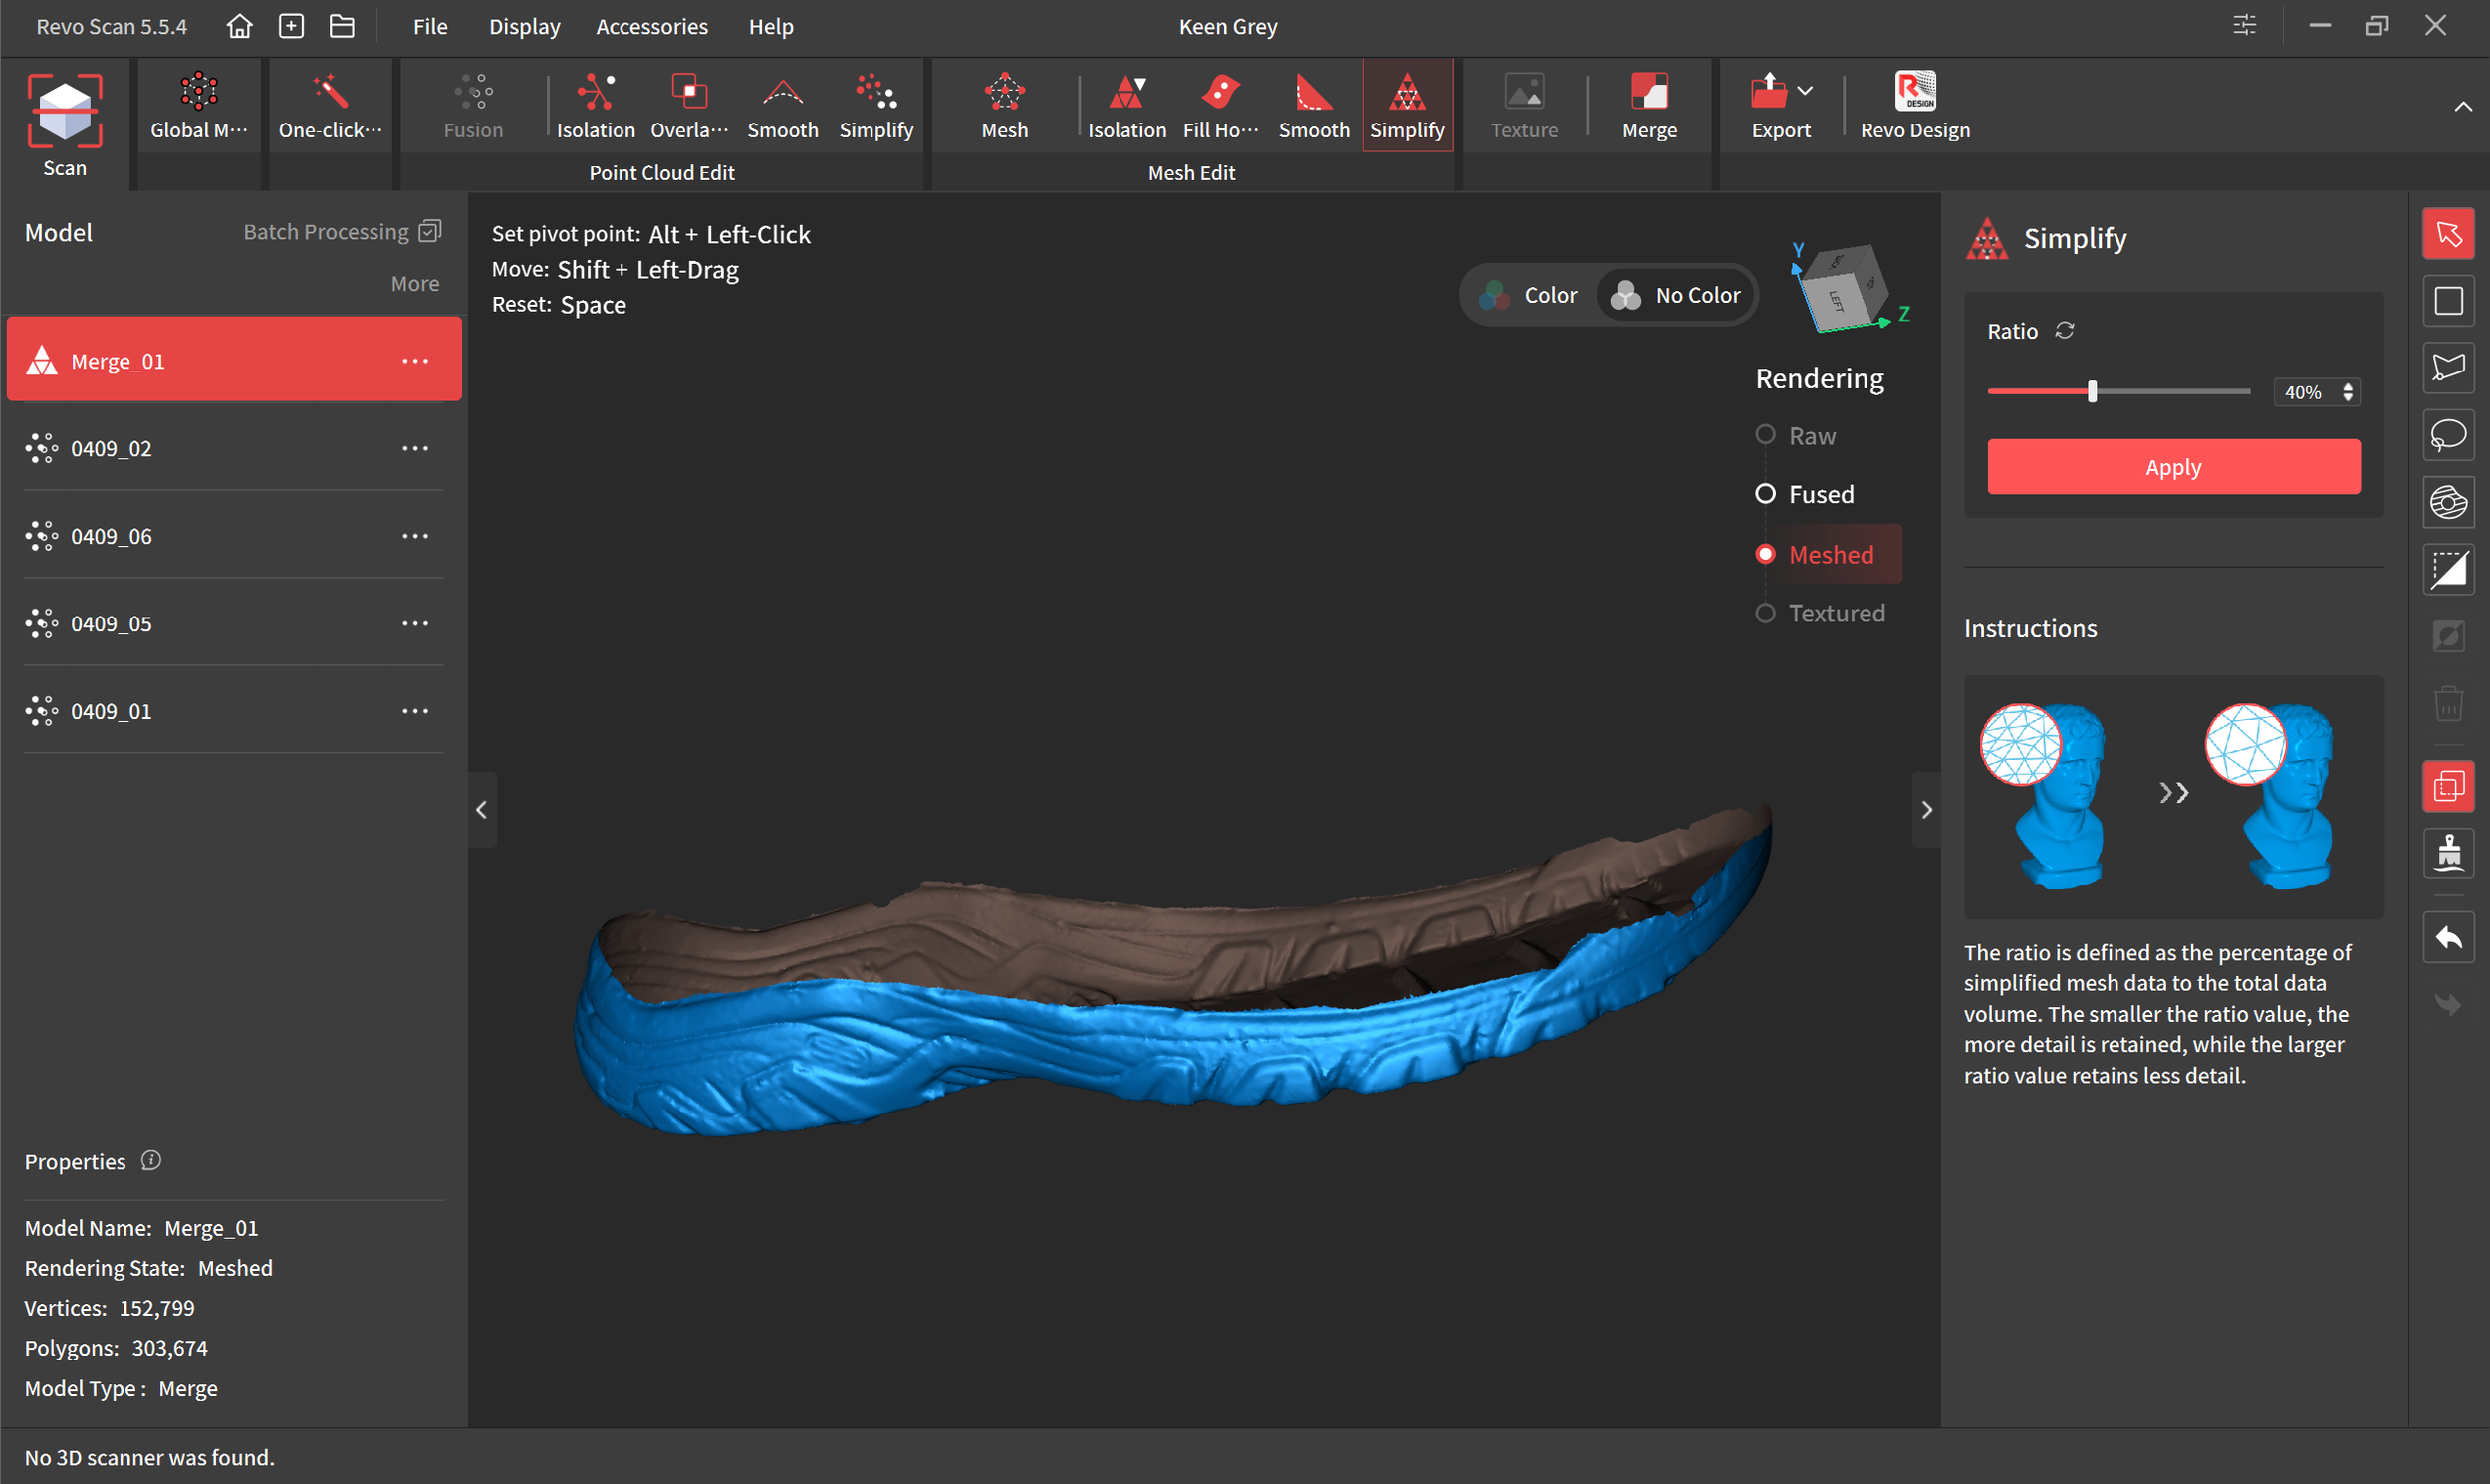
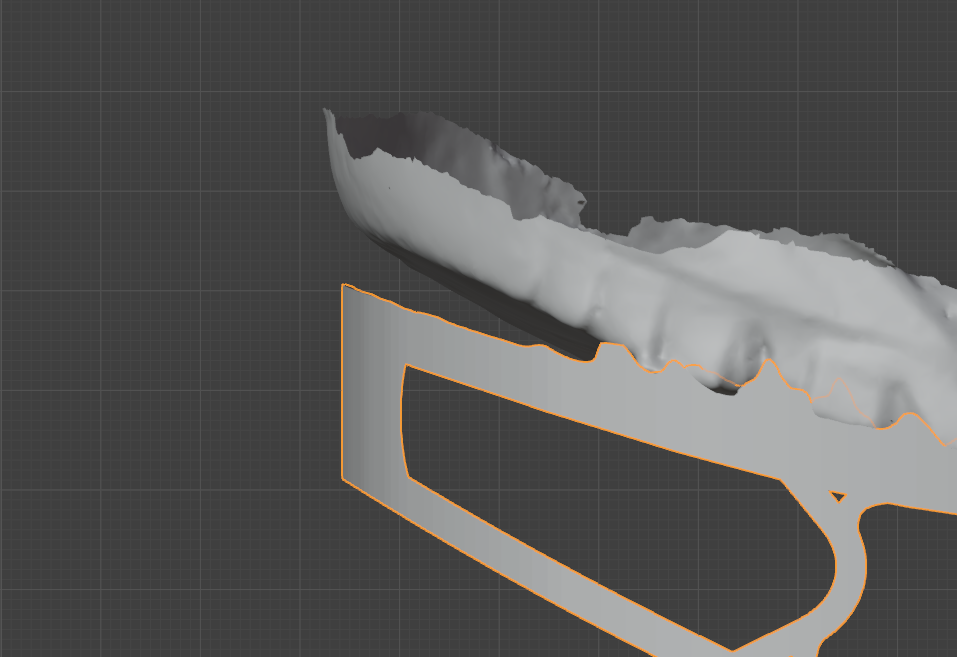
Above is an example of the cleaning. The inside of the scan is brown, the outside is blue, so all the inside blue bits need to be deleted. It’s tedious selecting them, but it’s critical they be deleted before turning it into a mesh. It will turn those bits into little pockets in the mesh if they aren’t deleted, and that will make the Boolean operation in Blender fail. The second picture shows the only part I need to keep on the merged model. Once I deleted everything and get it smoothed and cleaned I simplified the model, reducing it from 1.6 million polygons to 303,674. This makes a huge performance difference in Blender when I’m stacking multiple booleans on a single object and It has to calculate every polygon each time I make any adjustment.
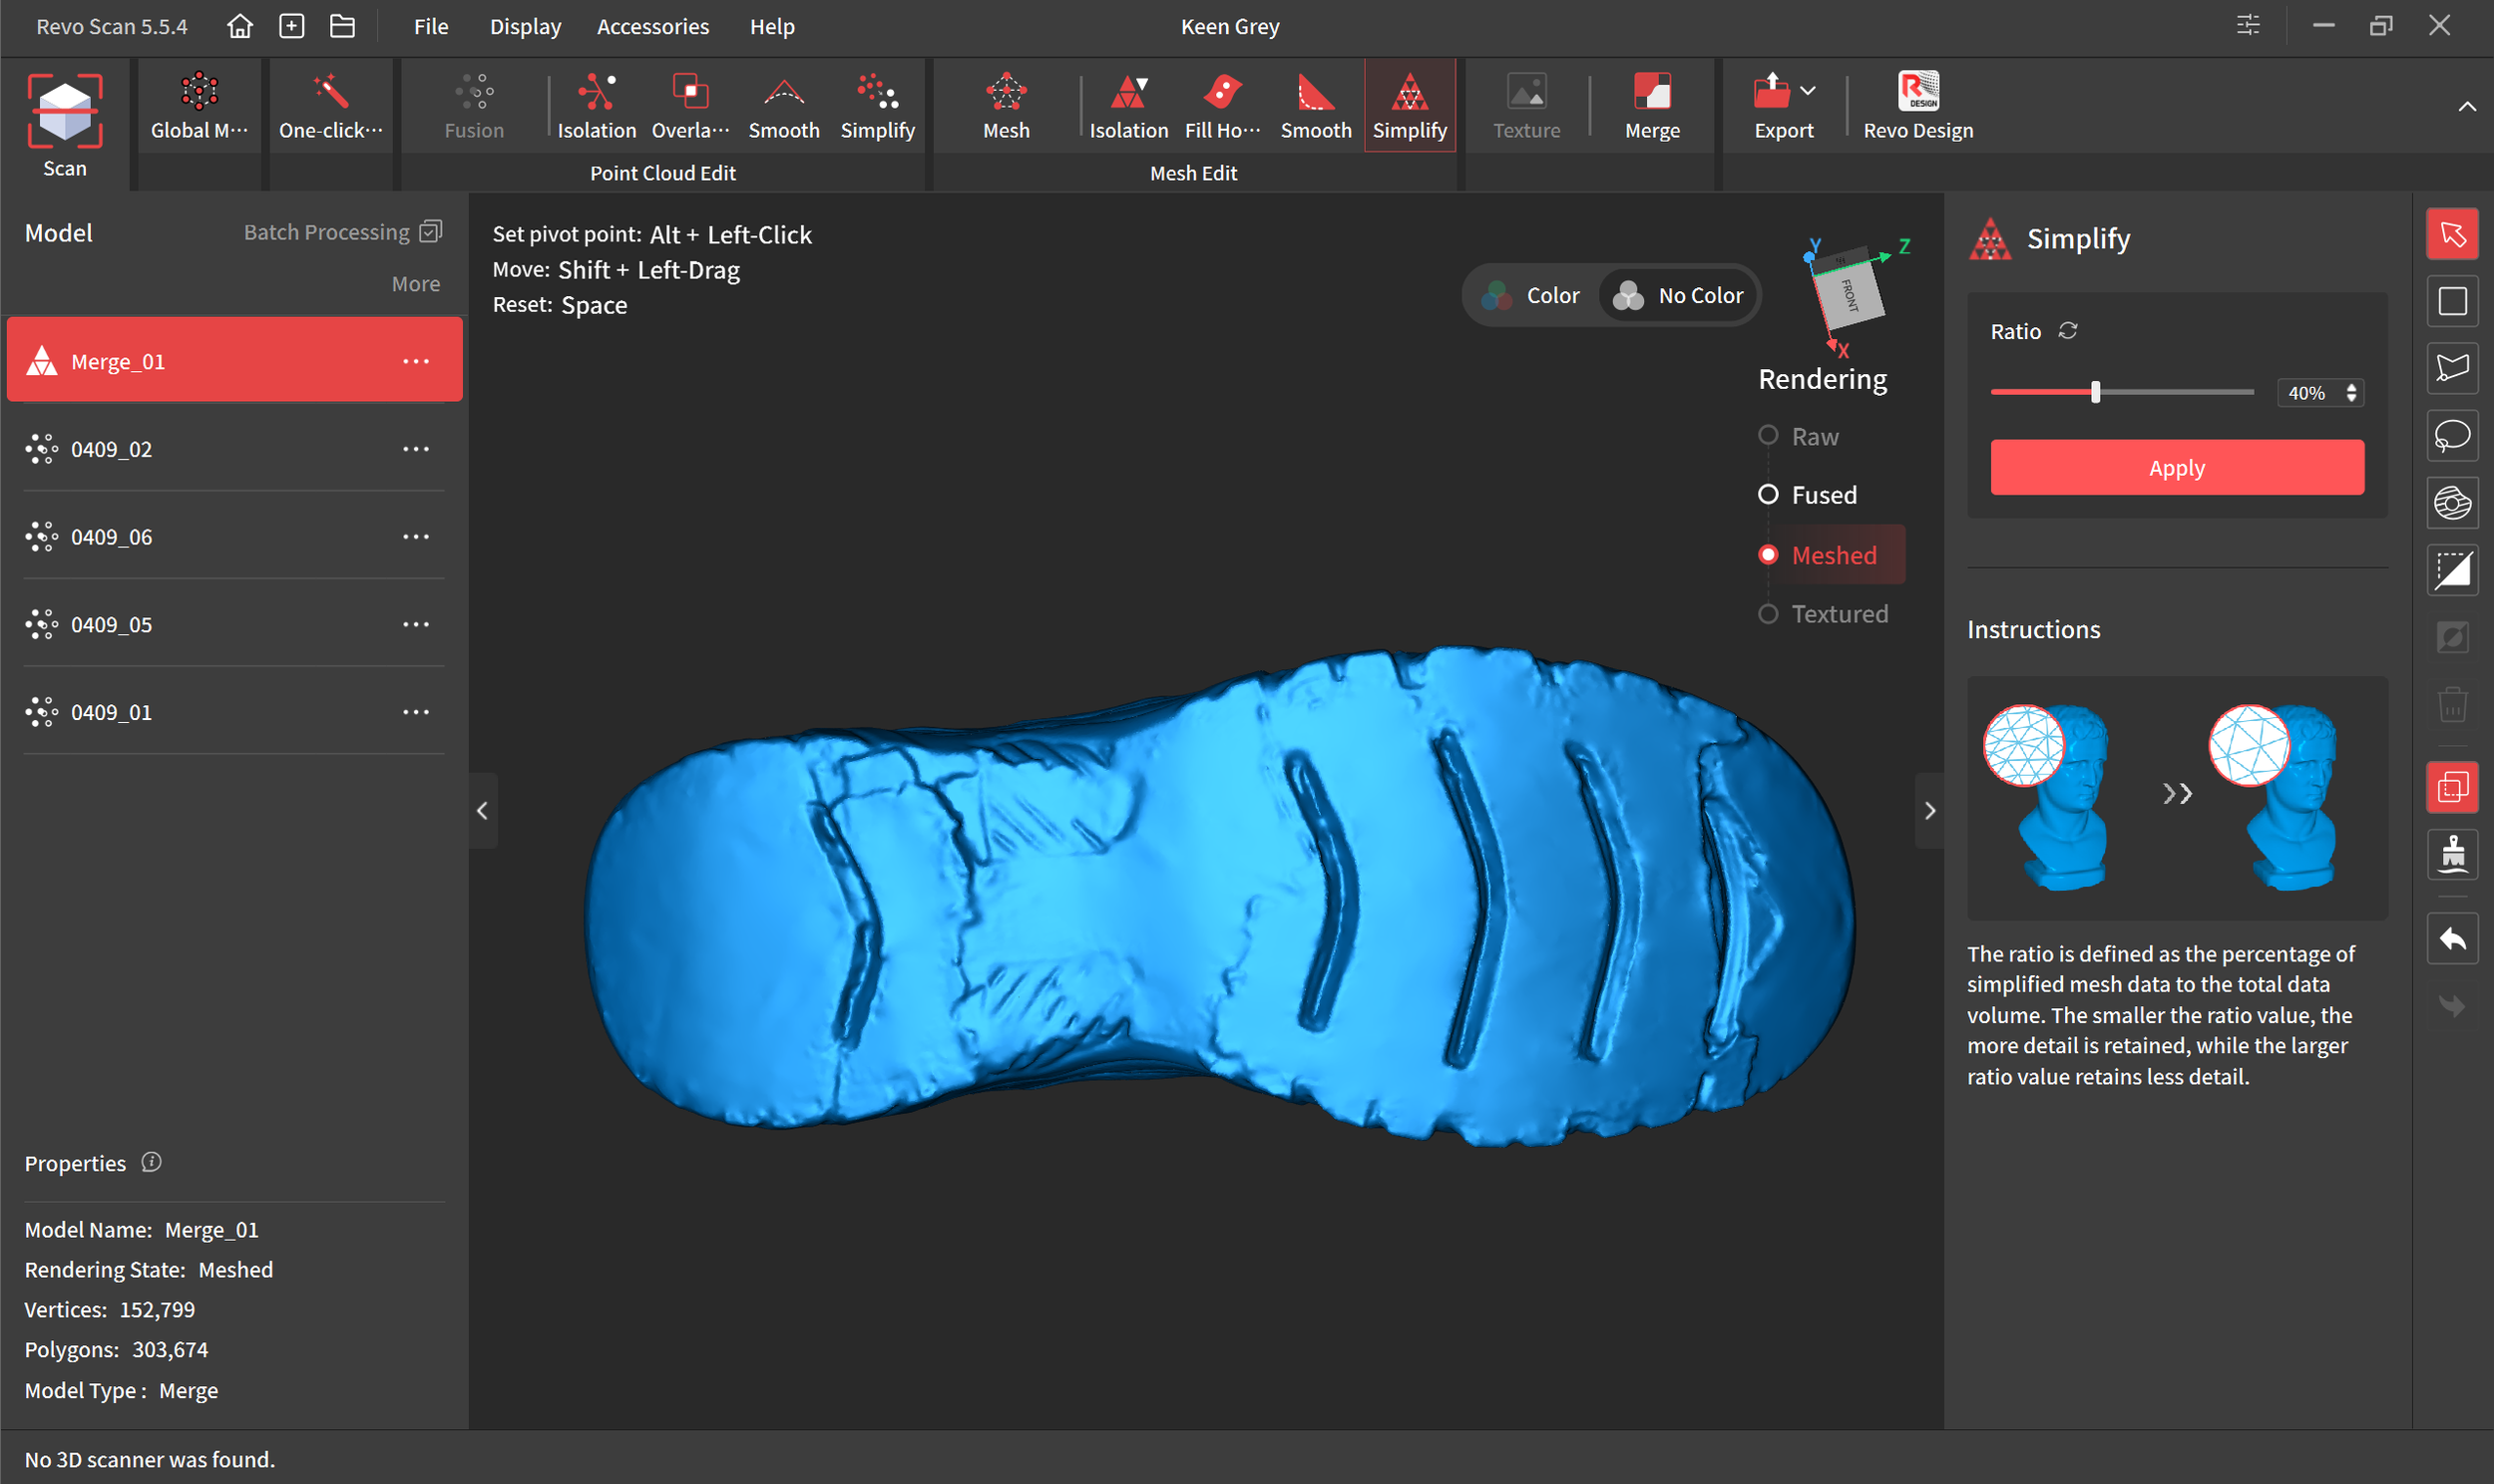
Once the model is merged and cleaned I begin smoothing out the sole. I don’t need every little crevice and bump, I just need the big features. I need the edges so they can properly interlock with the lift. The little bumps where old glue got scanned can be smoothed out. The sole looks great, we are done with Revo Scan and it’s time to import it into Blender.
2: Positioning the Scan in Blender
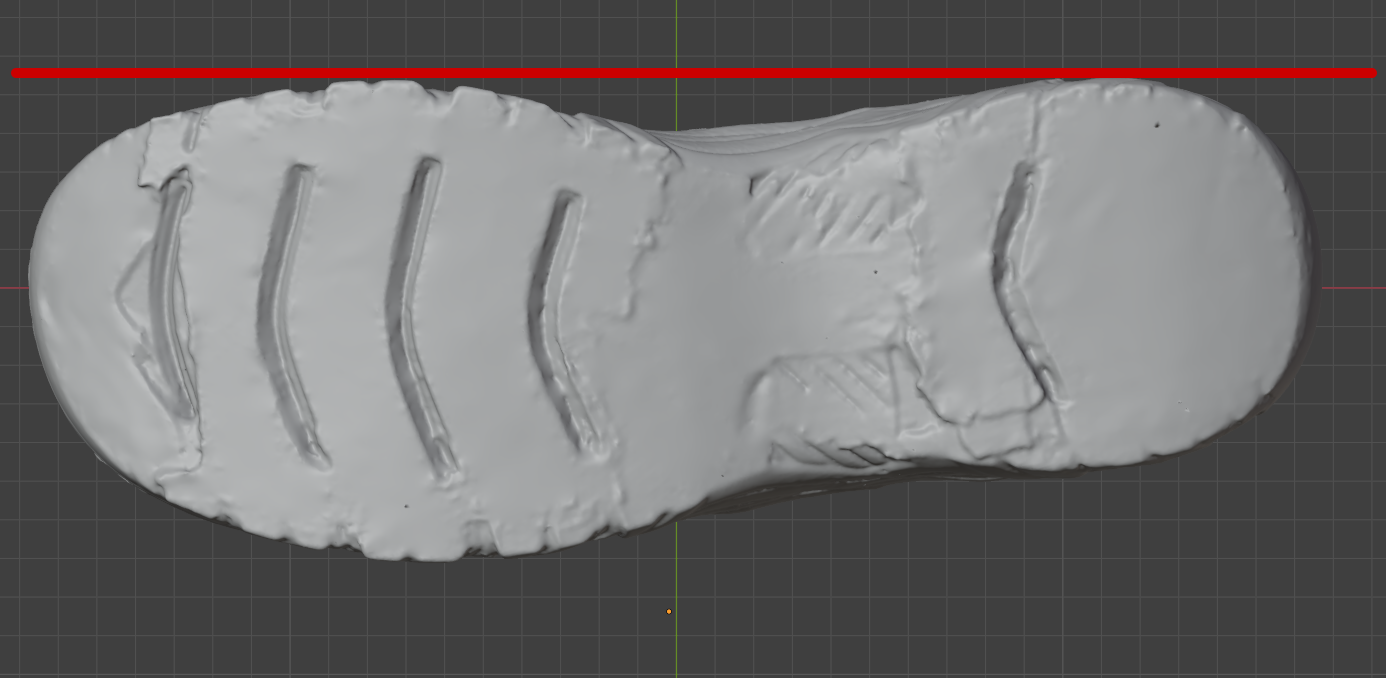
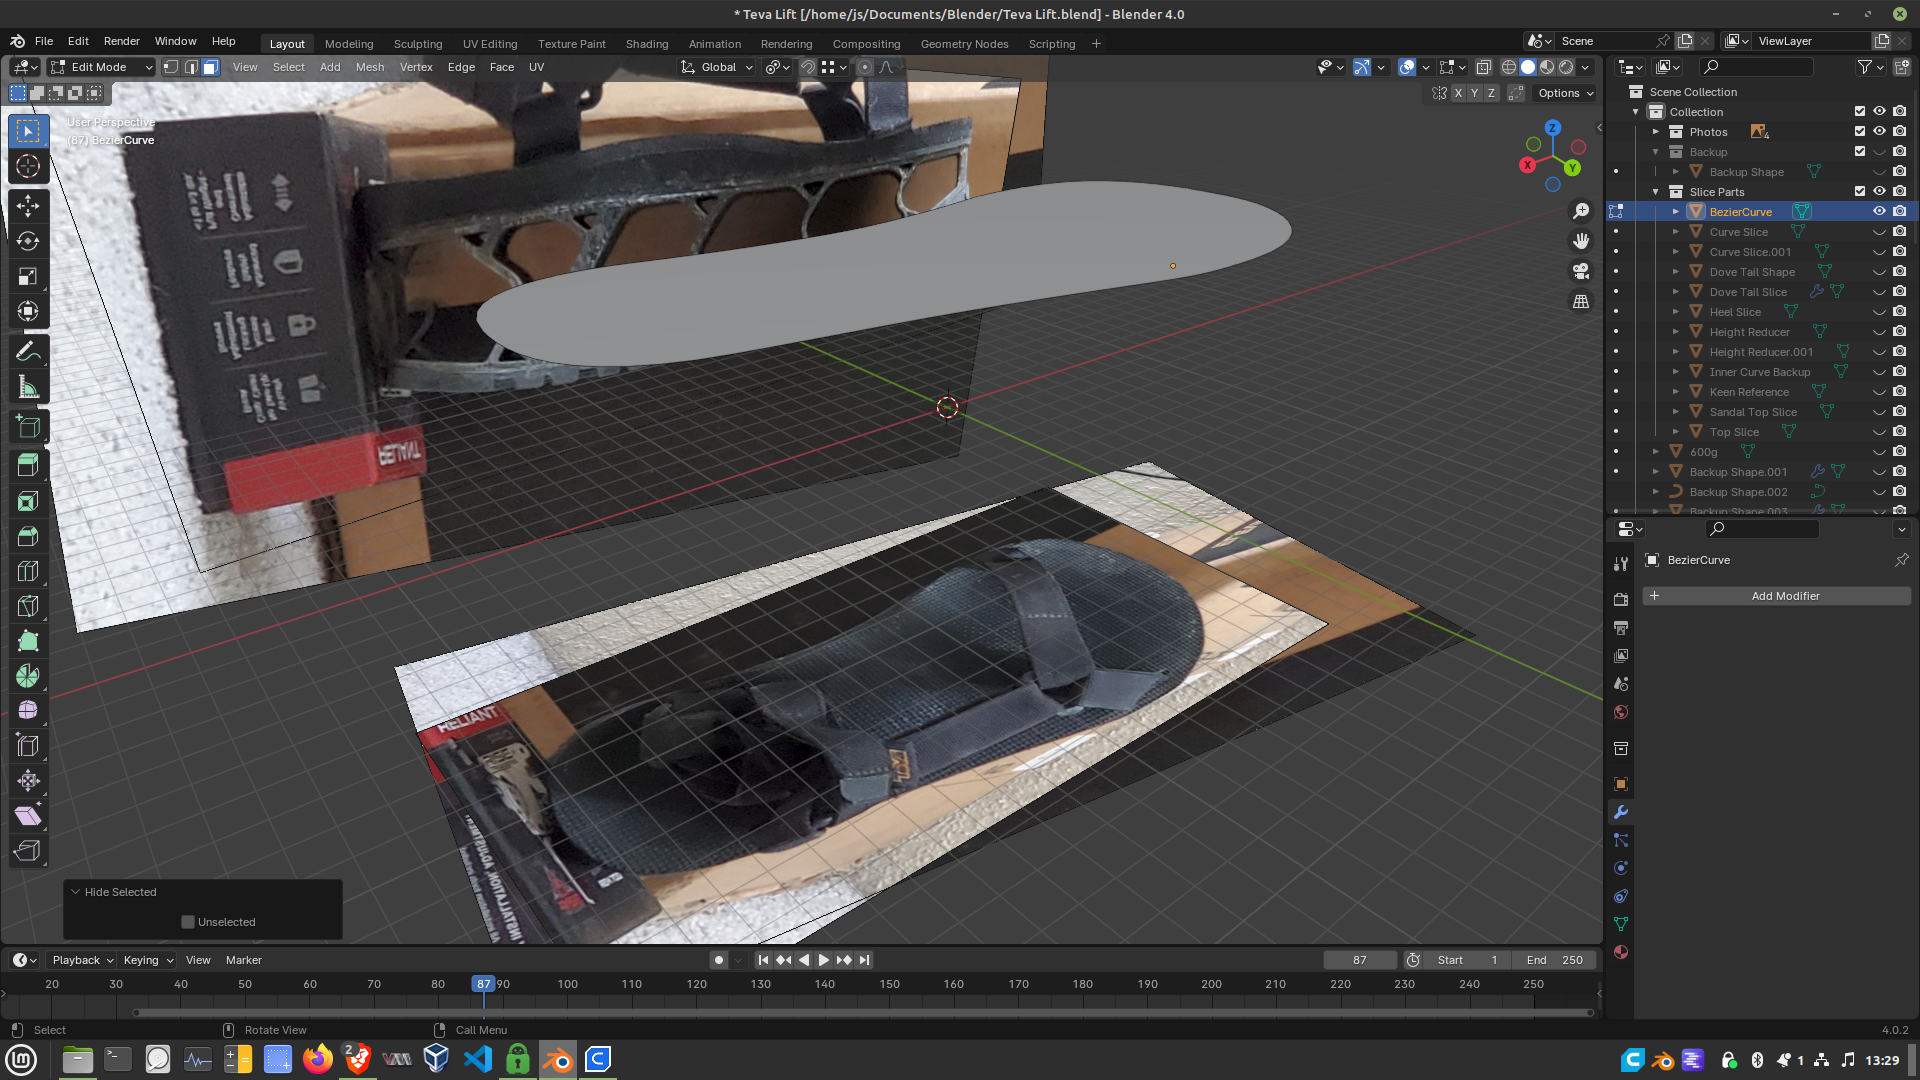
Revo Scan gives the model a random orientation, so I need to align it by hand after I import it into Blender. This is how I’ve been aligning them. This is an area I still have trouble with. I’d like to have exact positioning, but the only way I can do this is just by eyeballing it. I have the inside edge of my big toe and heel aligned as shown by the red line. I want my scan positioned exactly the same as my foot hits the ground while walking. I have developed some knee pain that might be caused by an incorrect rotation here. It requires some more testing to figure out. Without an ankle, any inward or outward rotation of my toe impacts my knee. This is a likely cause of my knee pain.
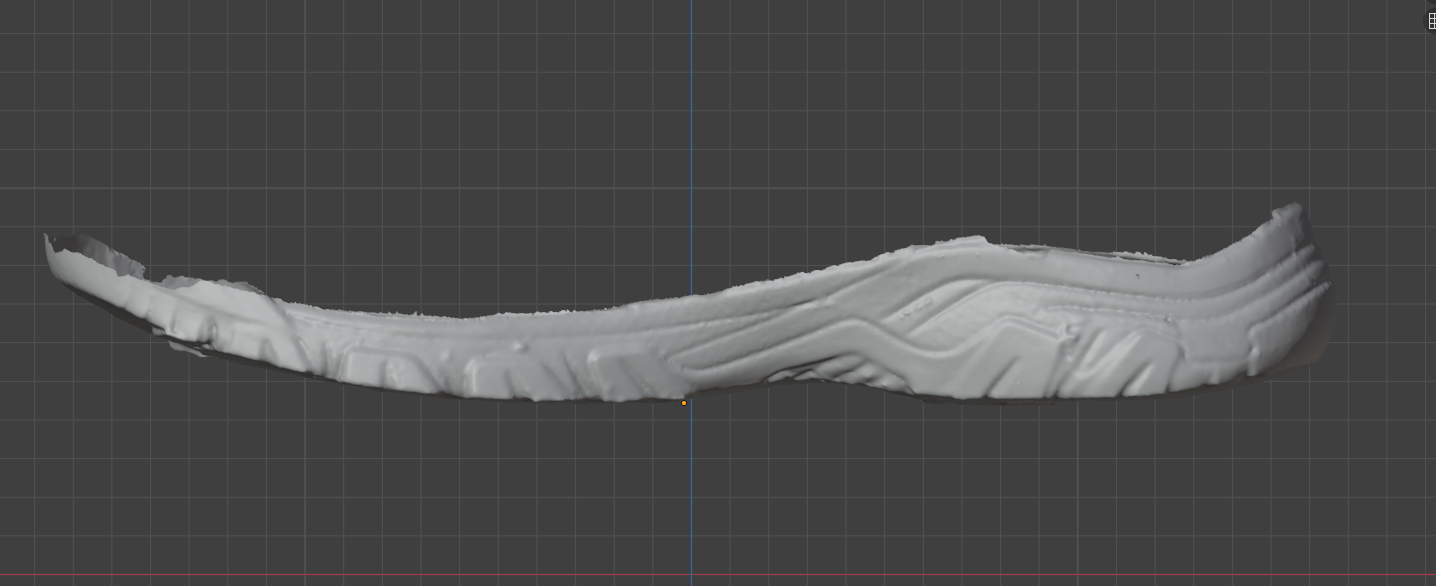
From the side view I need to get it correctly rotated as well. Too far forward or backward will prevent me from standing straight. My foot will naturally rest a little forward or backward. This is just trial and error, the design of the shoe will dictate how it’s rotated here. I have also bent the toe down a little bit using Soft Select. I select part of the toe and with a large soft select circle, I rotate the toe down, using that tiny orange dot as the pivot point. This will lay the toe more flat. I don’t make it exactly flat, I just want it closer to what it would naturally be when putting my weight on it.
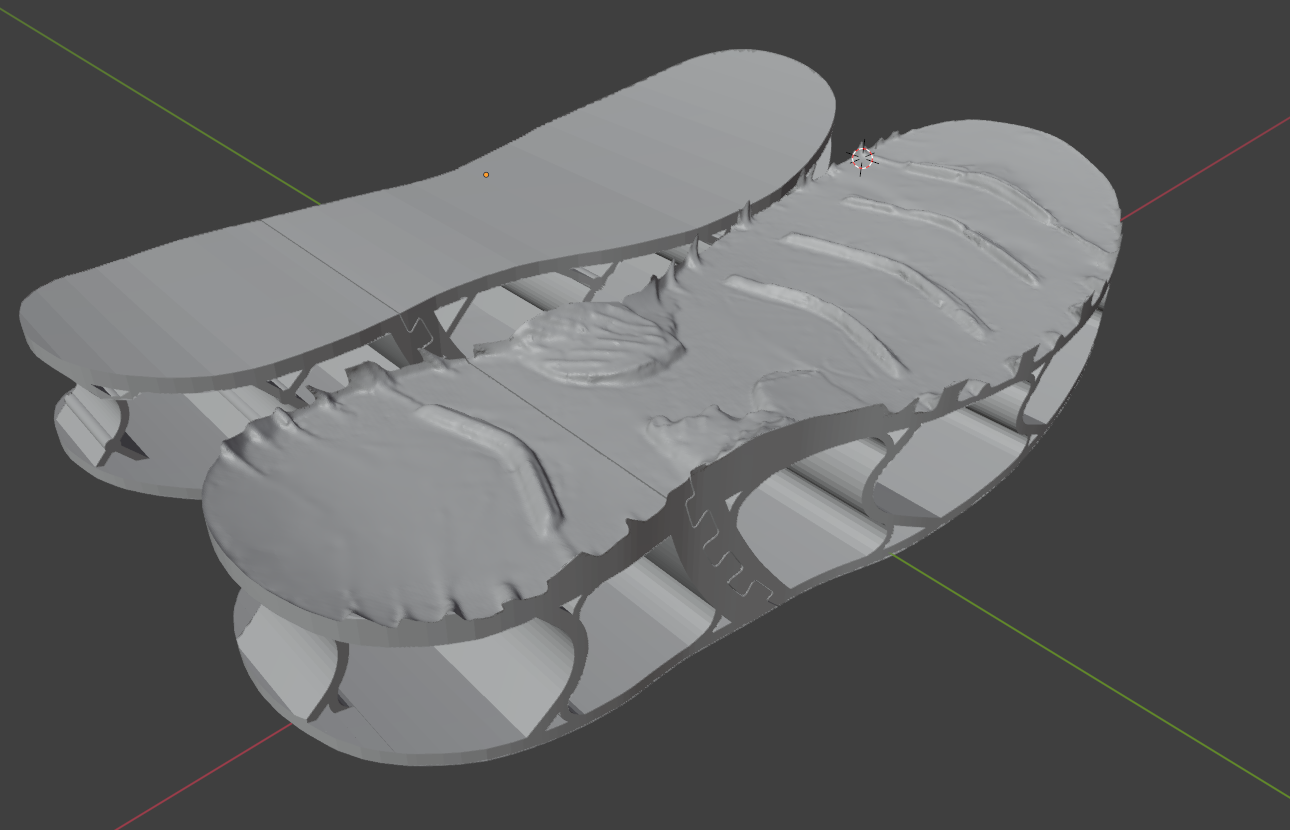
You can see on the left image how the big features show up, and most of the tiny scanned details were smoothed away. There are jagged bits that were torn rubber from the old lift. Everything should fit perfectly in the shoe. This should match the lift to the shoe without any stresses on the shoe or lift, a perfect fit.
On a side note, I see 4 little black dots on the sole. Those are spots I missed while cleaning in Revo Scan. They will very likely cause errors when I try to imprint the shoe onto the lift so I’ll have to fix those before the boolean operation. When converting the point cloud into a mesh, those little spots create tiny pockets, Blender will lag trying to fill them, and Cura could crash trying to slice them.
I’m comparing my new scan with my previous lift above. I needed to bend the toe down just a little more. I only select the tip of the toe, and use the 3d cursor (red&white circle) as the pivot point with Soft Select enabled. I make the soft select very large, and rotate the toe down to better match my previous lift. Soft Select gives a nice natural bend to the shoe. I’ve had no issues mating the lift to the shoe after making this bend.

This new scan is the green model. The red and blue are my other 2 pairs of identical shoes that have already been aligned like the above images. You can see how each shoe is slightly different. These are the differences in grinding the sole off by hand, and each scan is going to have a little bit of error as well. Tracking problems can cause the scan to be a slightly different shape. The blue shoe had a chunk of rubber from an old lift that wouldn’t come off in the center so I just scanned it in.
I have 3 pairs of the same shoe so I can align them on each other in Blender. This is the only time I use color in Blender. Everything stays grey the majority of the time. These shoes have worked great for me, so I’ve gone through several pairs over the years.
3: Creating the Curve
Positioning the curve is critical. This was the deciding factor for me attempting 3D printed lifts to begin with. Every single handmade lift had issues with the curve. It just isn’t possible for a human to make the exact same perfect curve every time on a grinder. I hated going in for tiny adjustments on a rubber curve that will be crushed down and need a new adjustment in a few months anyways. It always felt like I was wasting everyone’s time.
I use a cylinder to slice a perfect curve off the bottom of the lift. This allows me to have a perfect stride without a limp. Getting the size and position of the cylinder took several tries. Below is what has worked the best for me so far.
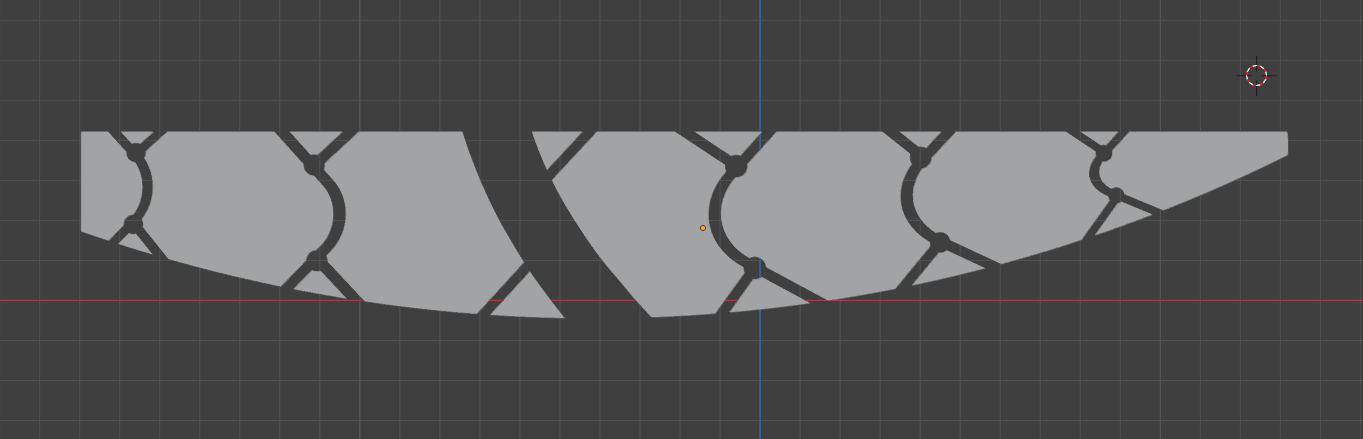
I created a large cylinder with a radius measured from my knee to the floor. This was too big. It gave me a very short stride. The smaller cylinder might be just slightly too small, but it’s what I have been using for several years now. When it’s too large it forces very short steps, when it’s too small it feels more like a peg leg, and I have to step down a little bit to touch my heel to the floor. This might be a cause of some of my SI joint problems in my hip. You can see the difference at my toe and heel between the 2 cylinders. That tiny height difference makes all the difference in the world for a proper stride. The radius of the smaller cylinder is about 60% the size of the larger.
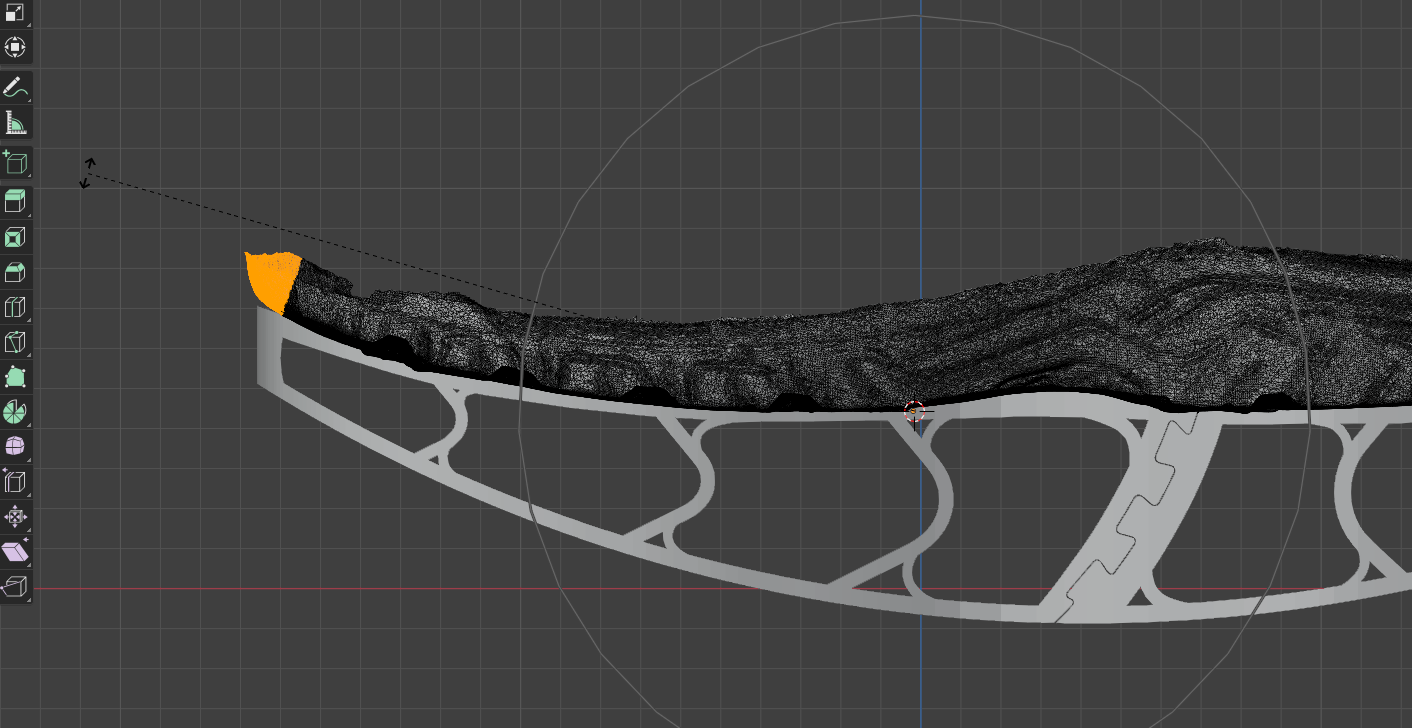
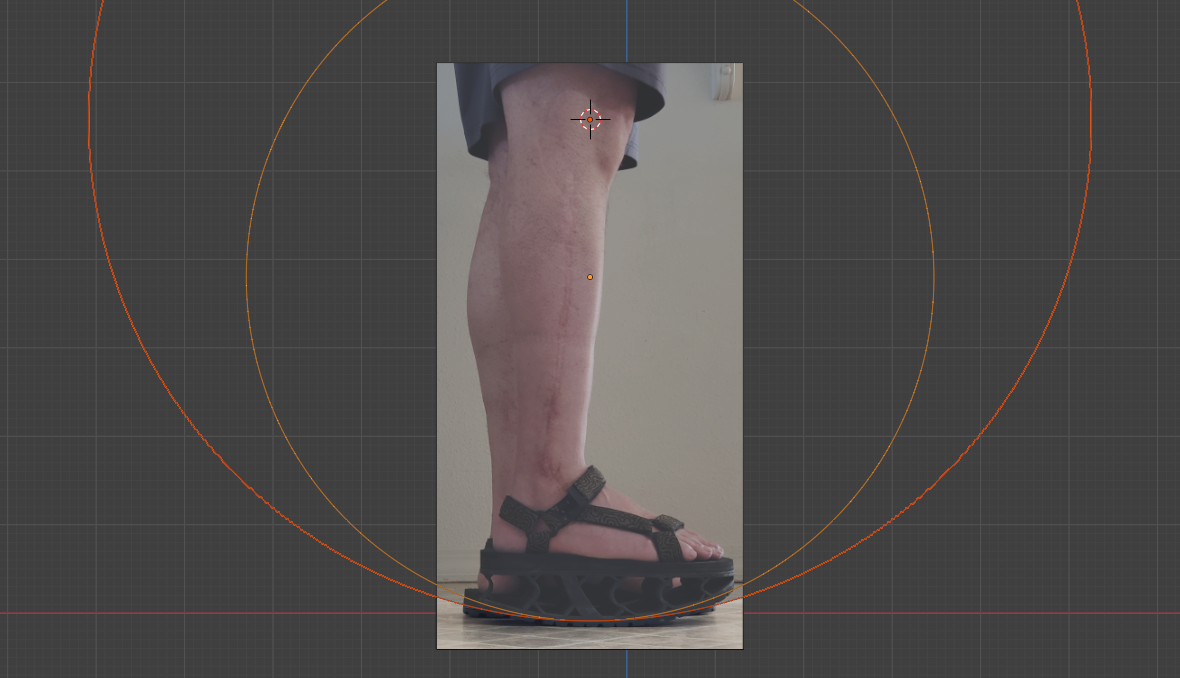
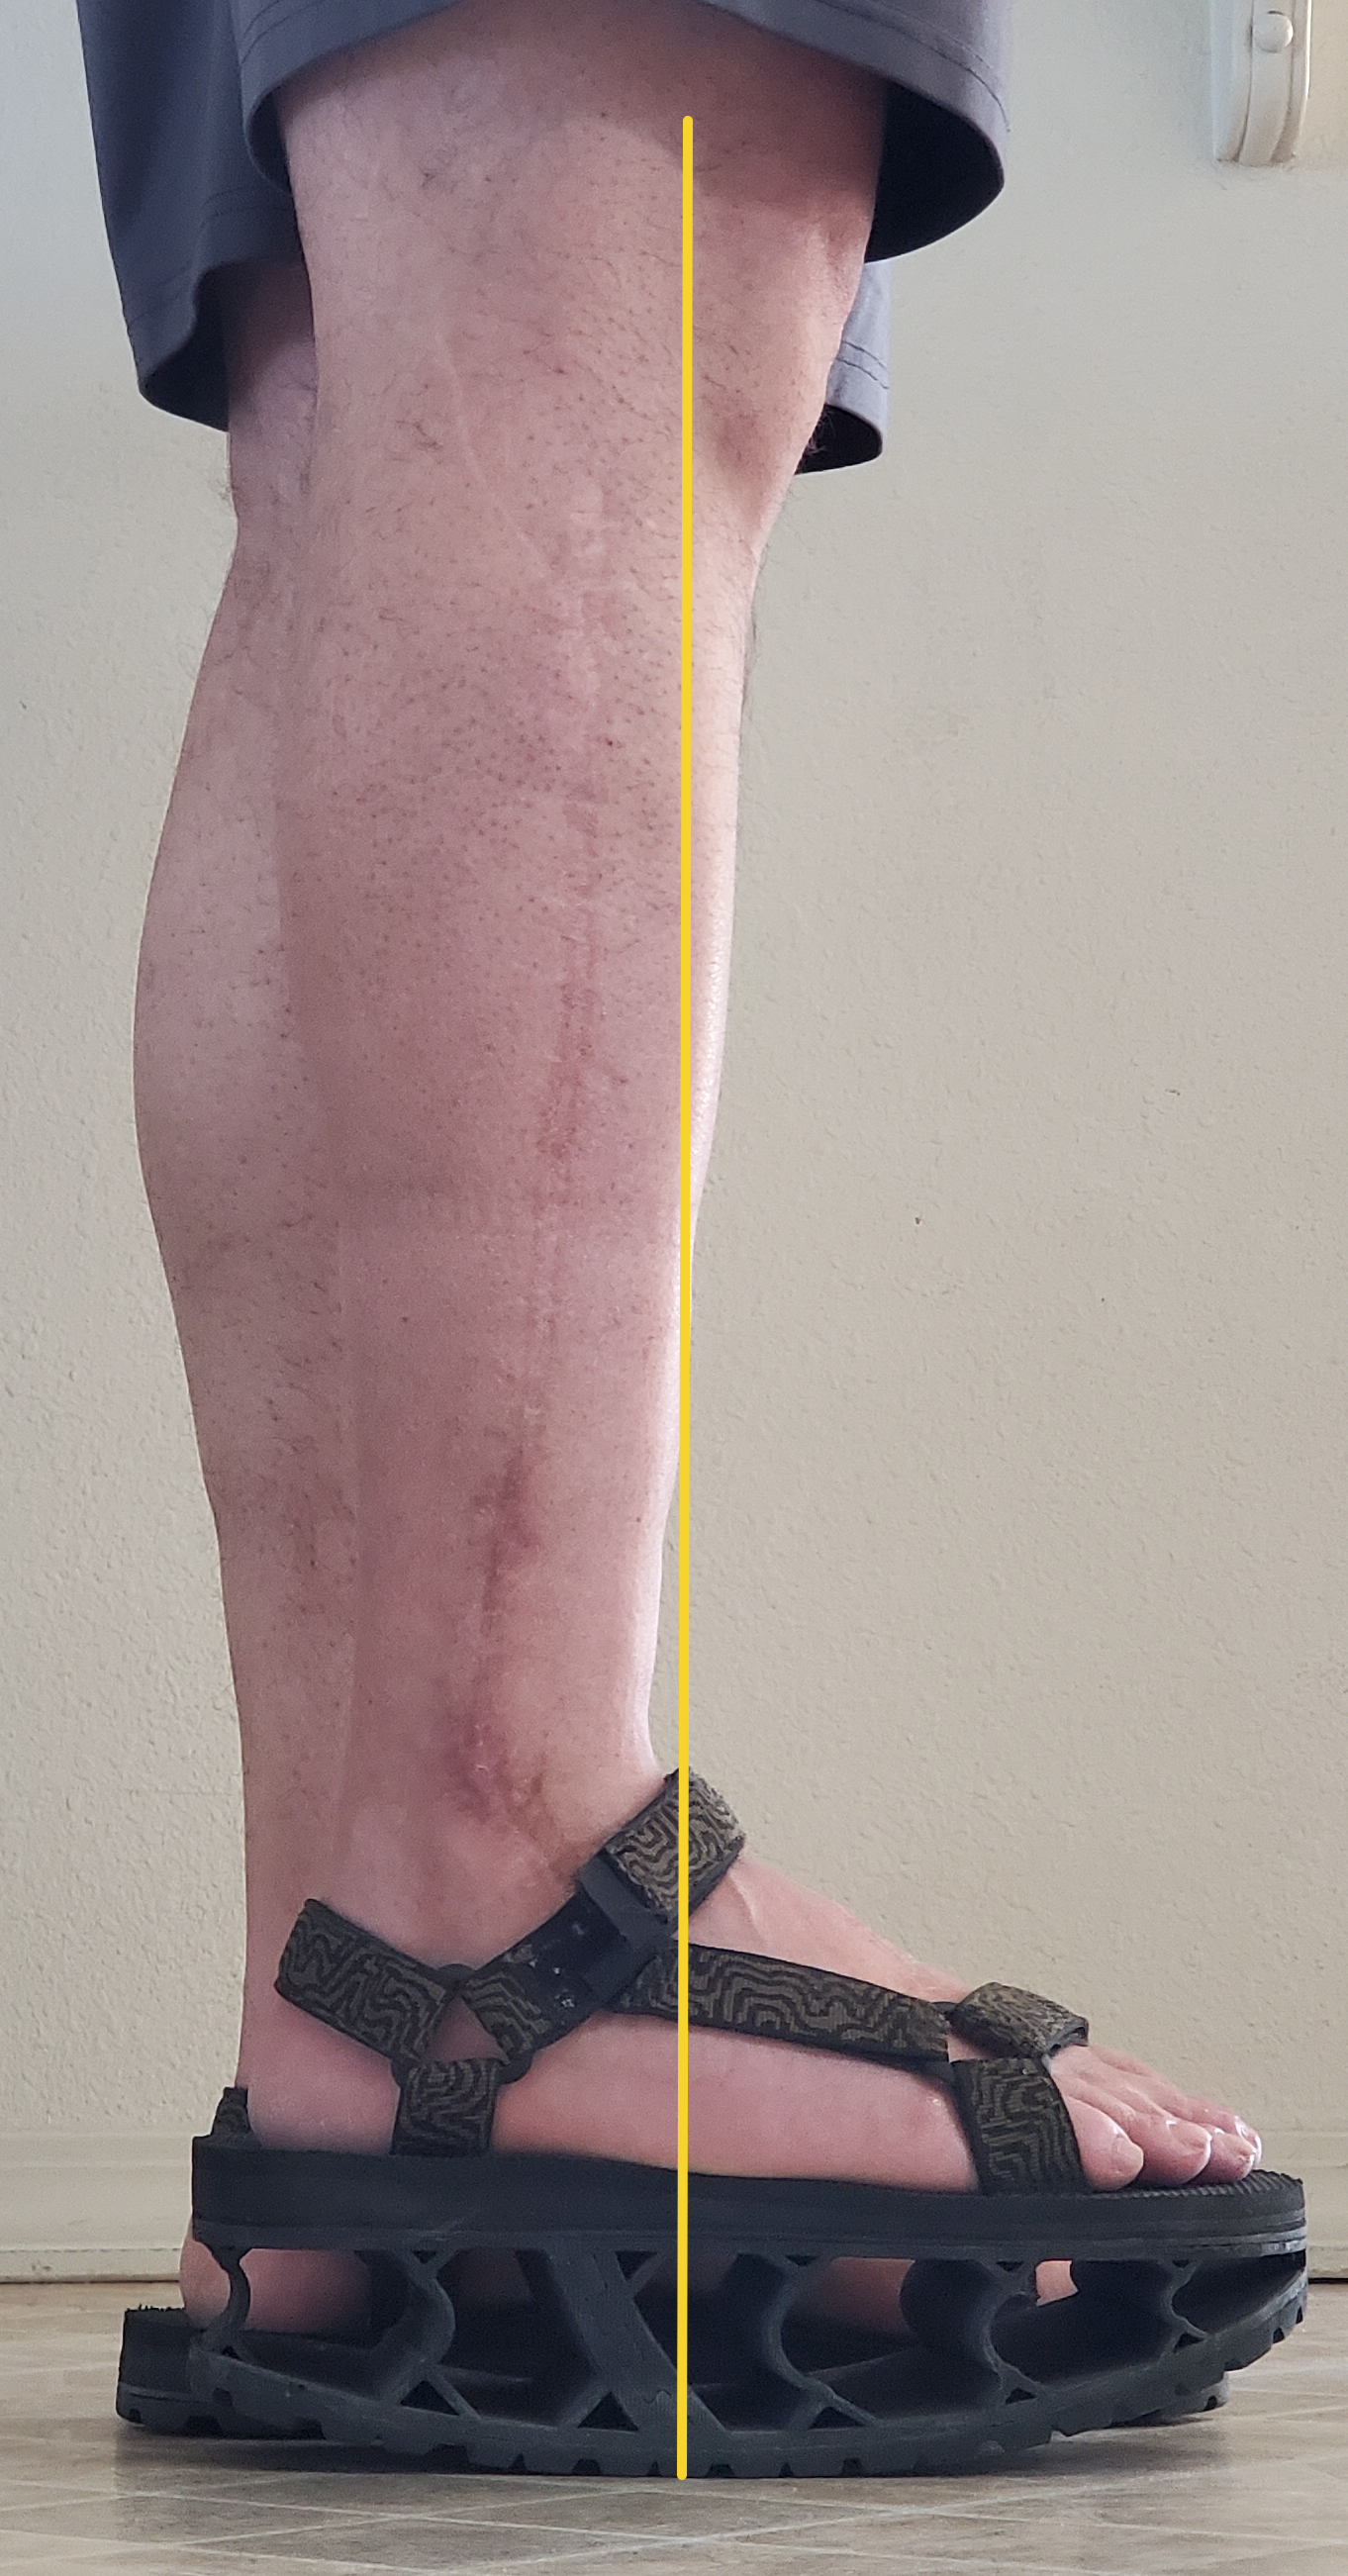
If the cylinder sits too far forward it feels like stepping on a speed bump. If it’s too far back I will always be falling forward. Having the very bottom of the curve inline with the yellow line is what has worked the best for me. It’s just far enough forward that I can stand up straight, not be falling or stepping on a bump. This could also be an area that’s causing my knee pain.
The yellow line shows where the thickest strongest point of the lift needs to be in contact with the ground when standing up straight. I curved the thick post to that point so it will have maximum strength, and minimal deformation at that spot.
——— More of the design process will be inserted here soon ———
Below this point is not the new lift I’ve been showing you thus far because I haven’t finished it yet. When I finish it I will replace the old images below with new images to keep everything consistent. The workflow is pretty much the same, but for now it will be a mix of screenshots from several other builds.
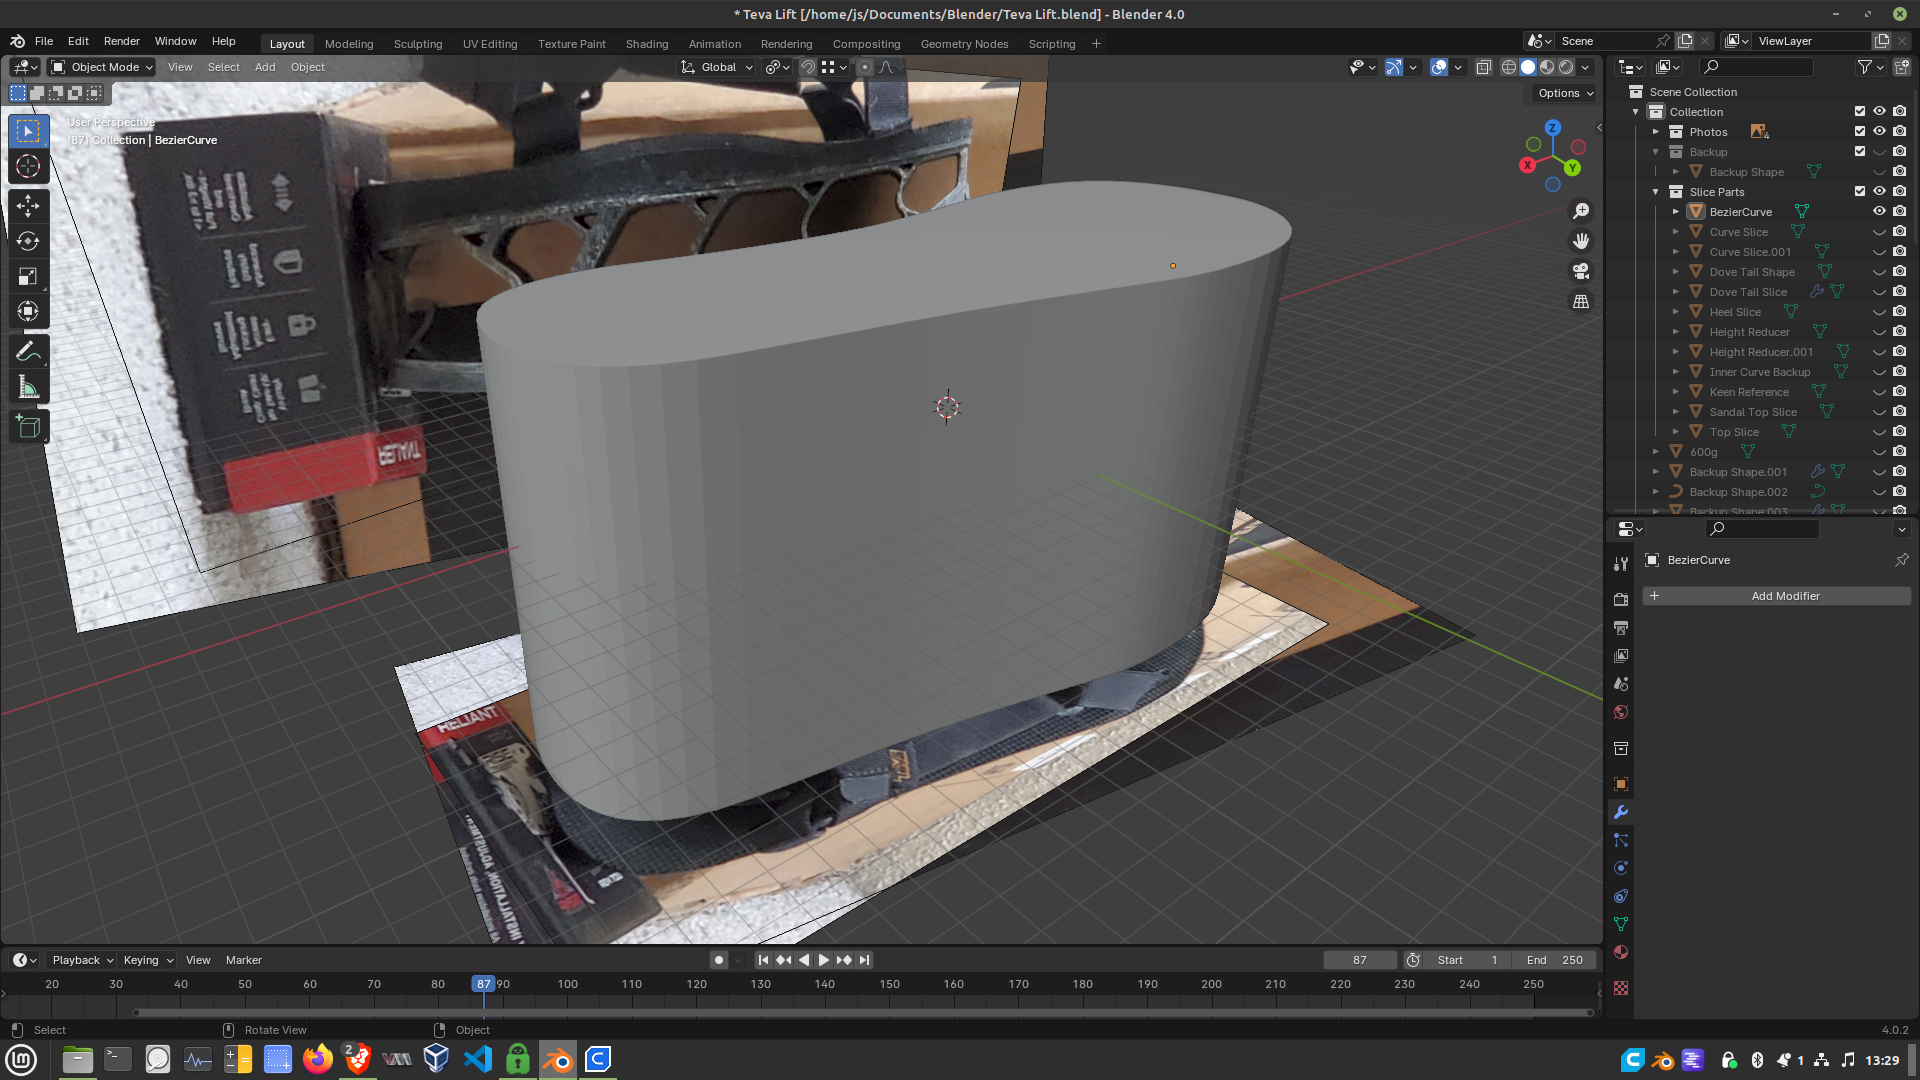
To get the basic shape of the lift that I want, I trace around the edge of the shoe, creating a 2d object. I extrude the 2d object down turning it into a 3d object. Then I slice the bottom off with my cylinder. In the above images I use reference photos to make it. I keep the reference images of shoes and sandals in Blender just in case I need them, but I rarely use them since getting a scanner. Now I trace around the scan, extrude that down, then slice it off.
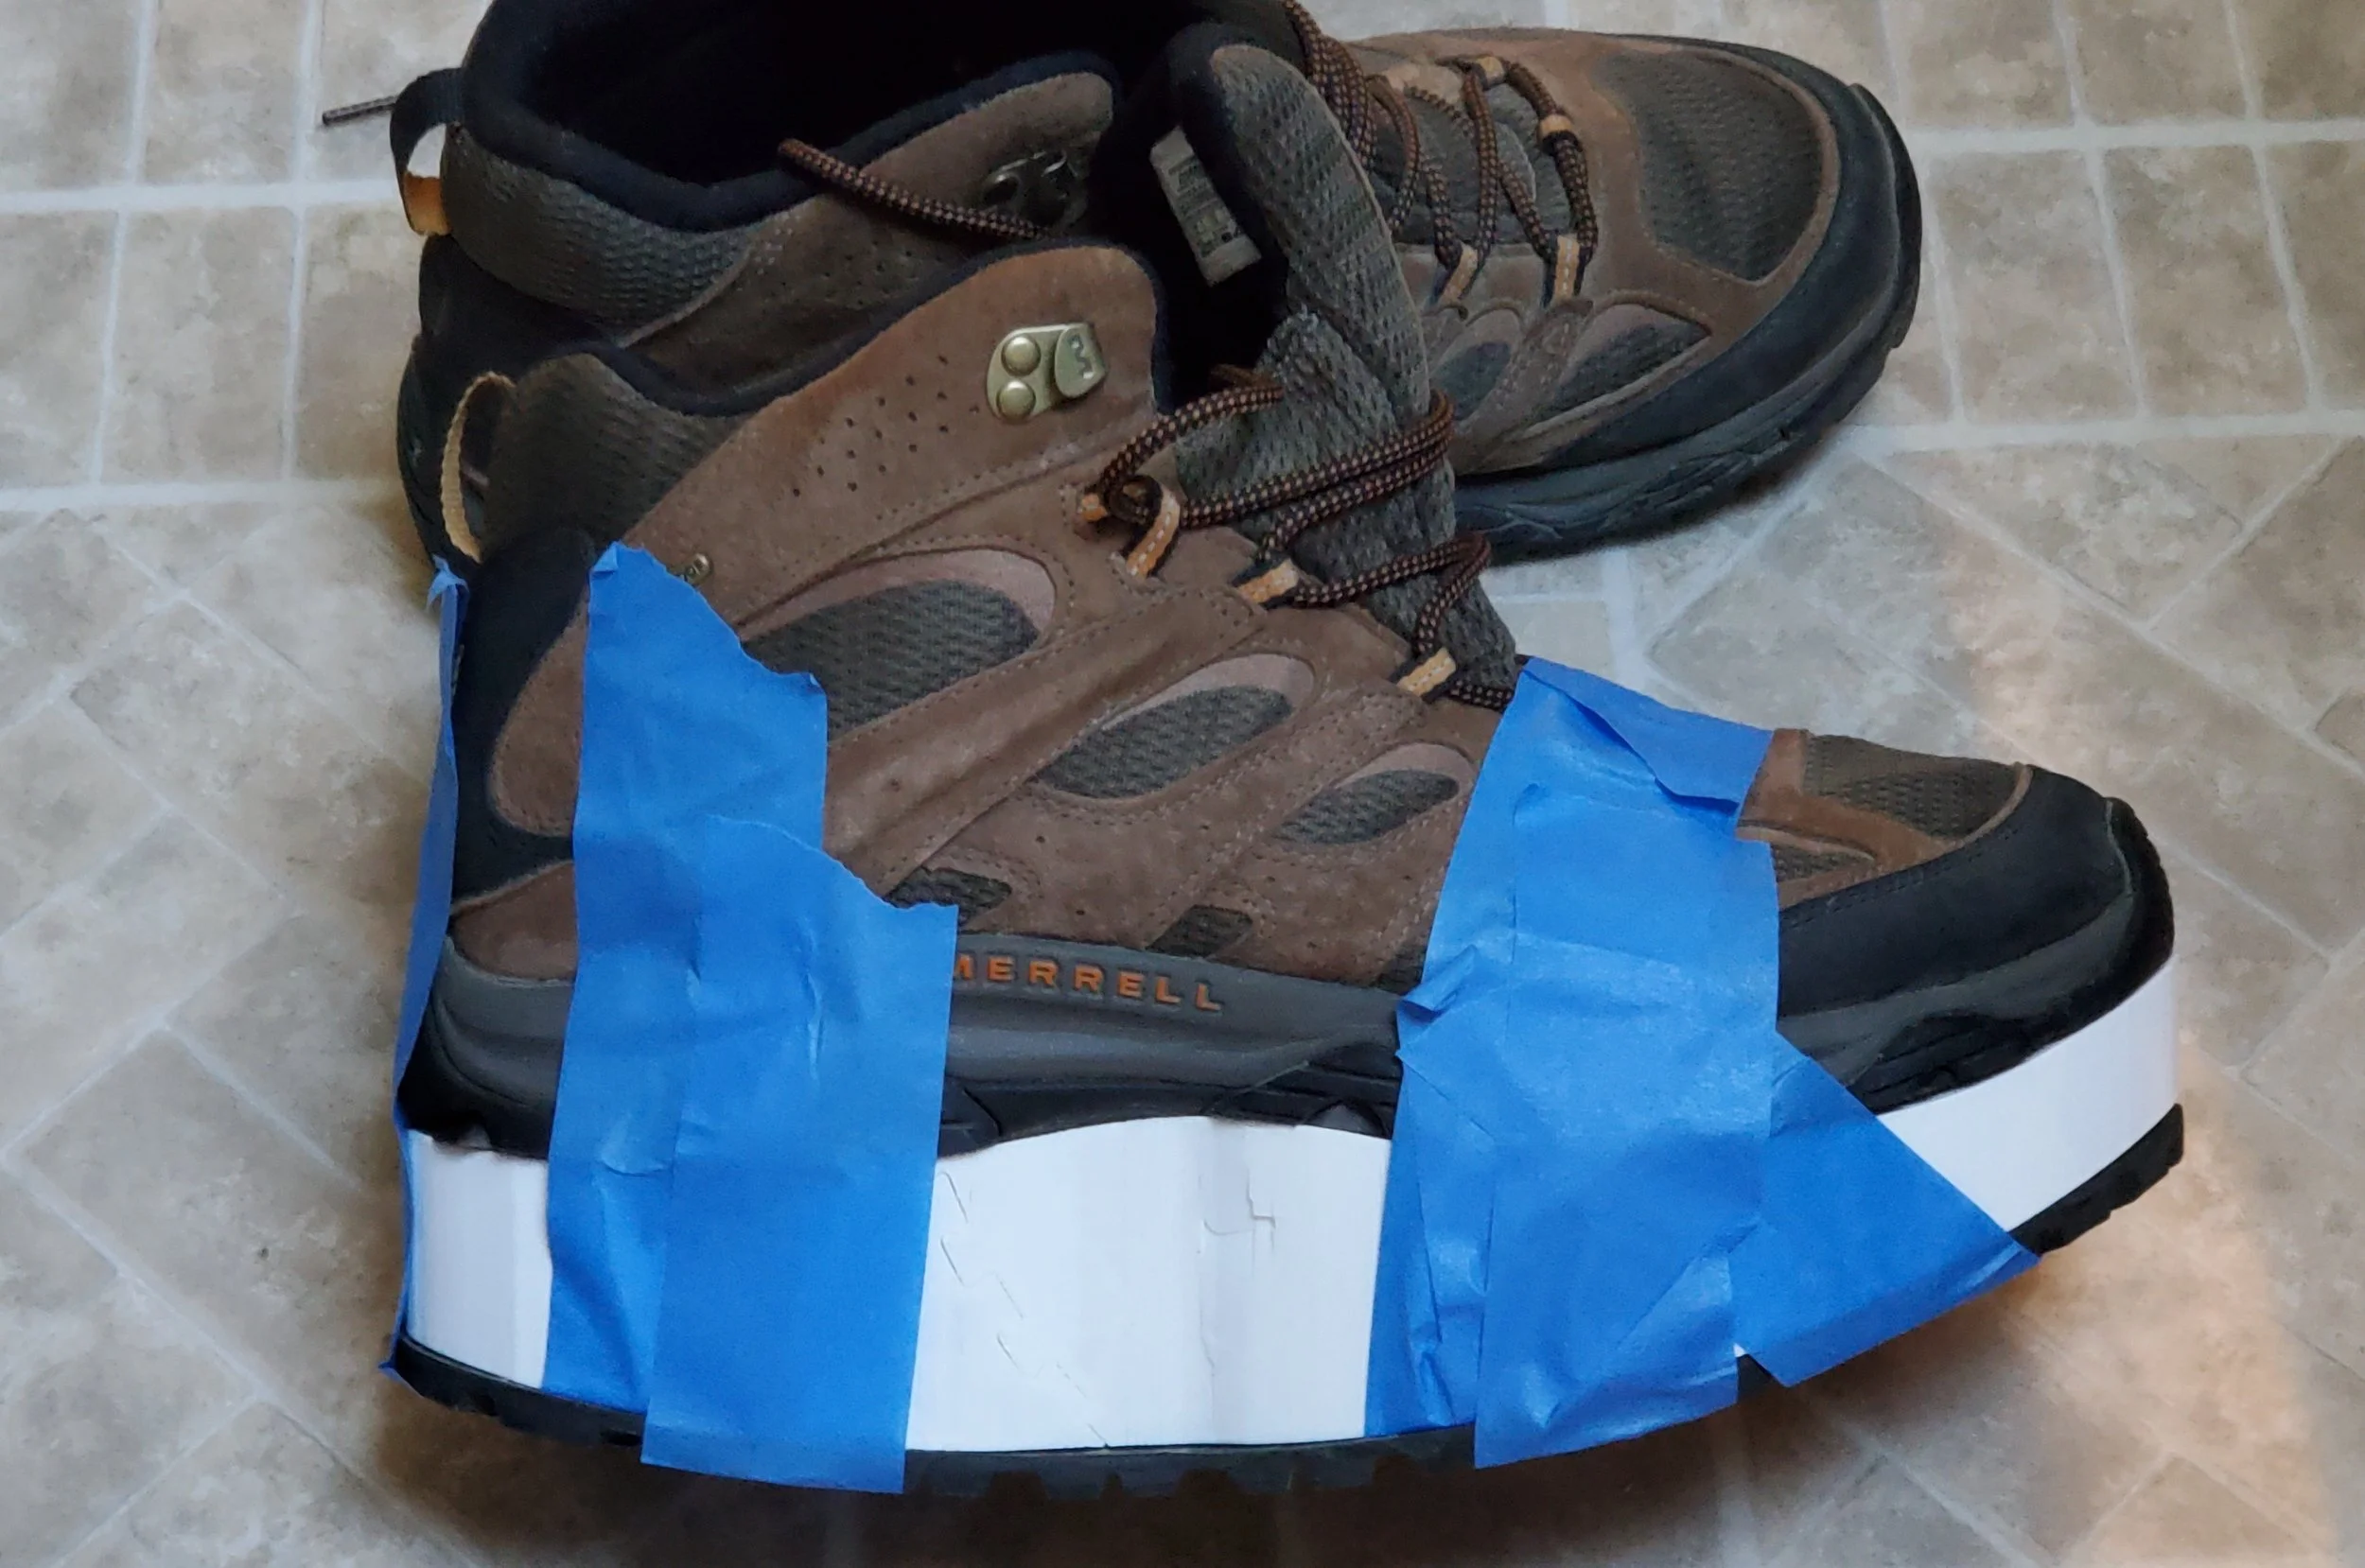
After I get the basic lift shape I want to test it to make sure everything is ok. I make tests with PLA. It costs $5-8 to make these tests. I keep them very thin, and can print a test in less than 24 hours. The test is flimsy, but strong enough for my tests. I make sure it fits the shoe, and I then I tape it to the shoe with the sole on the bottom because I need to make sure the height is correct. I stand between 2 chairs, using the backs of the chairs to hold myself straight. Then I slide each foot individually forward, backward, and to the side. This is to check the height of the lift. It should feel the same on both feet. If my right foot scrapes the floor or gets hung up, that means the lift it too tall. If my left foot gets hung up that means the lift is too short. I stand up straight to make sure it feels ok and I’m not falling forward and I can naturally stand straight. Once the height and position tests are done I keep wearing it with tape until it breaks. I want to make sure they feel normal as I move around. I wear the test for 15 minutes to an hour. If I need an adjustment I print out another. I have never needed more than 1 test print with the 3d scans.
4: Building The Final Shape
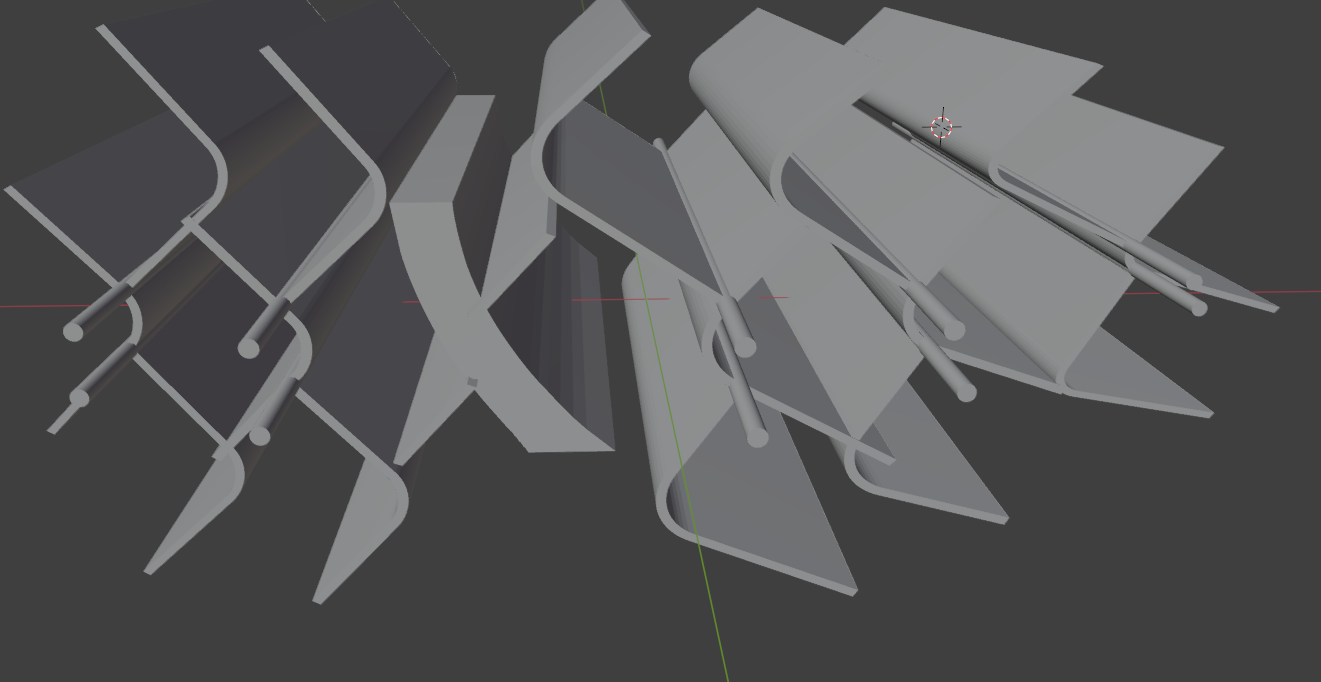
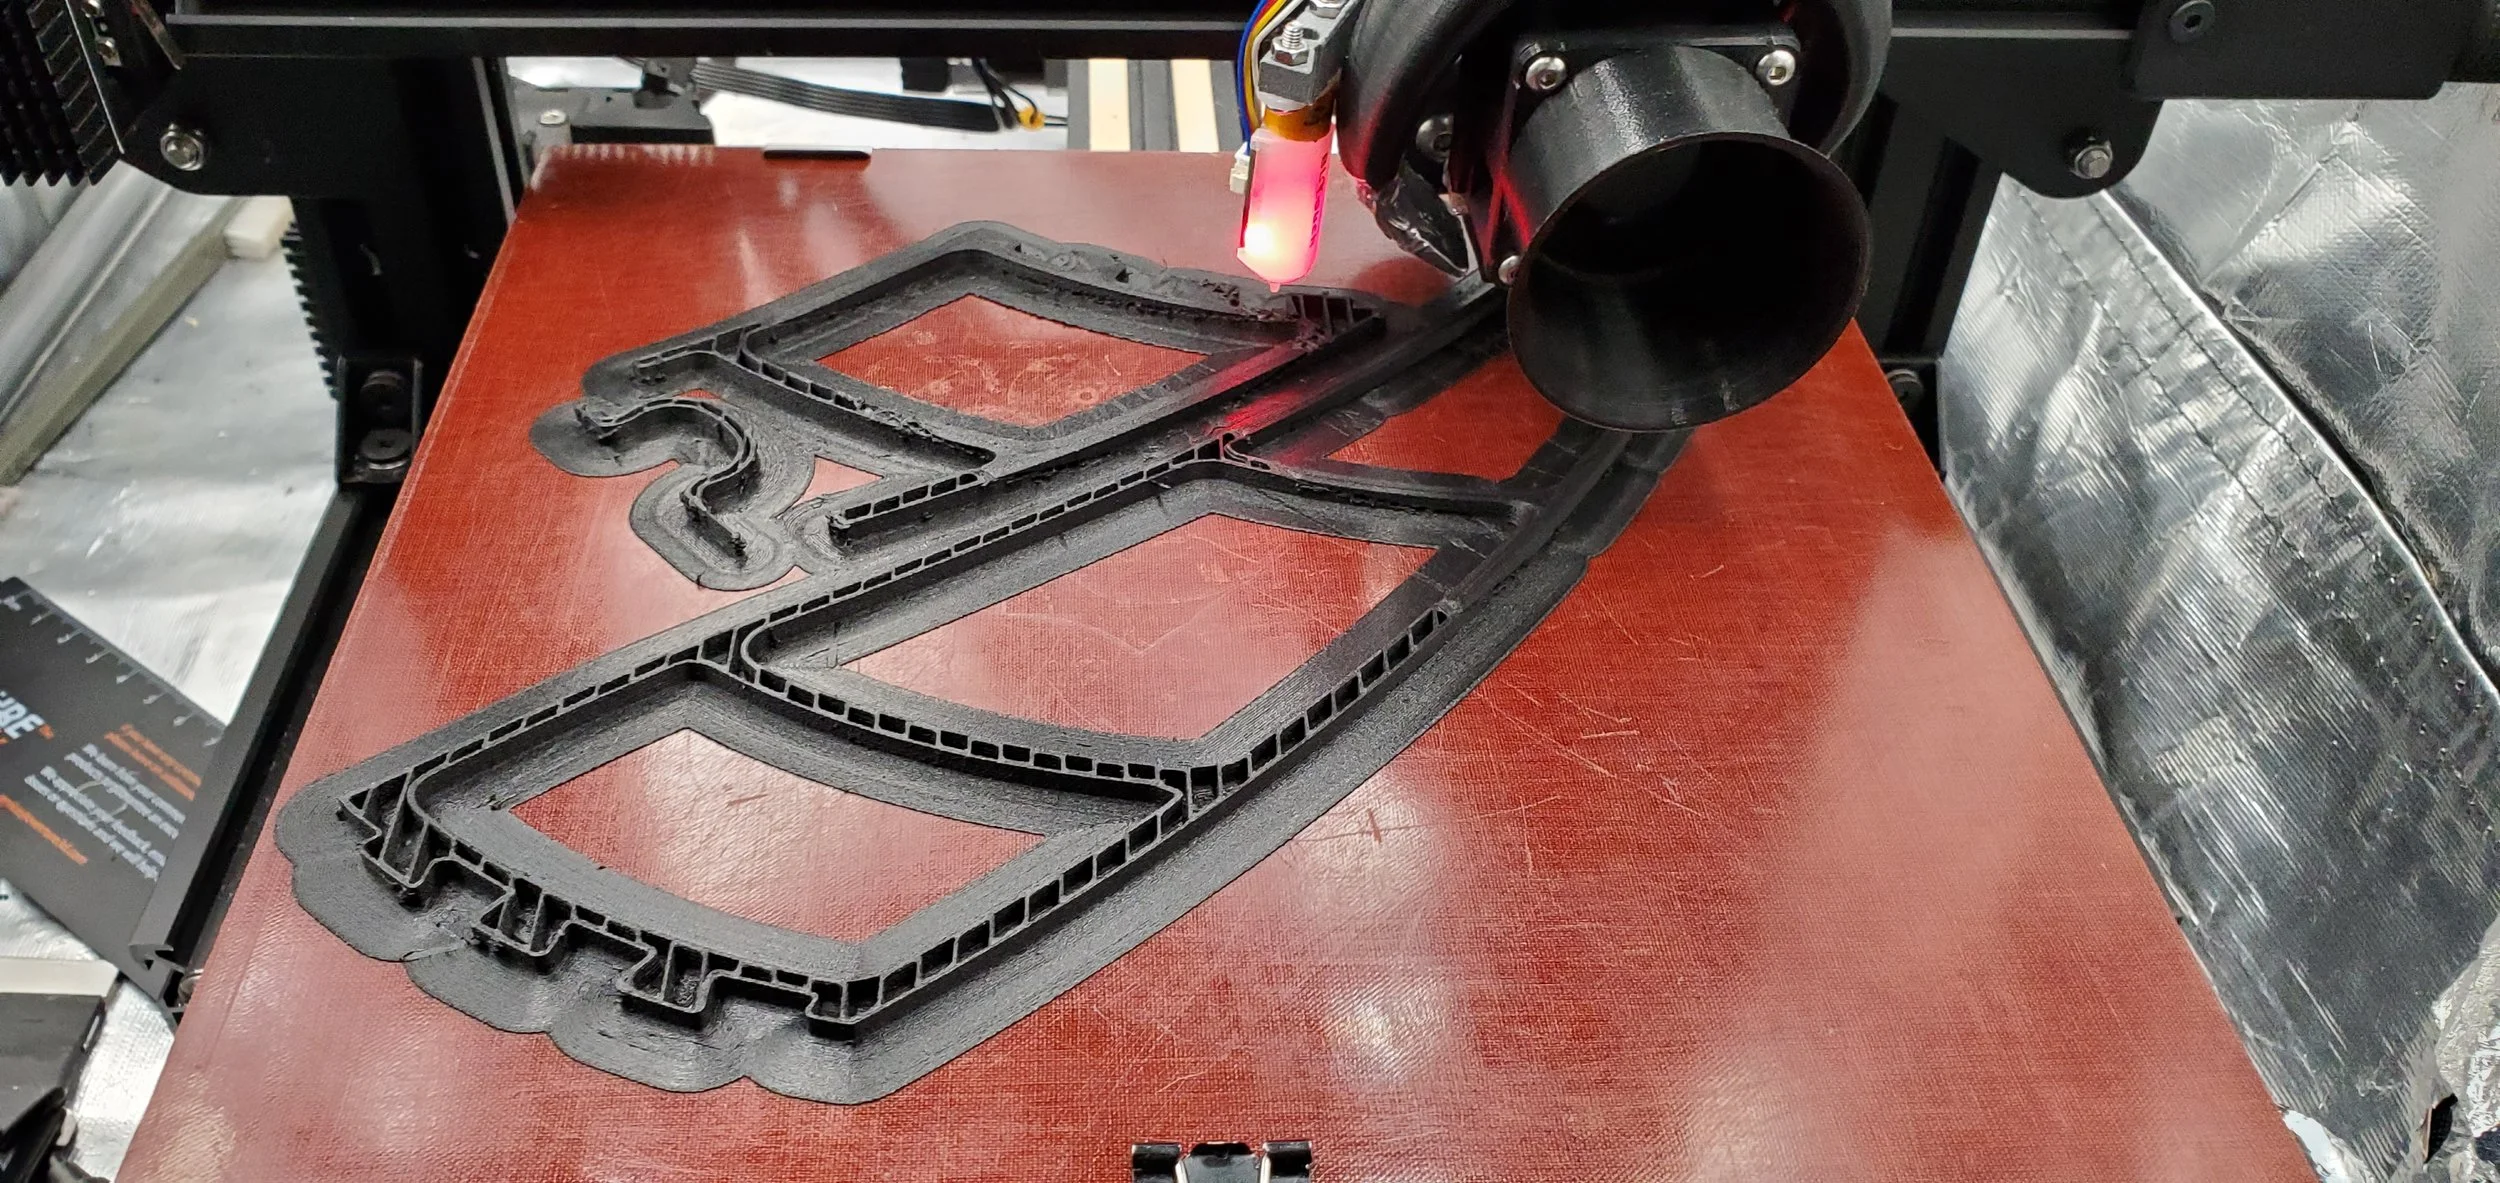
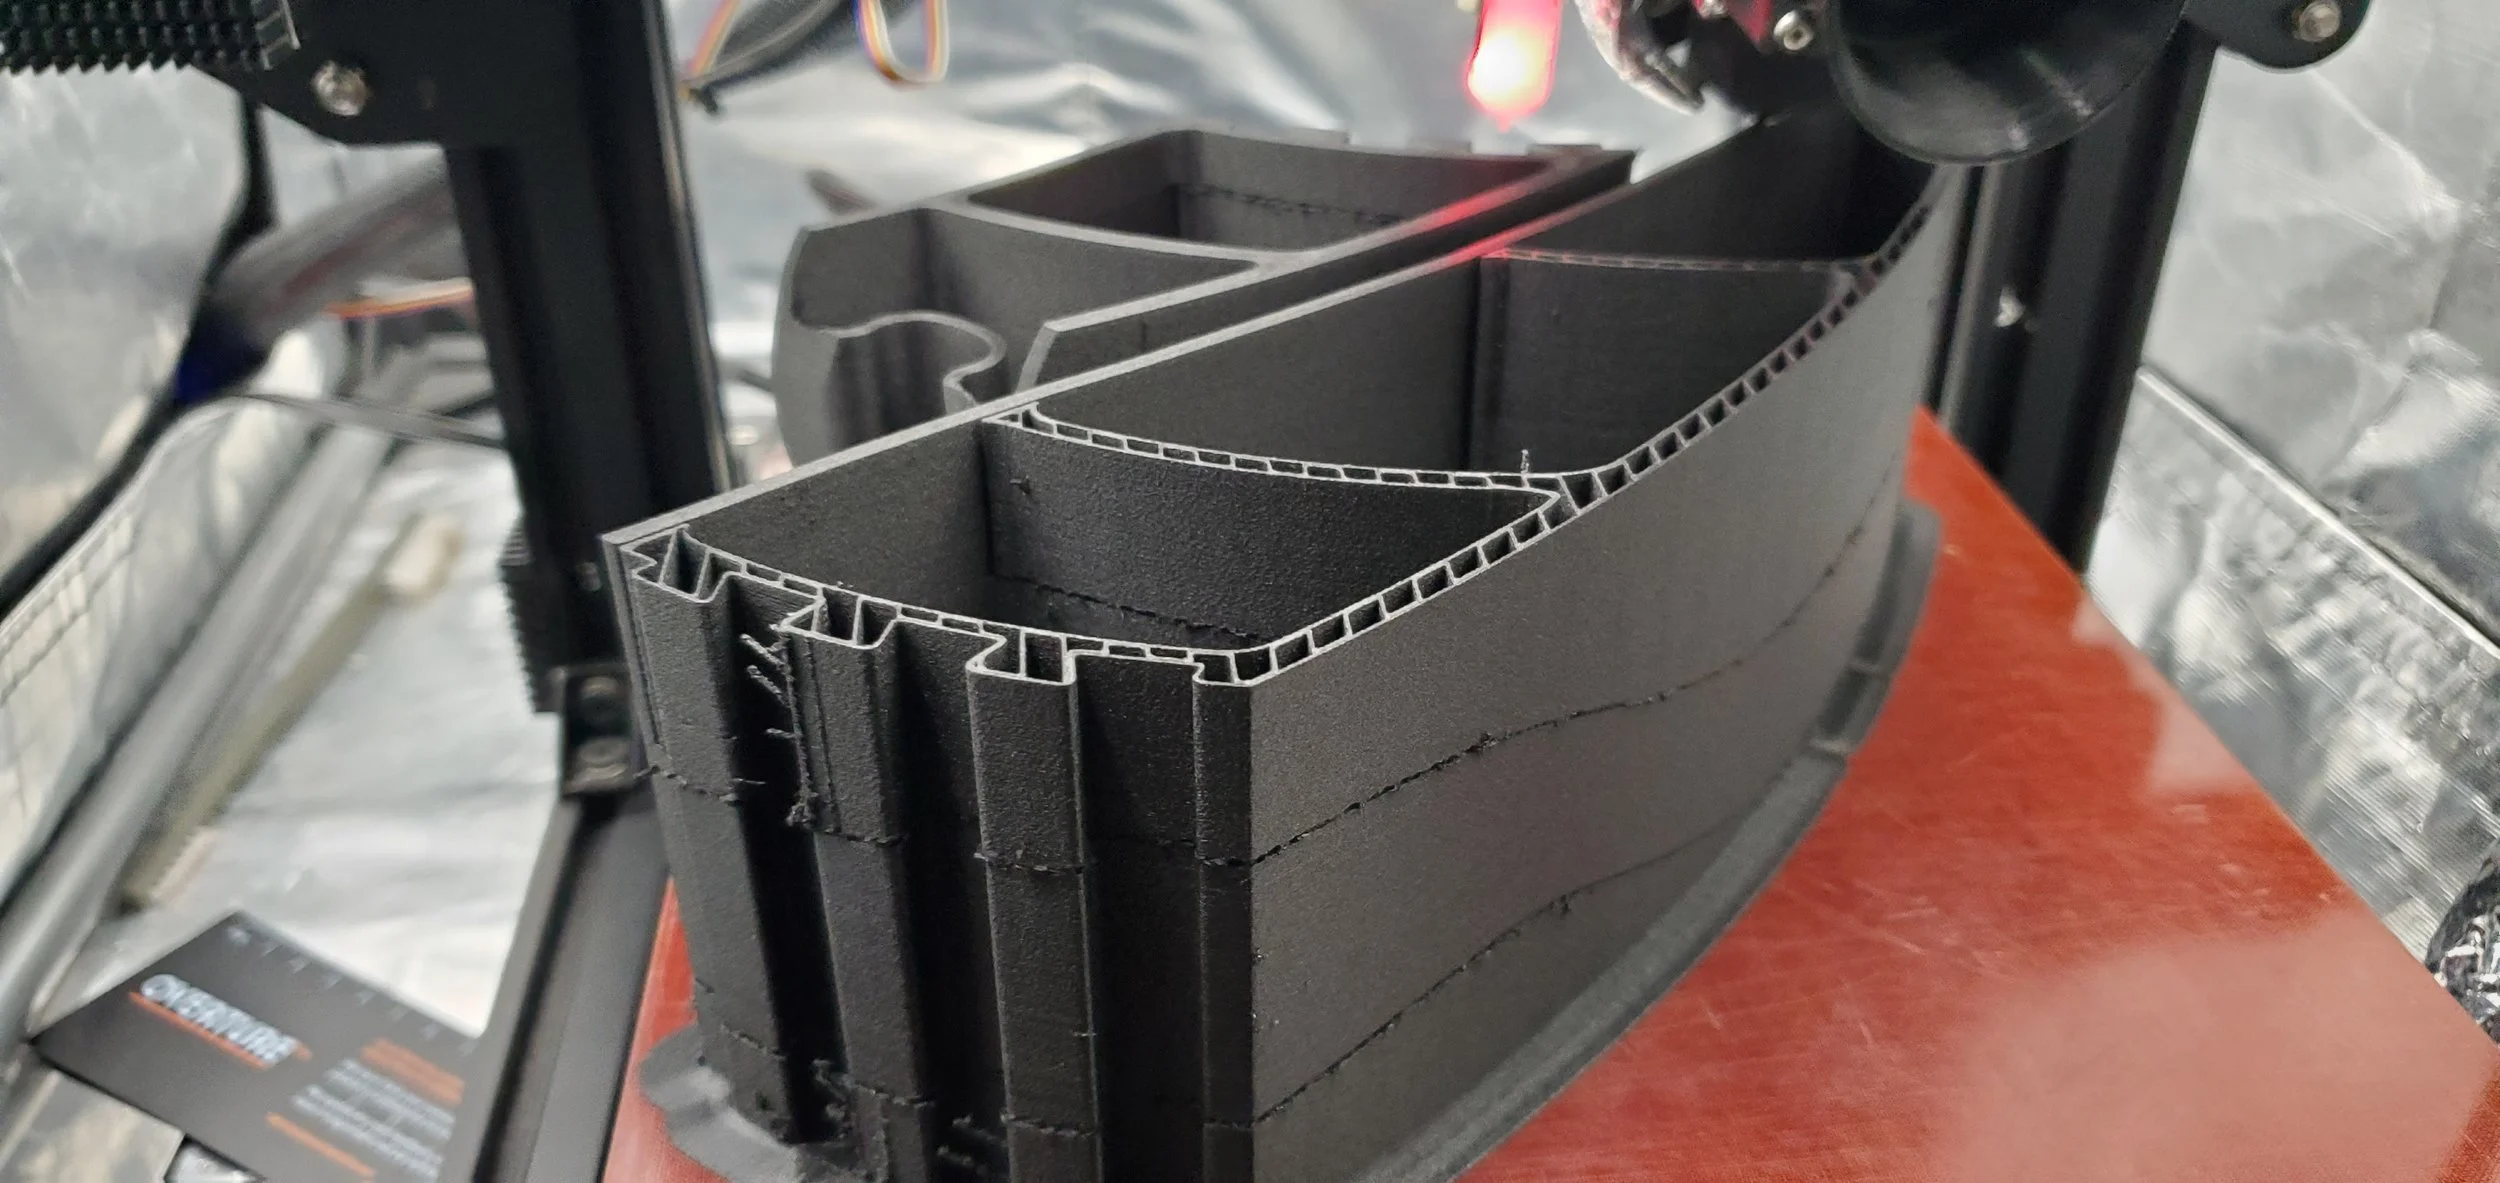
It gets messy. The posts need to be thick enough to withstand my weight, but thin enough to keep the lift lightweight. Due to issues with blender, I do the following. I make over a dozen little posts as seen here, and I cut them into a separate block. The lift shape that was created in the 3 steps above is a separate model. What I’m creating with this mess of posts on the right is basically a negative of the lift. Once I have this negative created, I use this negative to cut into the lift shape. If I don’t make this negative, Cura tends to have lots of issues trying to slice it. This method of building the posts, drastically reduces errors. I’ve spent hours building a lift only to find out that it crashes Cura and I need to start over because I can’t figure out what’s wrong with the model. Creating the negative block removed the majority of model errors.
My printer uses a 0.6 mm nozzle, so I make the posts in multiples of 0.6. So, 1.2, 1.8, 2.4, 3, 3.6 ect. This prevents tiny air gaps between the walls as it prints. If the post is 2.6mm instead of 2.4mm, there is a 0.2mm internal gap, and that will weaken the post. Each post started as a flat 2d object that I added thickness to with the Solidify modifier in Blender. Then as you can see in the image, I do duplicate the post over and over again positioning each one where I want it.
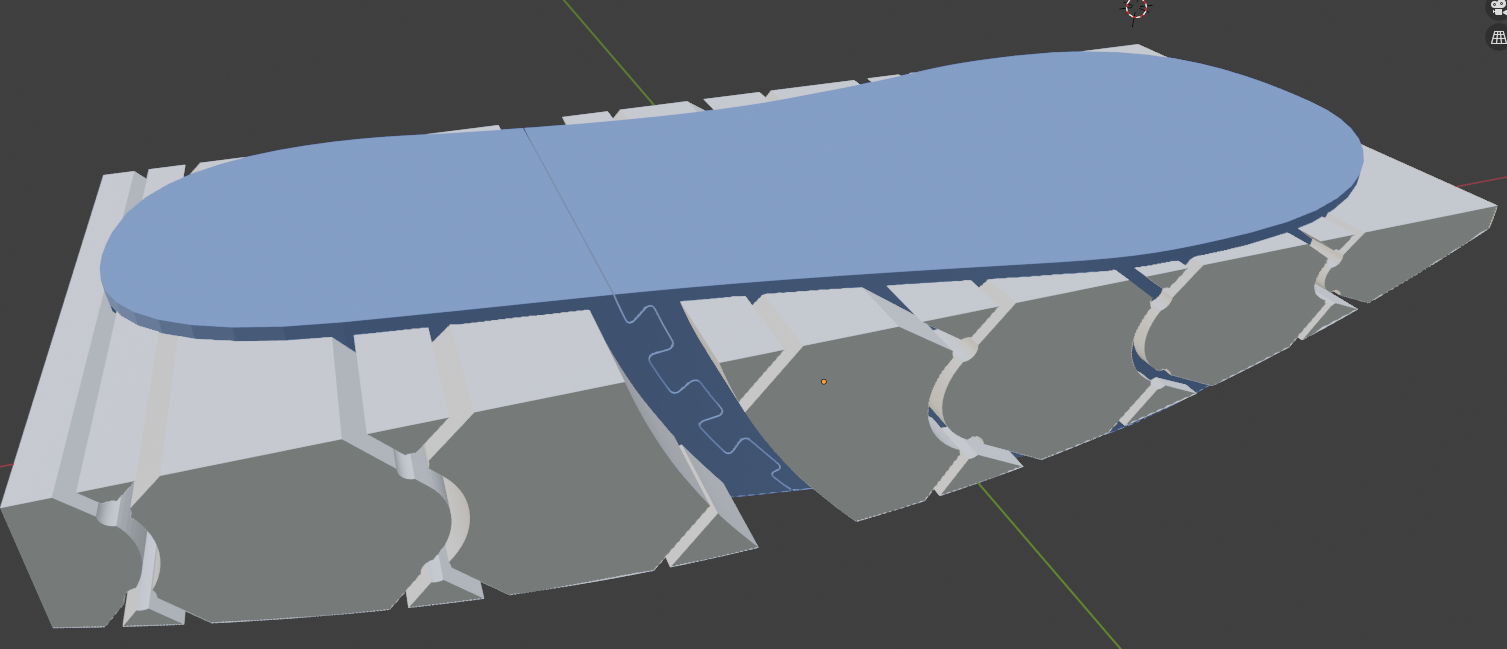

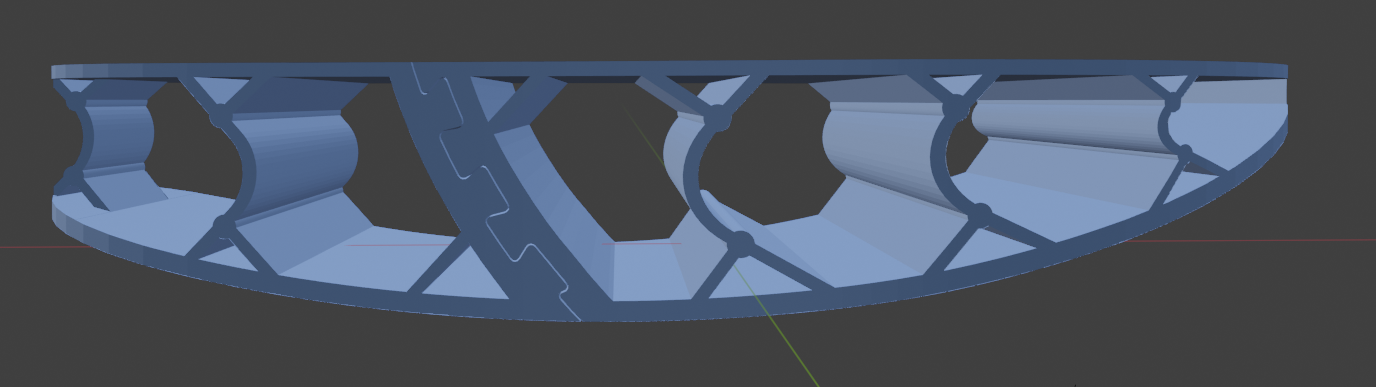
Here is how the negative block looks when it’s ready to cut the final shape out of the blue basic shape. It is odd getting used to making negative blocks. Using blocks to cut blocks that will then be used to cut other blocks. Booleans on blocks that have booleans. It gets confusing and it can bog down Blender with all the calculations that it needs to do. It’s important to keep everything organized, but my Blender file is a big mess. You will also notice that I actually have 2 cylinders. The main cylinder that I’ve been referencing all throughout is what cuts the bottom off the lift. The second cylinder is slightly smaller and is used to slice the bottom off the negative block. The thickness of what’s left is strong enough to maintain my weight without deformation of the curve.
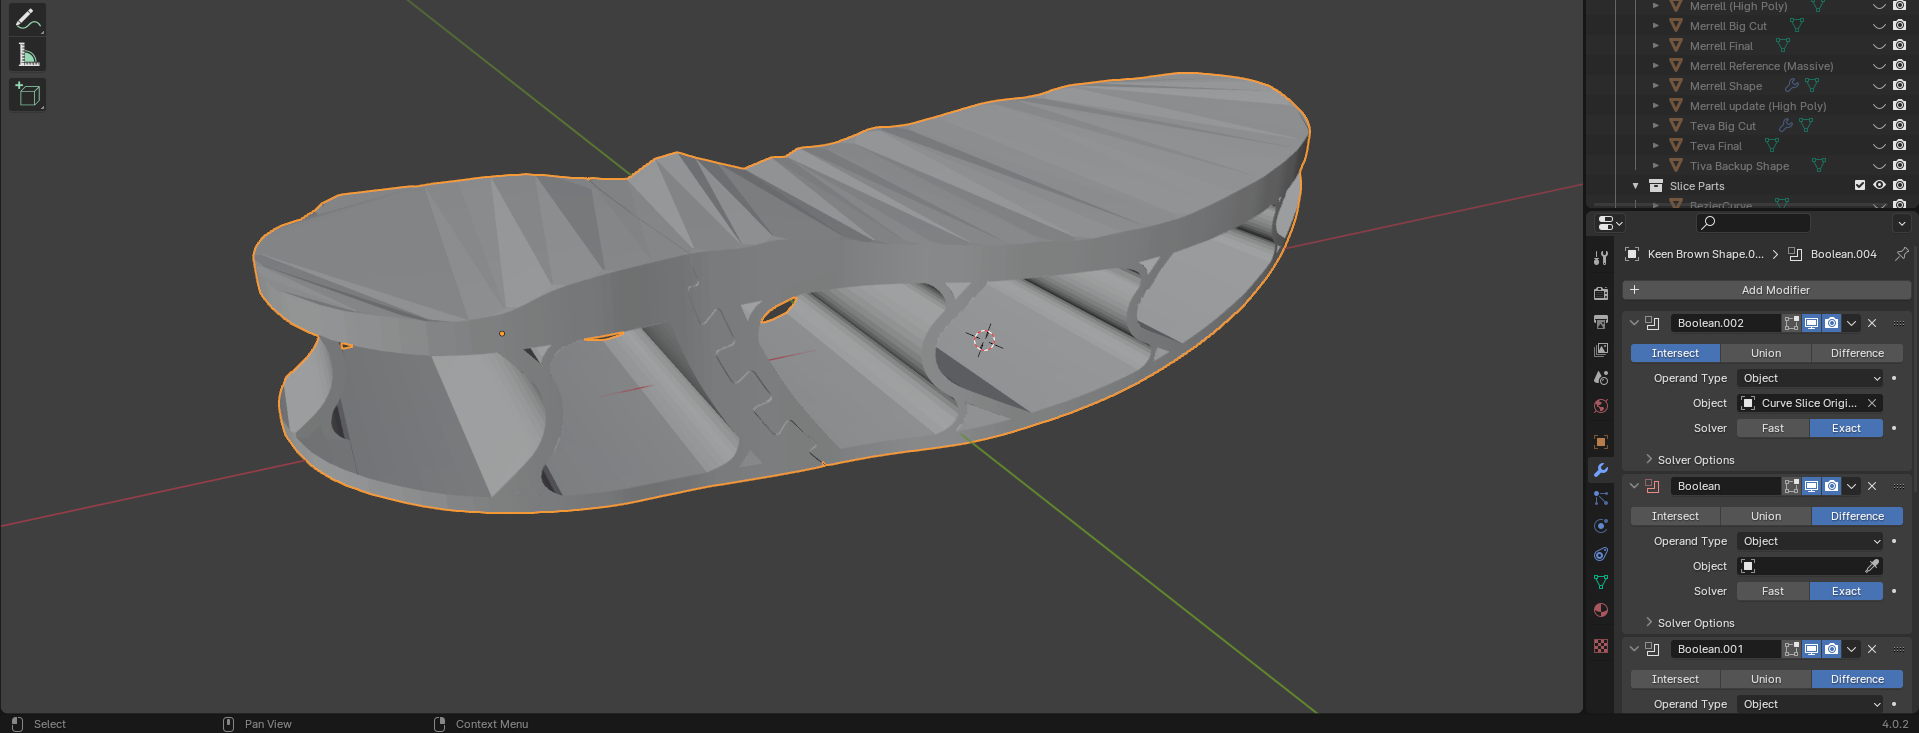
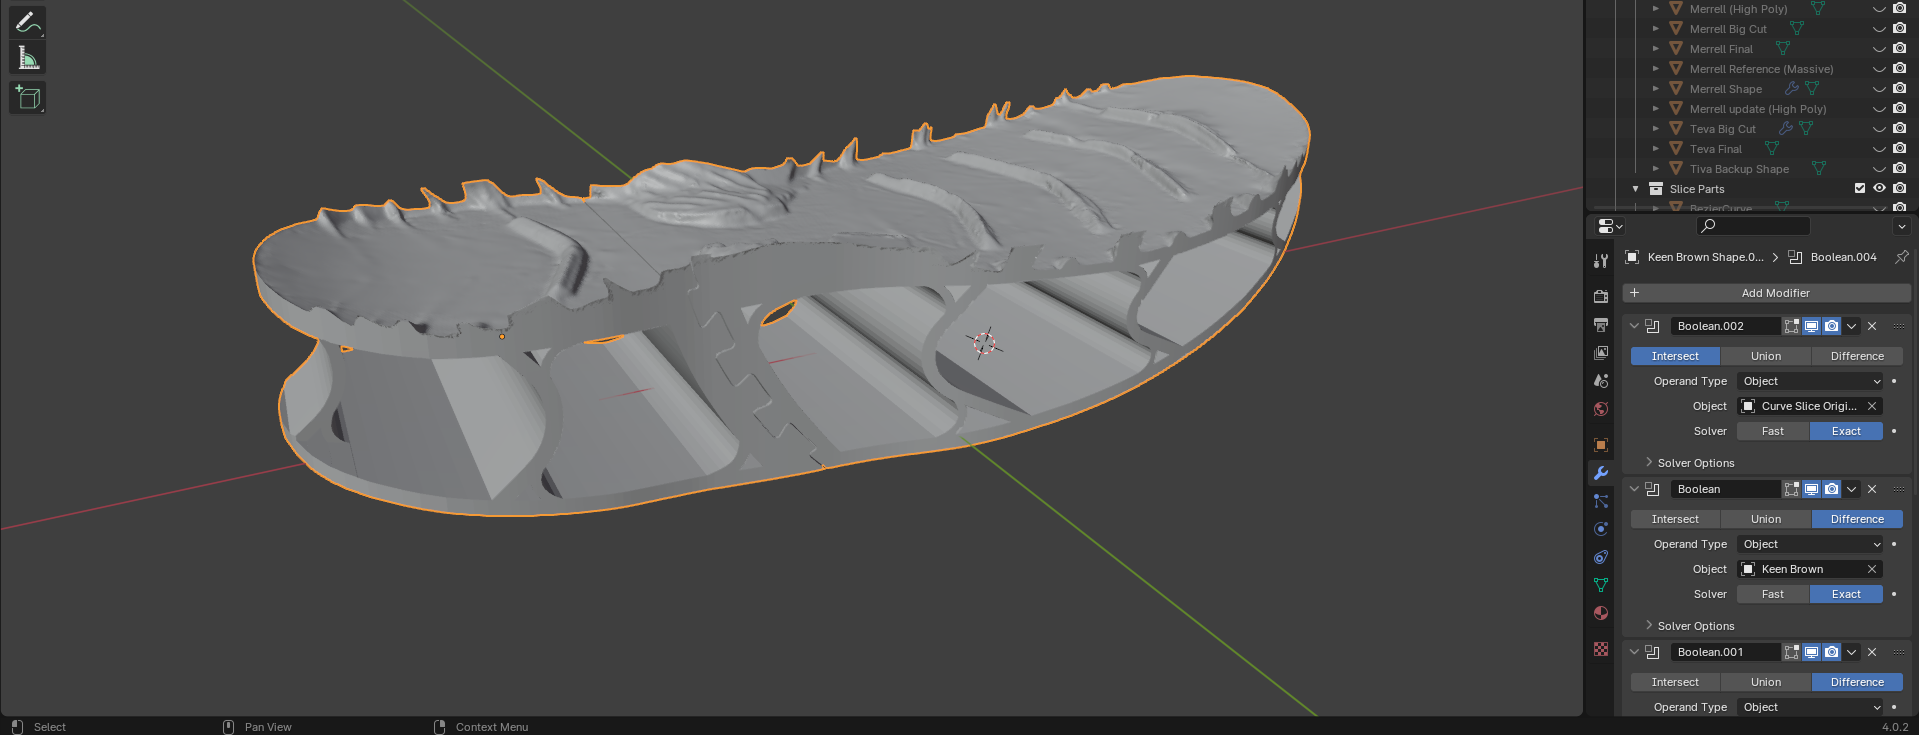
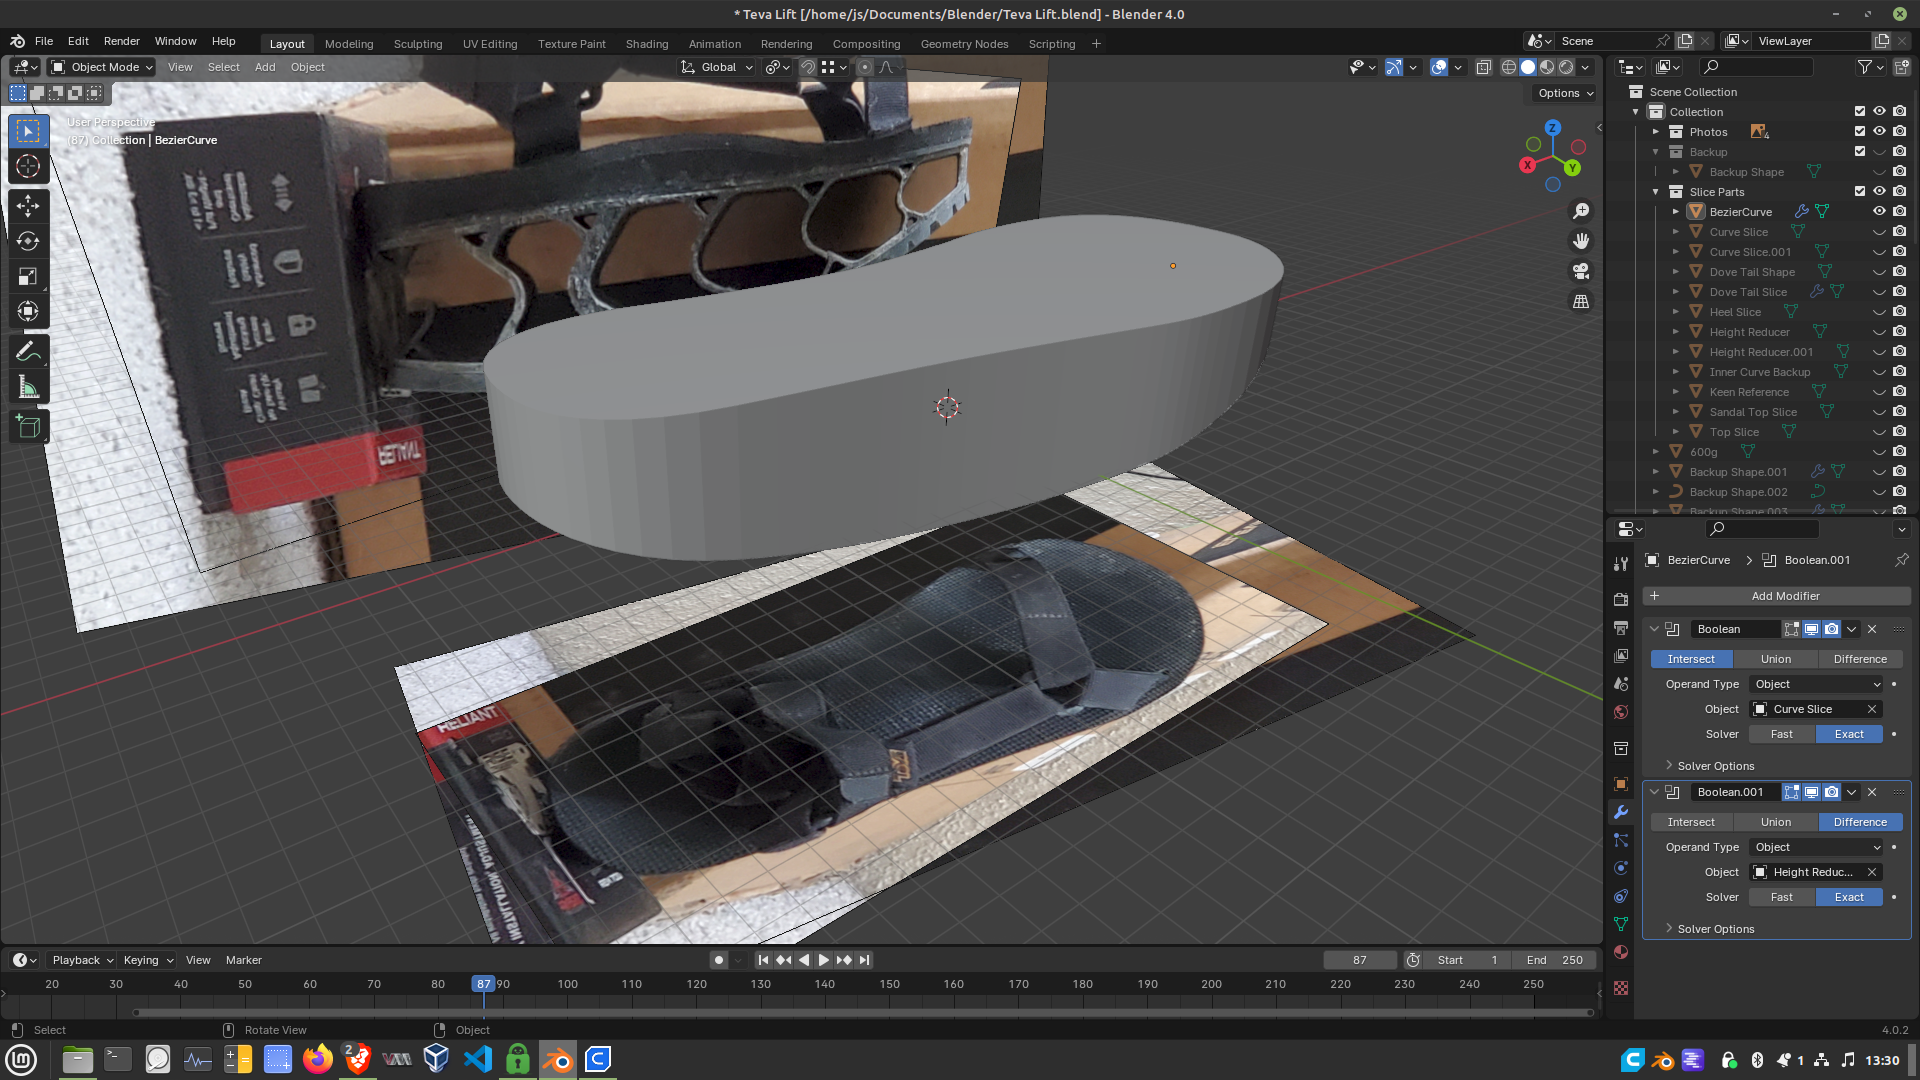
Above is what the imprint surface looks like before the Boolean. It’s messy. I just traced around the scan and made a very uneven terrible looking surface. Once I add the scan to the Boolean modifier, it subtracts it from the lift and creates the perfect surface.
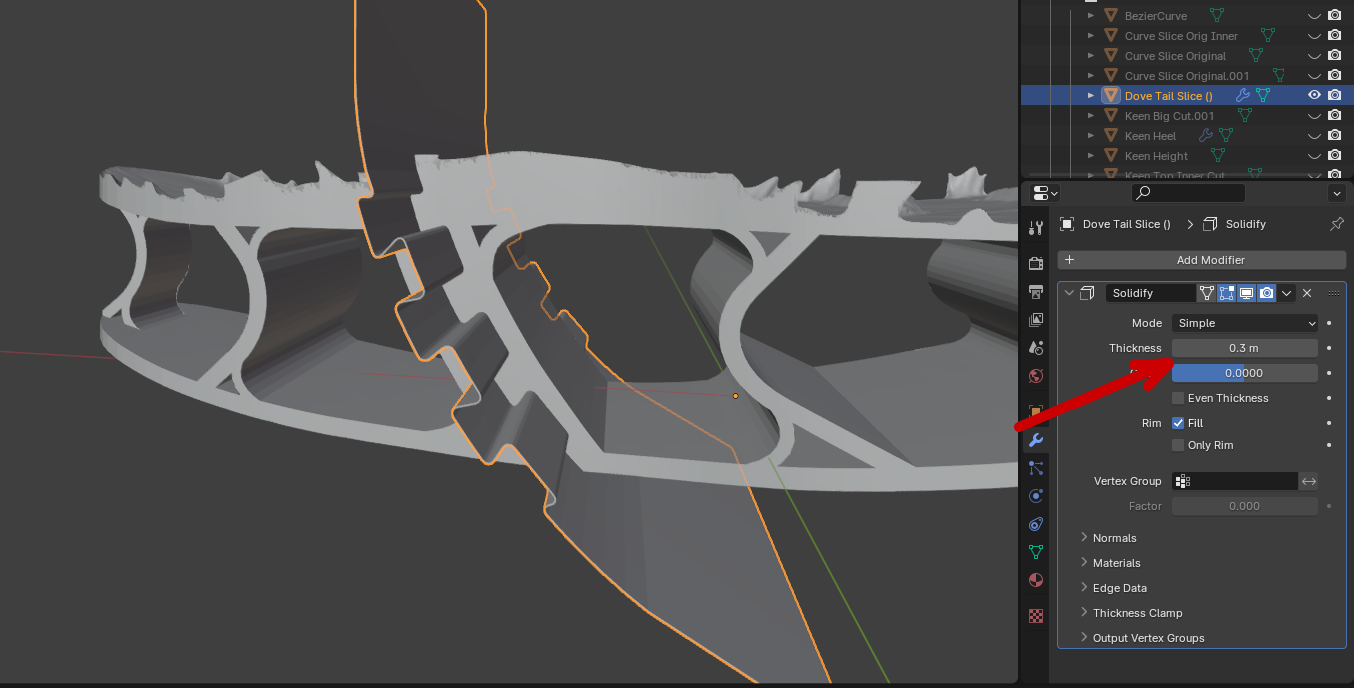
I wear a size 14 and it’s too big to fit on the printer, so it needs to be cut and printed as 2 pieces. This is how I make the dovetail joint to keep both pieces firmly locked together. It started as a simple 2d plane. Then like a piece of paper, I put a bunch of folds in it to make the dovetail shape. Then I added the Solidify modifier to it and set it to 0.3mm thickness. Just like the negative block, the dovetail subtracts this fraction of a millimeter from the model, giving me my joint. Getting the dovetail just right was difficult. If the filament isn’t dry, the joint is too tight and needs to be sanded down. Getting a filament dryer made this much easier. I never knew if the thickness was correct until I pulled the lift off the printer. Then I would spend hours sanding. With the filament dryer I have never needed sanding, and the joint looks perfect. It could probably be just slightly tighter. I use the same dovetail piece and the same thick central post on every lift.
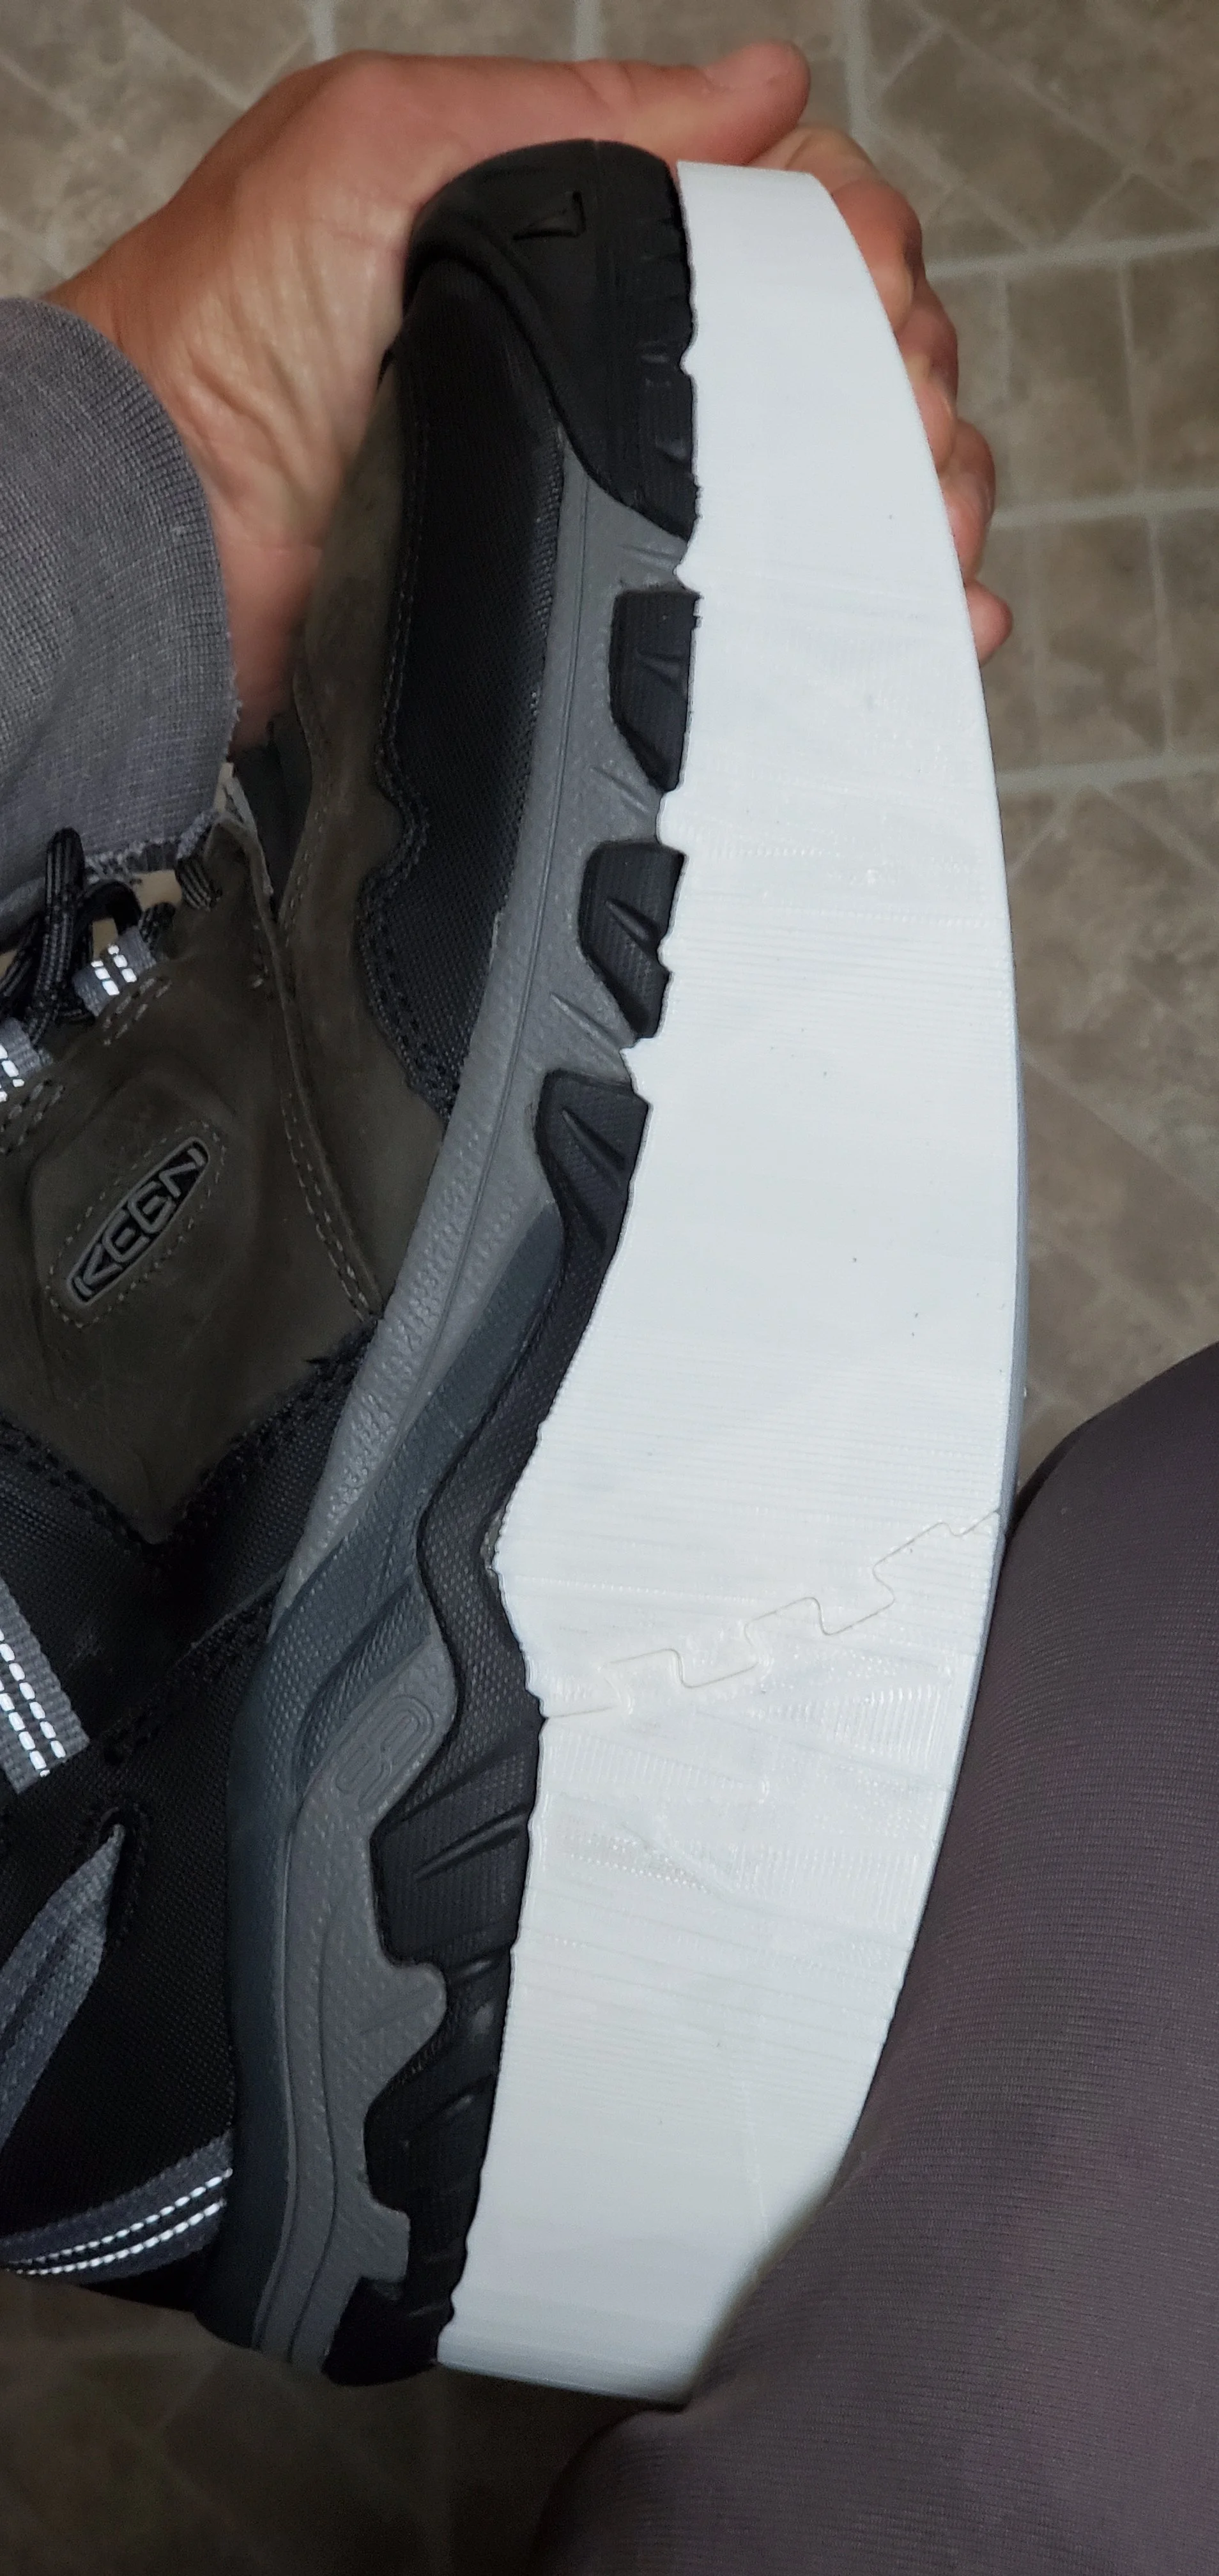
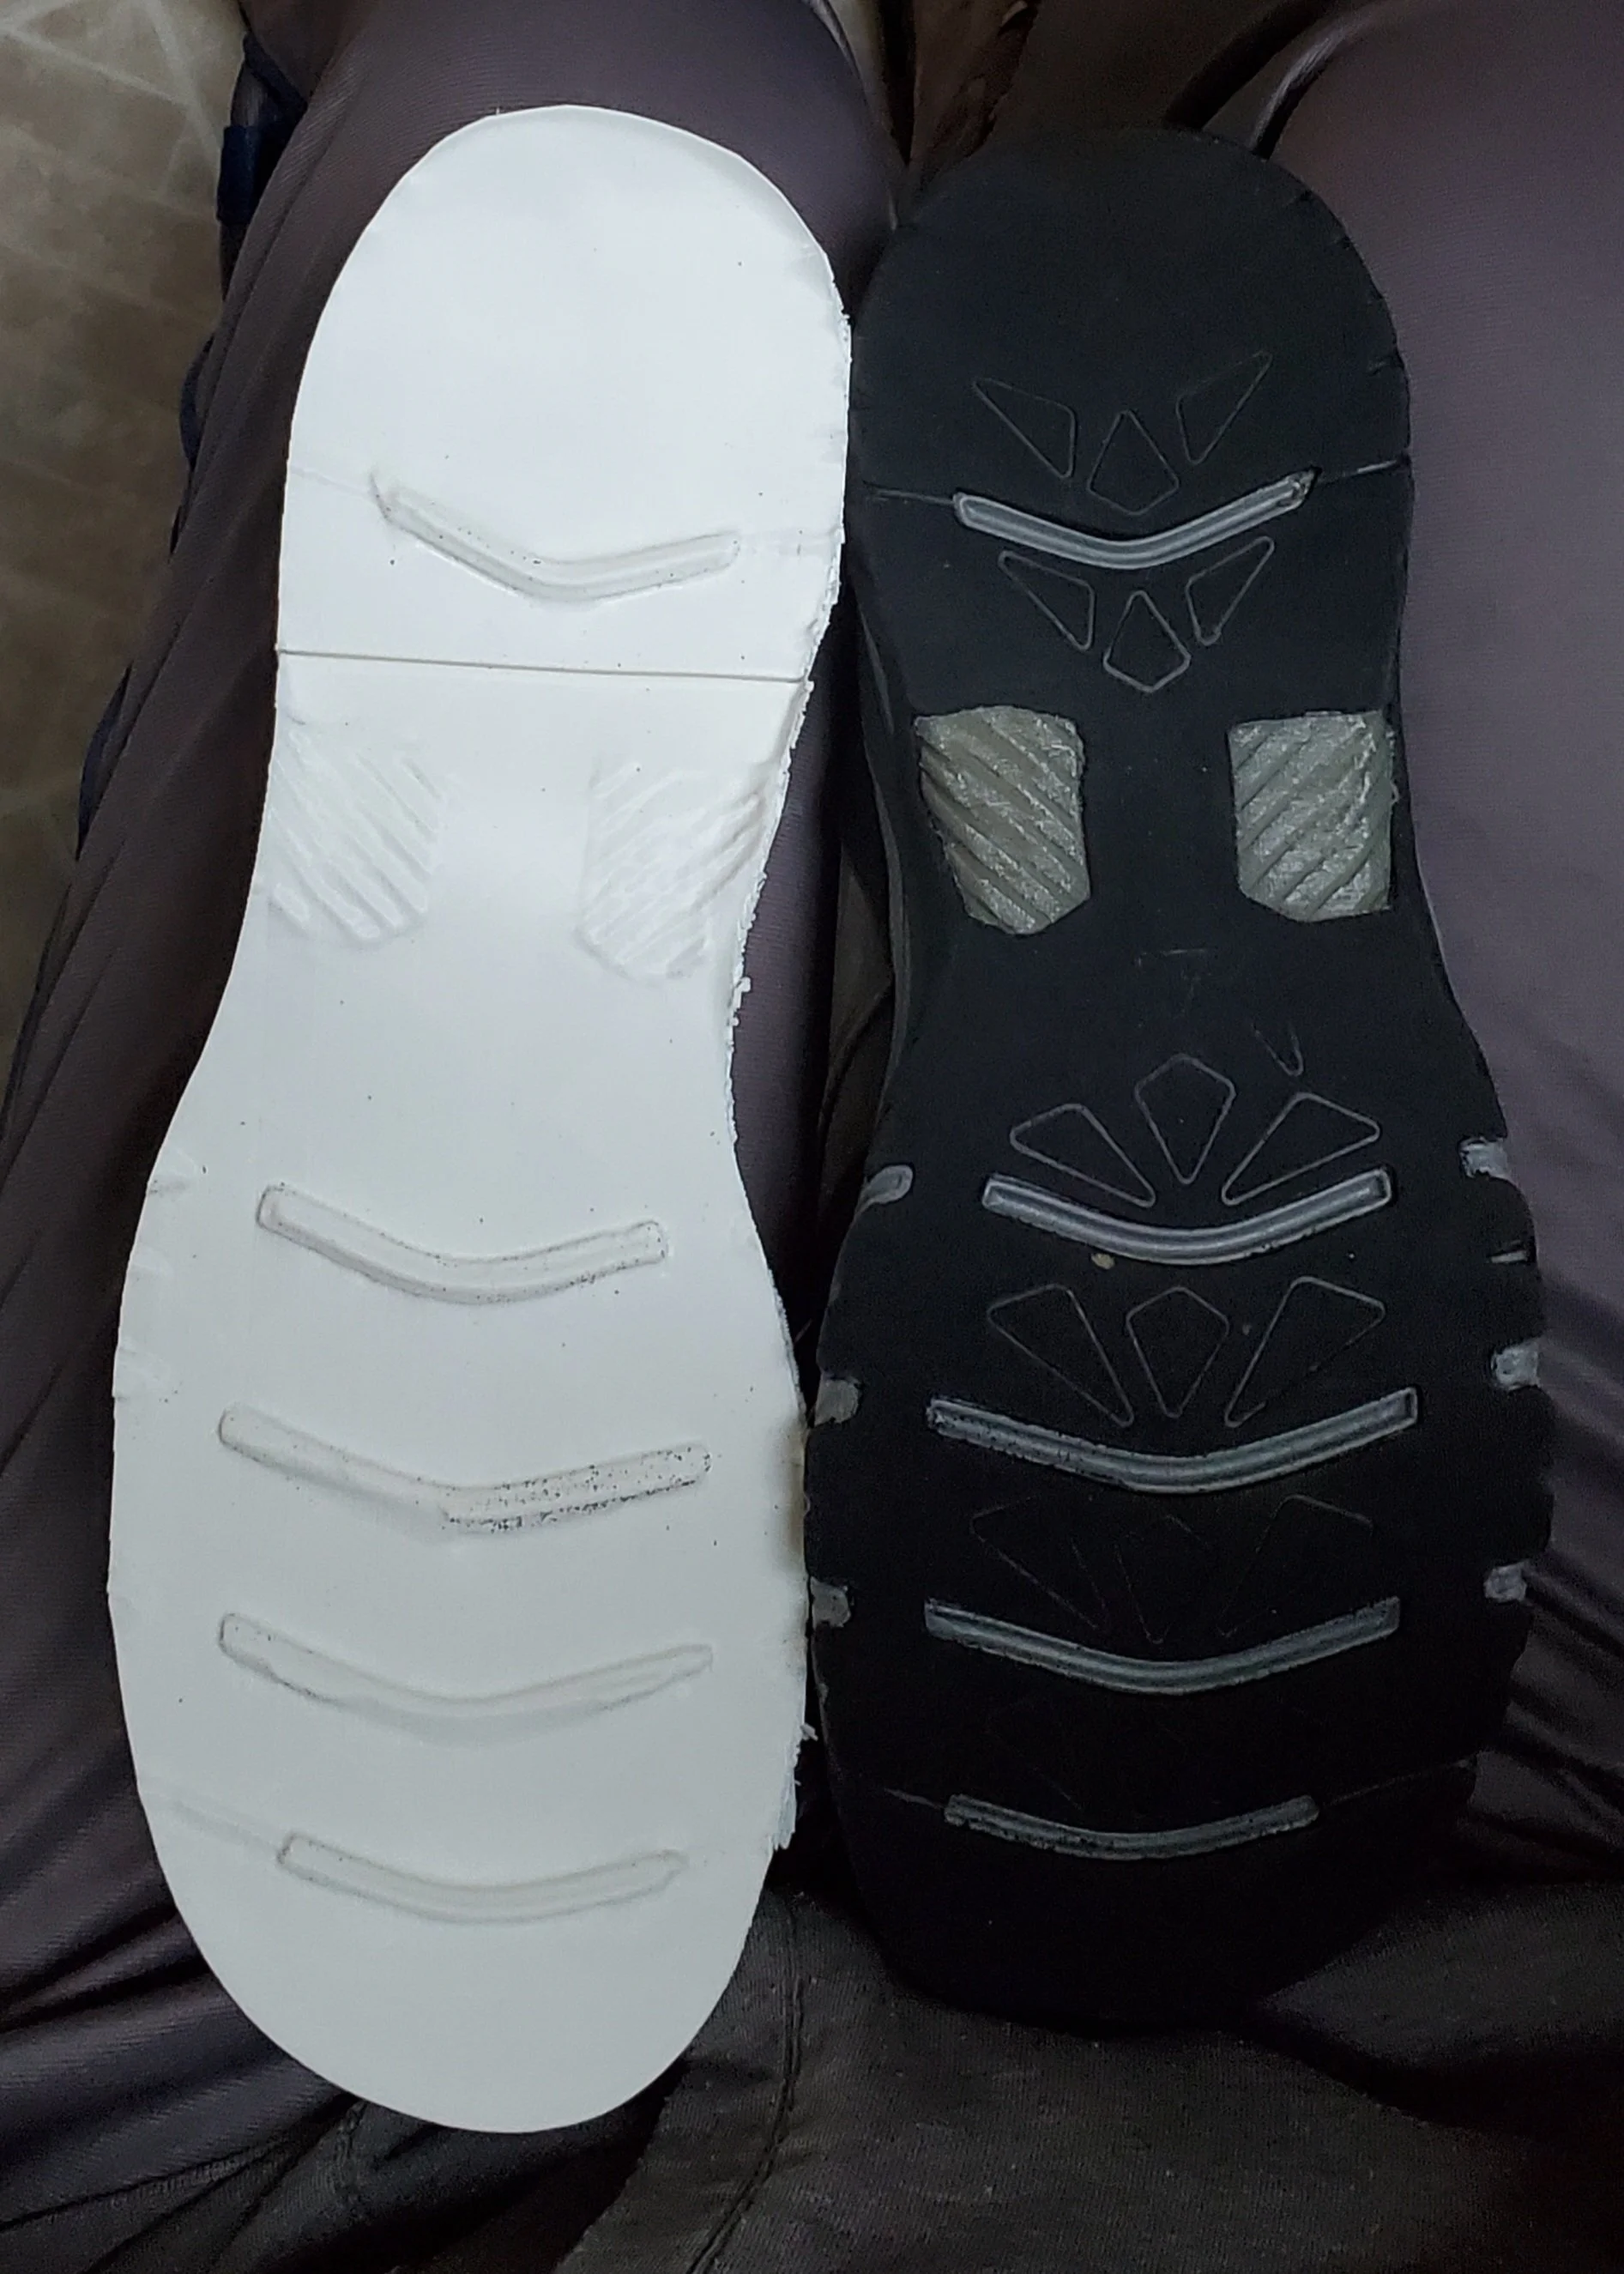
This is the difference between the old lift and the scanned lift. The old lift didn’t perfectly mate to the shoe. There were lots of gaps, and it needed little wedges to be inserted to level things out. The scan gives an absolutely perfect surface every time. Total glue contact everywhere between shoe and lift.
5: Slicing in Cura and Printing
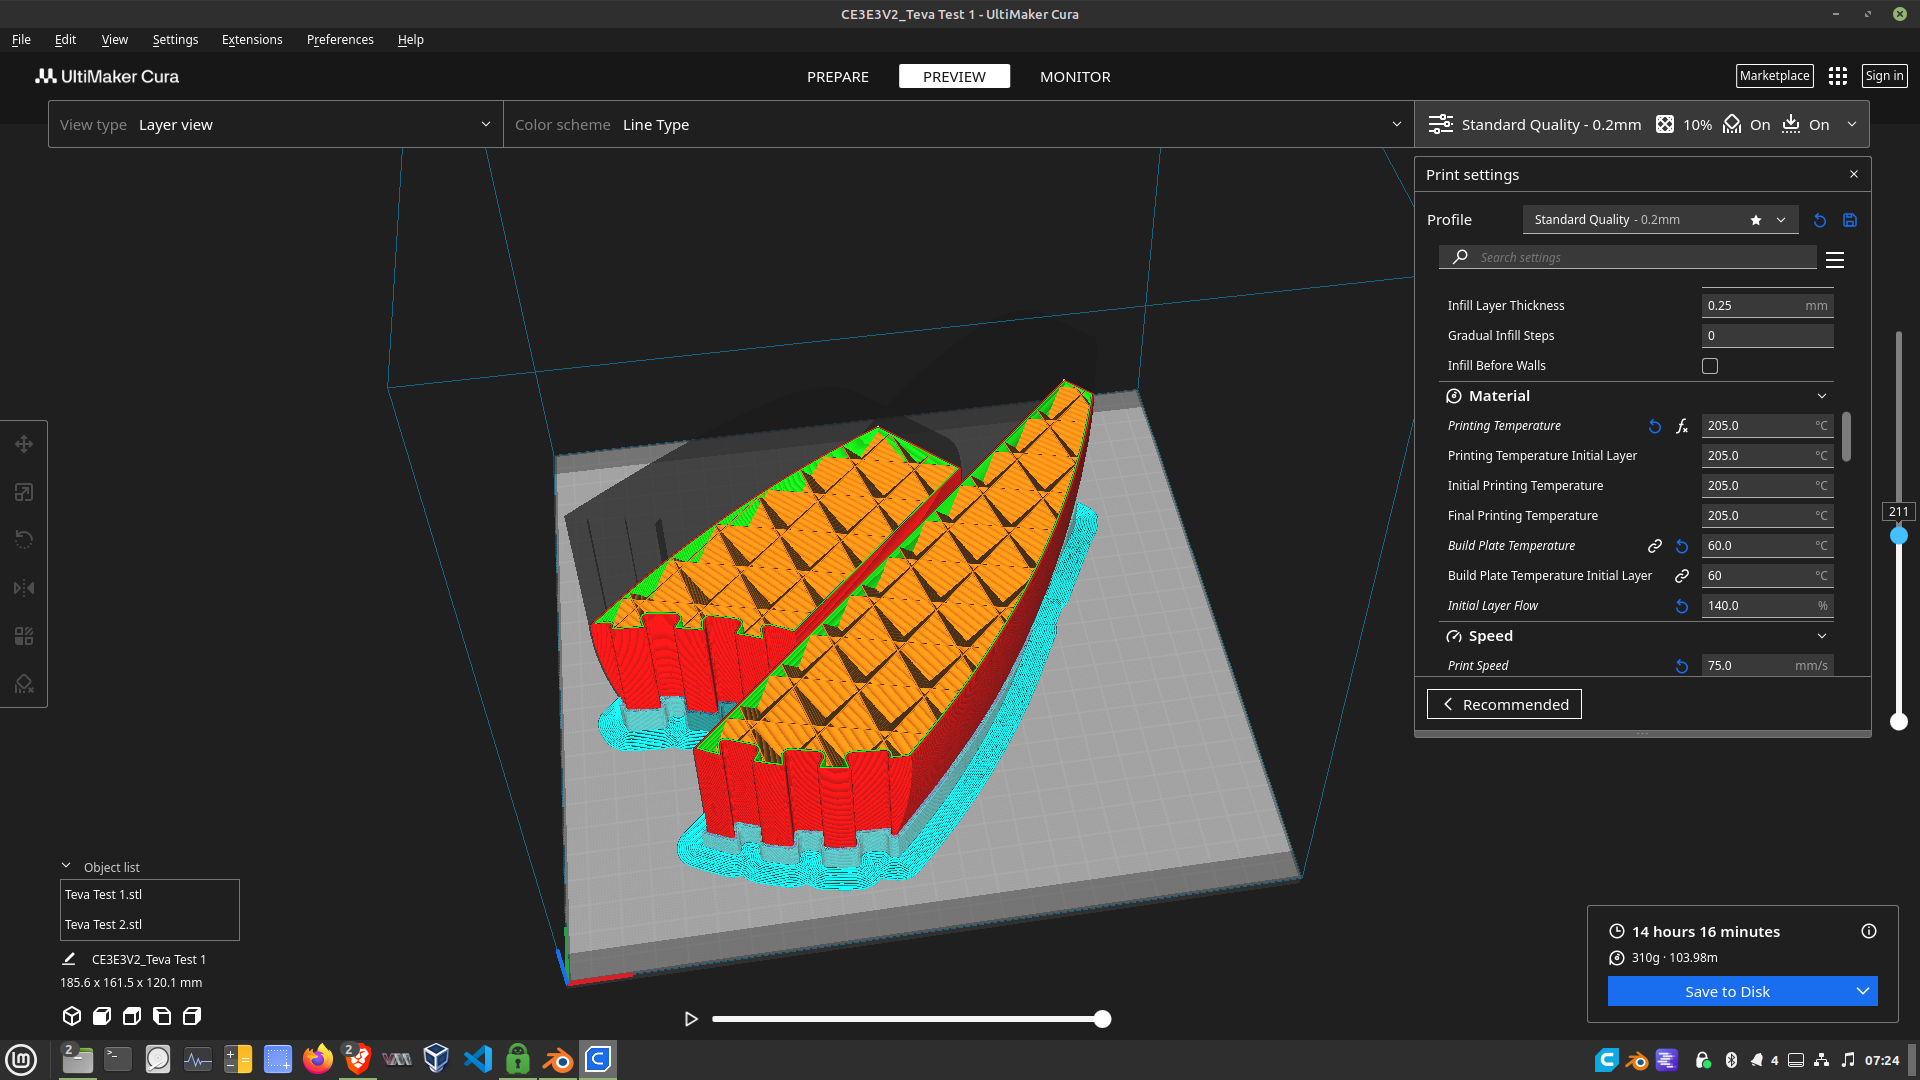
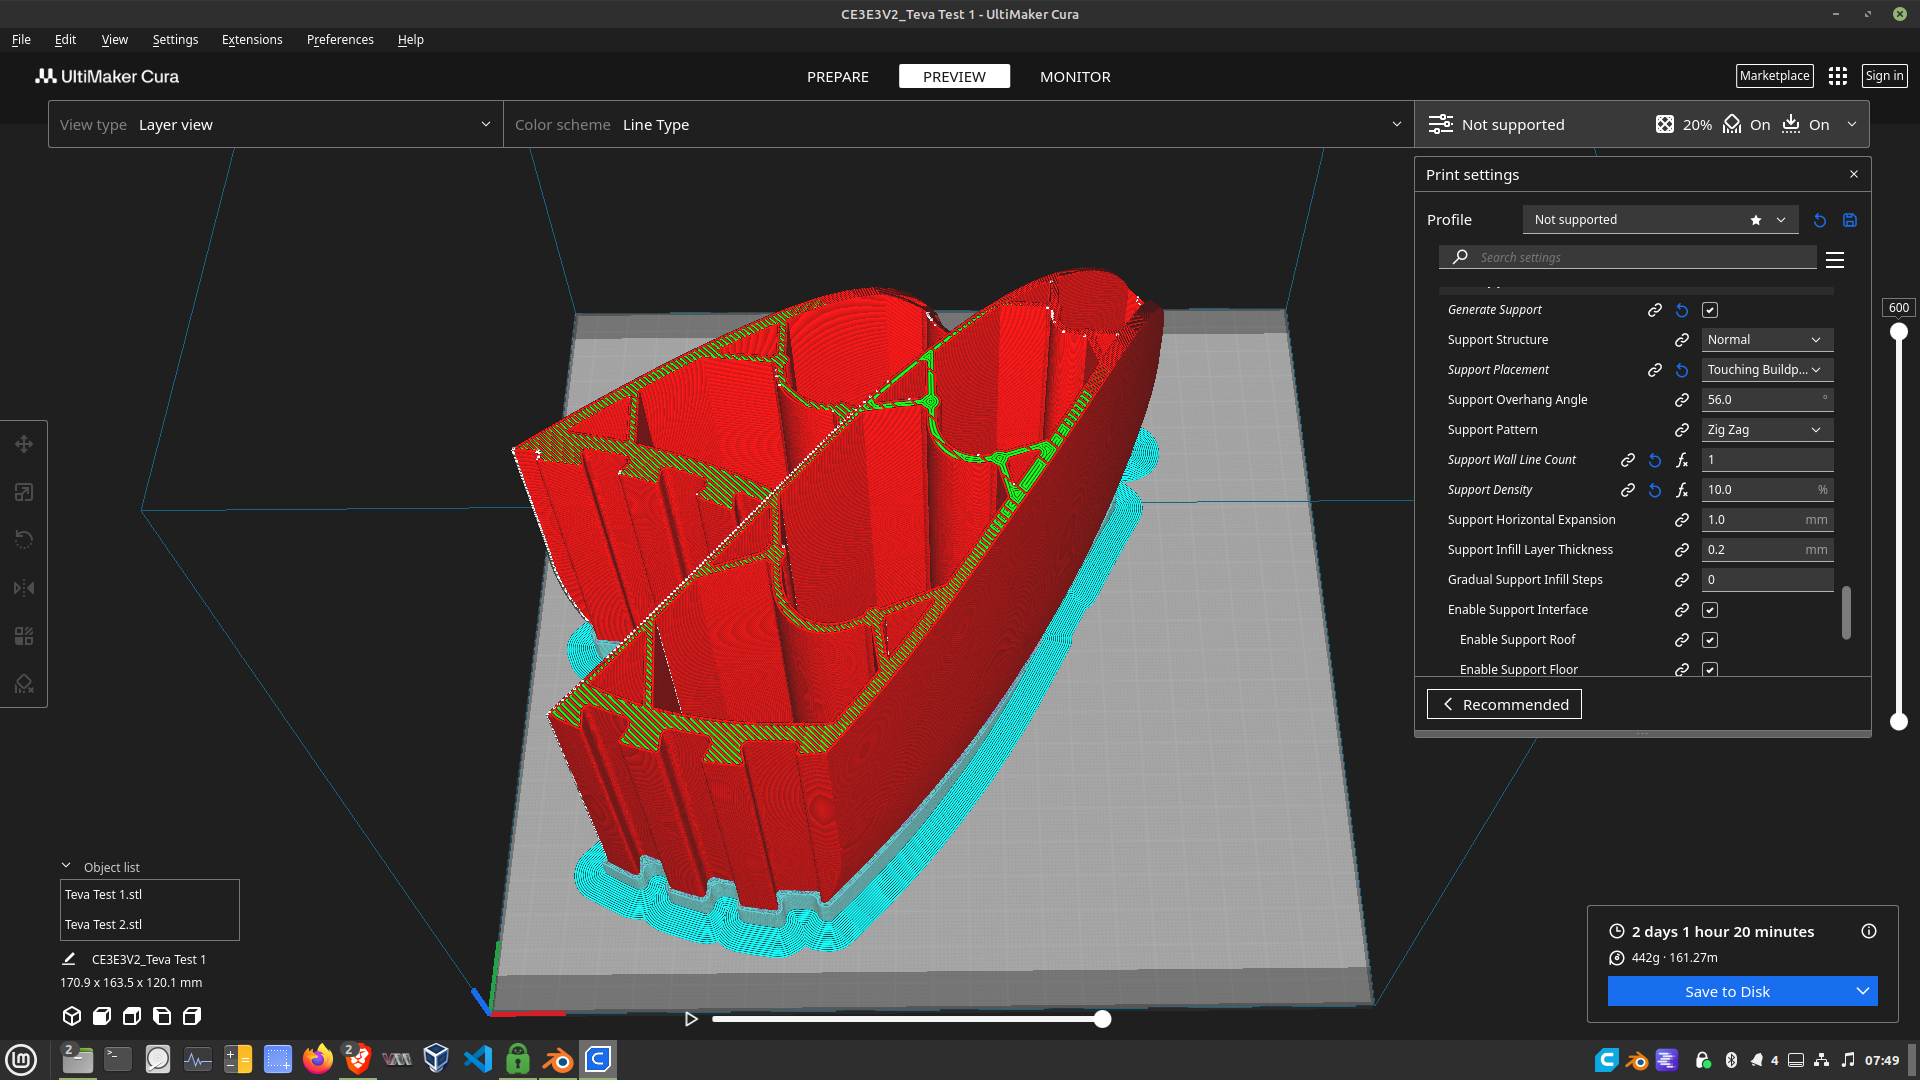
Here is a test print and a final print in Cura. The test was made with PLA, and took about 14 hours to print. It weighs 316g, that’s about $6-7 of PLA. It’s mostly empty air and had just enough strength for my tests. The final print here took just over 2 days. It weighed 442g, and was printed with NylonX. It costs about $65. I used to set the layer height to 0.2mm. This would allow fast prints, but I was having durability issues, so I have gone back to a 0.1mm layer. This doubles the number of layers and doubles the print time. I’m now back to taking about 5 days to print a lift. The extra time is worth it for the extra durability. The final print shown above is has a 0.2mm layer height, and is 600 layers. With 0.1mm height it would have 1200 layers. I found the 0.1 better fuses the layers together and has less room for little gaps to form weaken the print. I still use 0.2 for the test print because it’s fast and doesn’t need to survive more than a few minutes.
These lifts have worked better than I ever could have imagined. The very first lift I printed was for a pair of sandals. I wasn’t sure if it would survive my first step, but it lasted for about a year. They have survived extreme temperature swings, from as low as 9 to over 100 degrees. They didn’t shatter in the cold, nor did they get soft and mush in the heat. The one downside to this design is that they scoop up a lot of dirt so I need to bang my lift on the side of the step before coming inside.
3d printers are incredible technology. Just a few years ago it was unimaginable that you could just press print and overnight have complex geometry created from engineering grade materials, and all done from the corner of your living room.
More to come. I will be adding a page with my initial tests and other failed experimental designs.